4
4
4-39
4-39
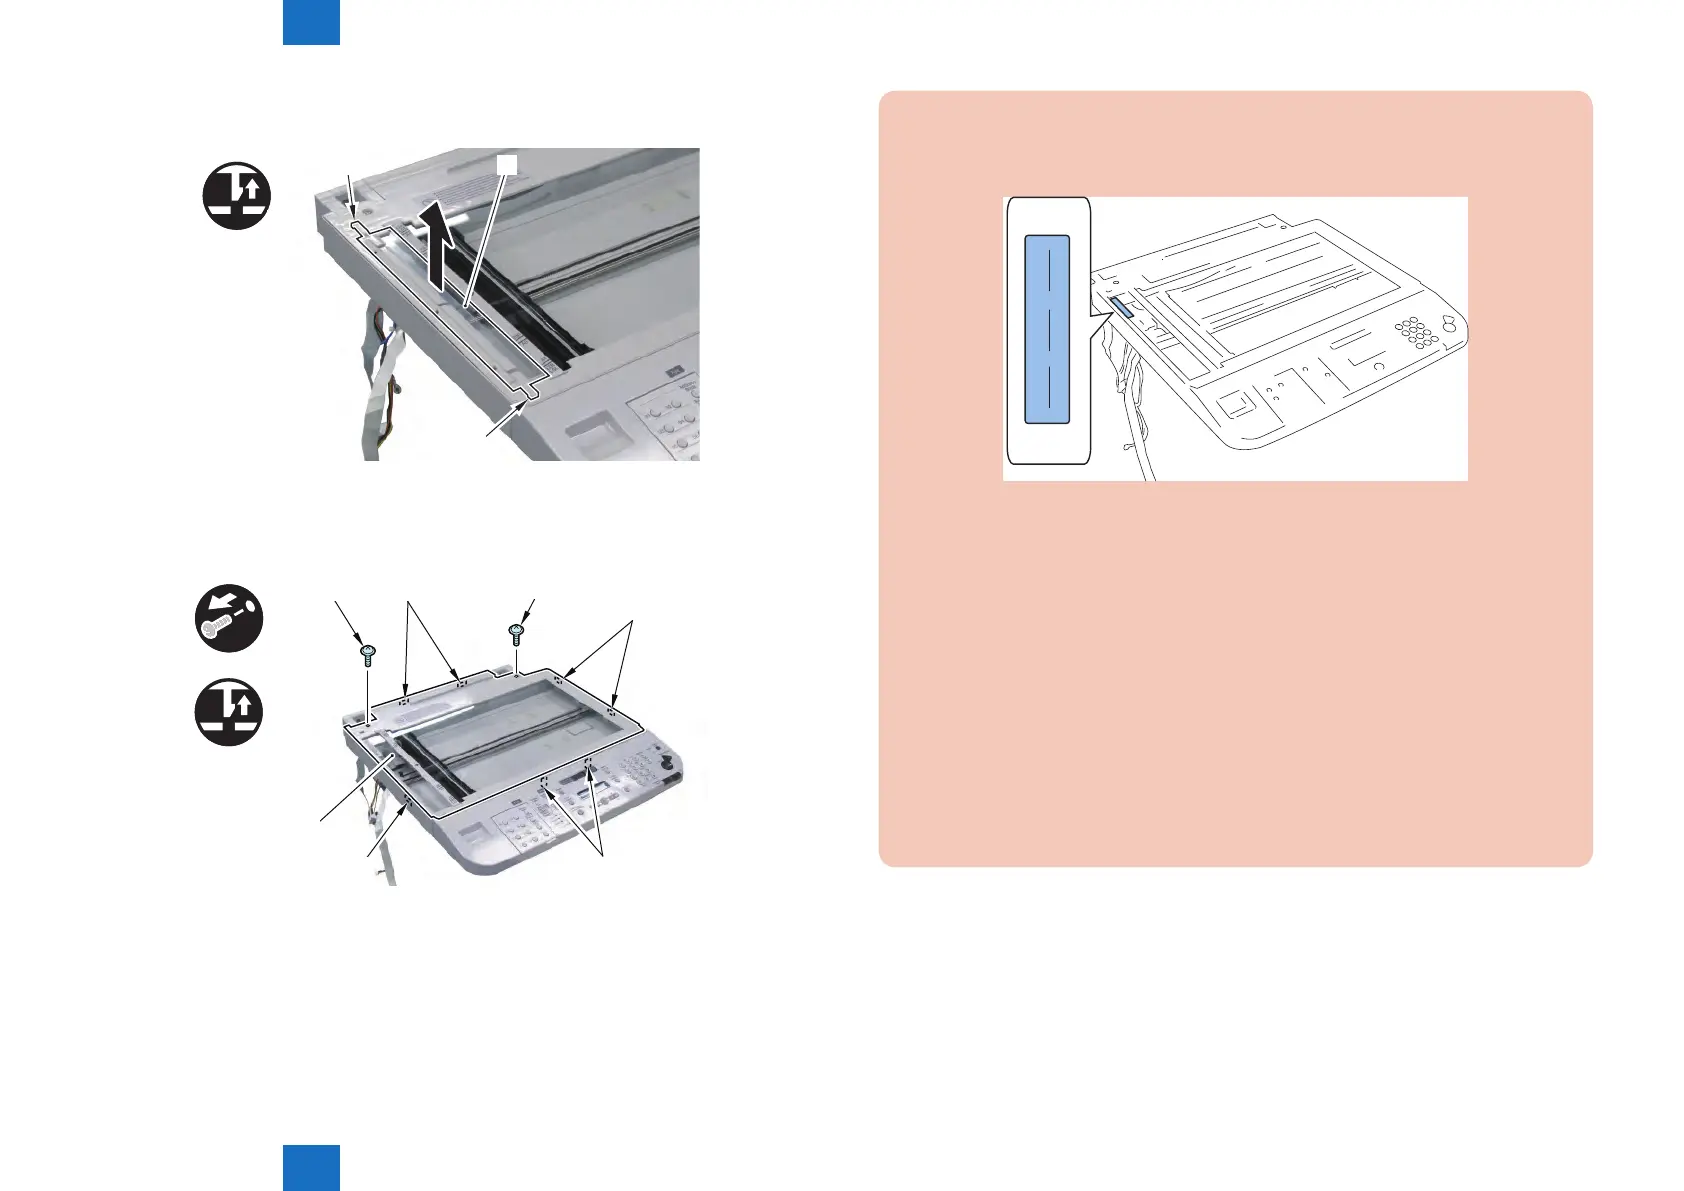
Disassembly/Assembly > Document Exposure / Delivery System > Removing the Reader Unit Upper Cover
Disassembly/Assembly > Document Exposure / Delivery System > Removing the Reader Unit Upper Cover
2) Remove the Standard White Plate [1].
• 2 Claws [2]
[1]
[2]
[2]
x2
3) Remove the Reader Unit Upper Cover [1].
• 2 Screws [2]
• 7 Claws [3]
[1]
[2]
[2]
[3]
[3]
[3]
[3]
x2
x7
F-4-94
F-4-95
Procedure After Replacing the Reader Upper Cover Unit:
1) Enter the values of the label afxed at the upper left of the glass in the following
service mode item, and write the values in the service label.
XXXX YYYY ZZZZ
• COPIER > ADJUST > CCD > W-PLT-X (standard White Plate X signal data)
• COPIER > ADJUST > CCD > W-PLT-Y (standard White Plate Y signal data)
• COPIER > ADJUST > CCD > W-PLT-Z (standard White Plate Z signal data)
2) Place a blank paper on the Copyboard Glass, and execute white level adjustment in
the following service mode.
COPIER > FUNCTION > CCD > DF-WLVL1 (white level adjustment [copyboard scan])
COPIER > FUNCTION > CCD > DF-WLVL3 (white level adjustment B&W [copyboard
scan])
Next, place the same blank paper on the DF and execute the following service mode.
• COPIER > FUNCTION > CCD > DF-WLVL2 (white level adjustment [DF scan])
• COPIER > FUNCTION > CCD > DF-WLVL4 (white level adjustment B&W [DF scan])
If it results in NG, execute it again after turning OFF and then ON the power.
F-4-96
 Loading...