Page 23
Configuring "YOUR" Unit:
There are 3 sample configurations on pages 26 and 27 to help you understand
the 4 step process needed to setup YOUR external access control devices.
SetUP "Your Settings"
SetUP "Your Settings"
Set Each Relay Mode for the Appropriate Response: There are 5 different relay modes
(Previous Page). The relay mode determines what the relay will control (a door, alarm,
CCTV, etc.). See next page.
Set Each Relay’s Strike Time: The relay time determines the amount of time the relay
remains activated. For example, when a strike relay activates to unlock a door, the relay
activation time determines how long the door will remain unlocked (next page).
Assign Each Door Number to One or More Relays: Defines which relays will activate
when a resident presents a valid access code to an external access control device
(next page).
Assign Each External Access Control Device to a Door Number: When a valid access
code is entered into a external access control device, the Assigned door’s relays will
activate (see below).
Step 1
Step 2
Step 3
Step 4
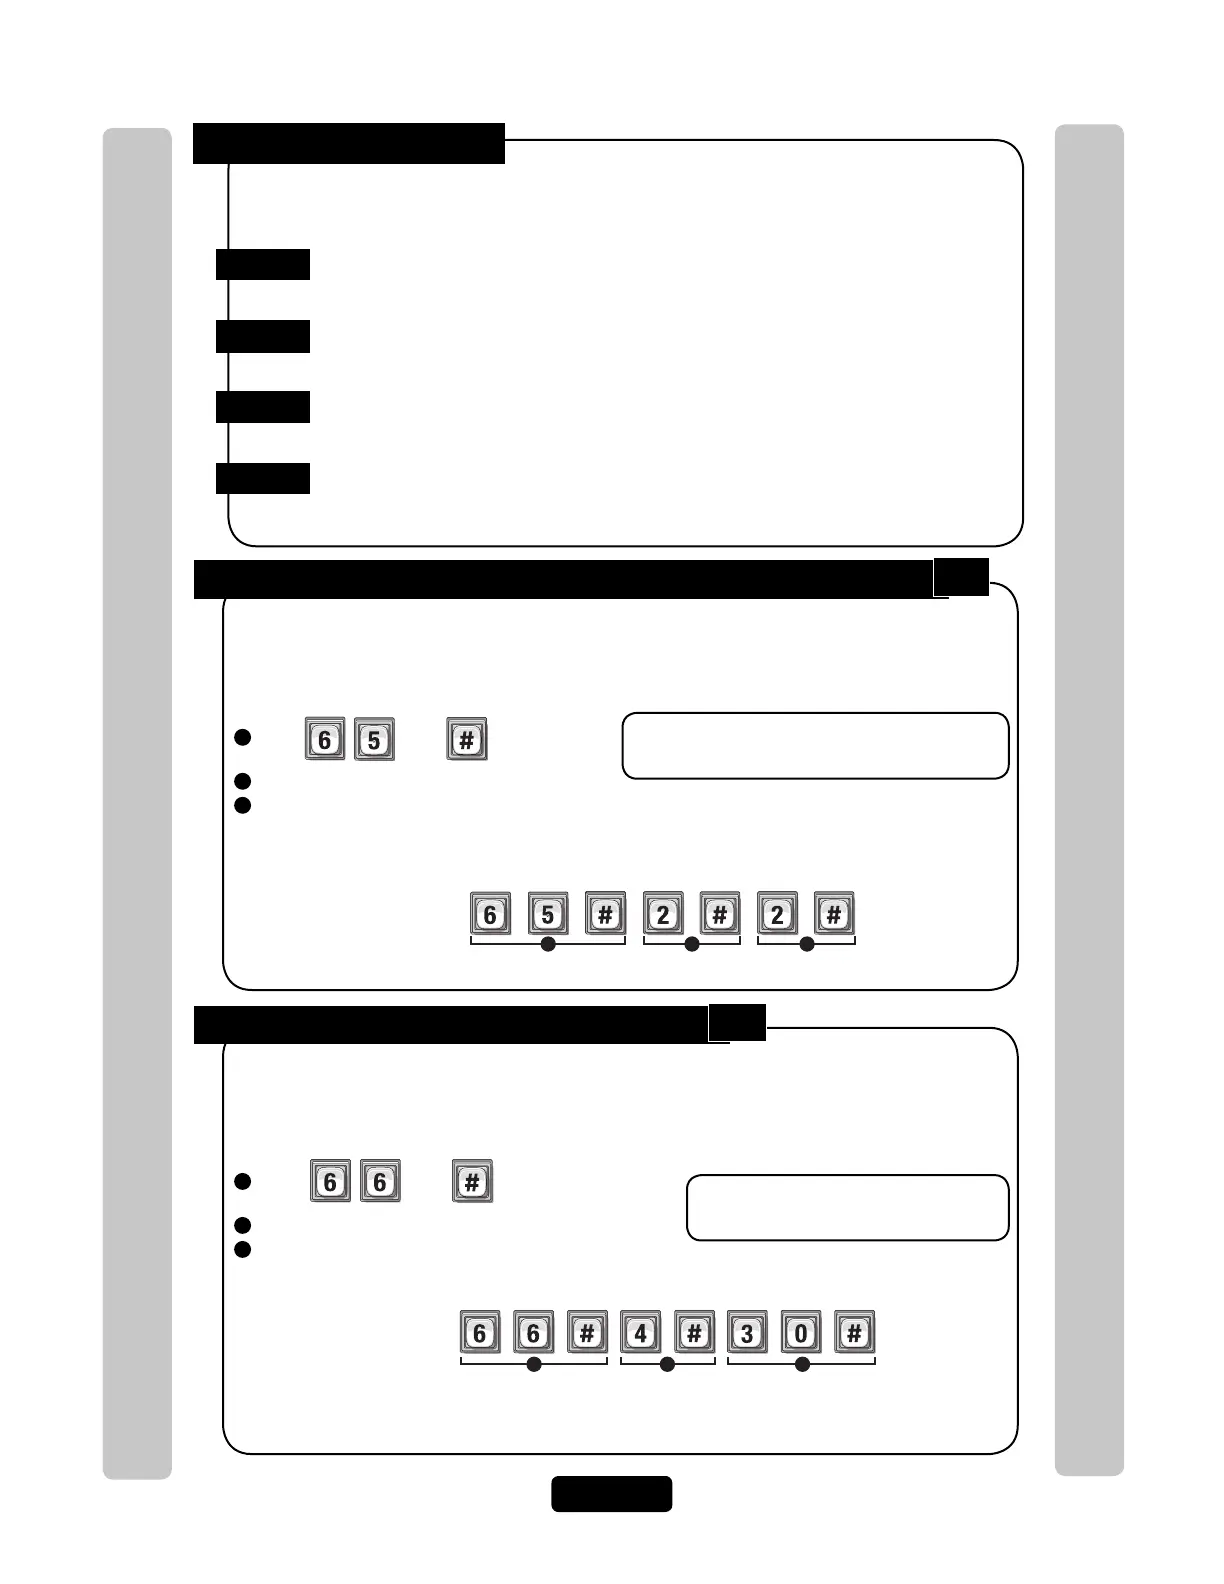
There are 5 different relay modes (see page 22). The Relay Mode determines what the response
will be when a valid access code is entered (open a door, turn on an alarm, turn on a light then
turn it off, turn on a CCTV, etc.). Be sure relays are not activated when changing "Relay Mode"
types. Factory Setting: All Relays are Set at "1 - Strike"
Step 1 Set Each "Relay Mode" to get the Appropriate Response:
1
Press
Then
2
Enter the Relay Number (1-4). Then (#)
3
Enter Relay Mode (1-5). Then (#)
1 = Strike - controls a door/gate by unlocking/opening it. 4 = Alarm - activates another device (siren)
2 = Shunt - bypasses the alarm under normal 5 = Control - controls another device
circumstances. (on/off light)
Important: 1-3 must be performed for EACH
Relay assigned to the unit.
Example:
1 2 3
Assigns Relay “2” as a Shunt Relay
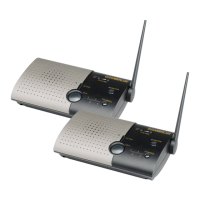
This is the amount of time (in seconds) the relay remains activated. This will define the amount
of time a door cycles (unlocks, then relocks) or how long the CCTV camera remains on after
being activated. Be sure relays are not activated when changing relay "Activation Time".
Factory Setting: All Relays are set at 10 seconds.
Step 2 Set Each Relay’s "Activation Time":
1
Press
Then
2
Enter the Relay Number (1-4). Then (#)
3
Enter Activation Time (1-300 Seconds). Then (#)
Important: 1-3 must be performed for
EACH Relay assigned to the unit.
1 2 3
Example:
When Activated, the Relay Number "4" will activate for "30" seconds.
NOTE: Most gate operators recommend activation of 2 seconds.
65
66