Control Installation Chore-Tronics® 3 Control
112
MT2398C
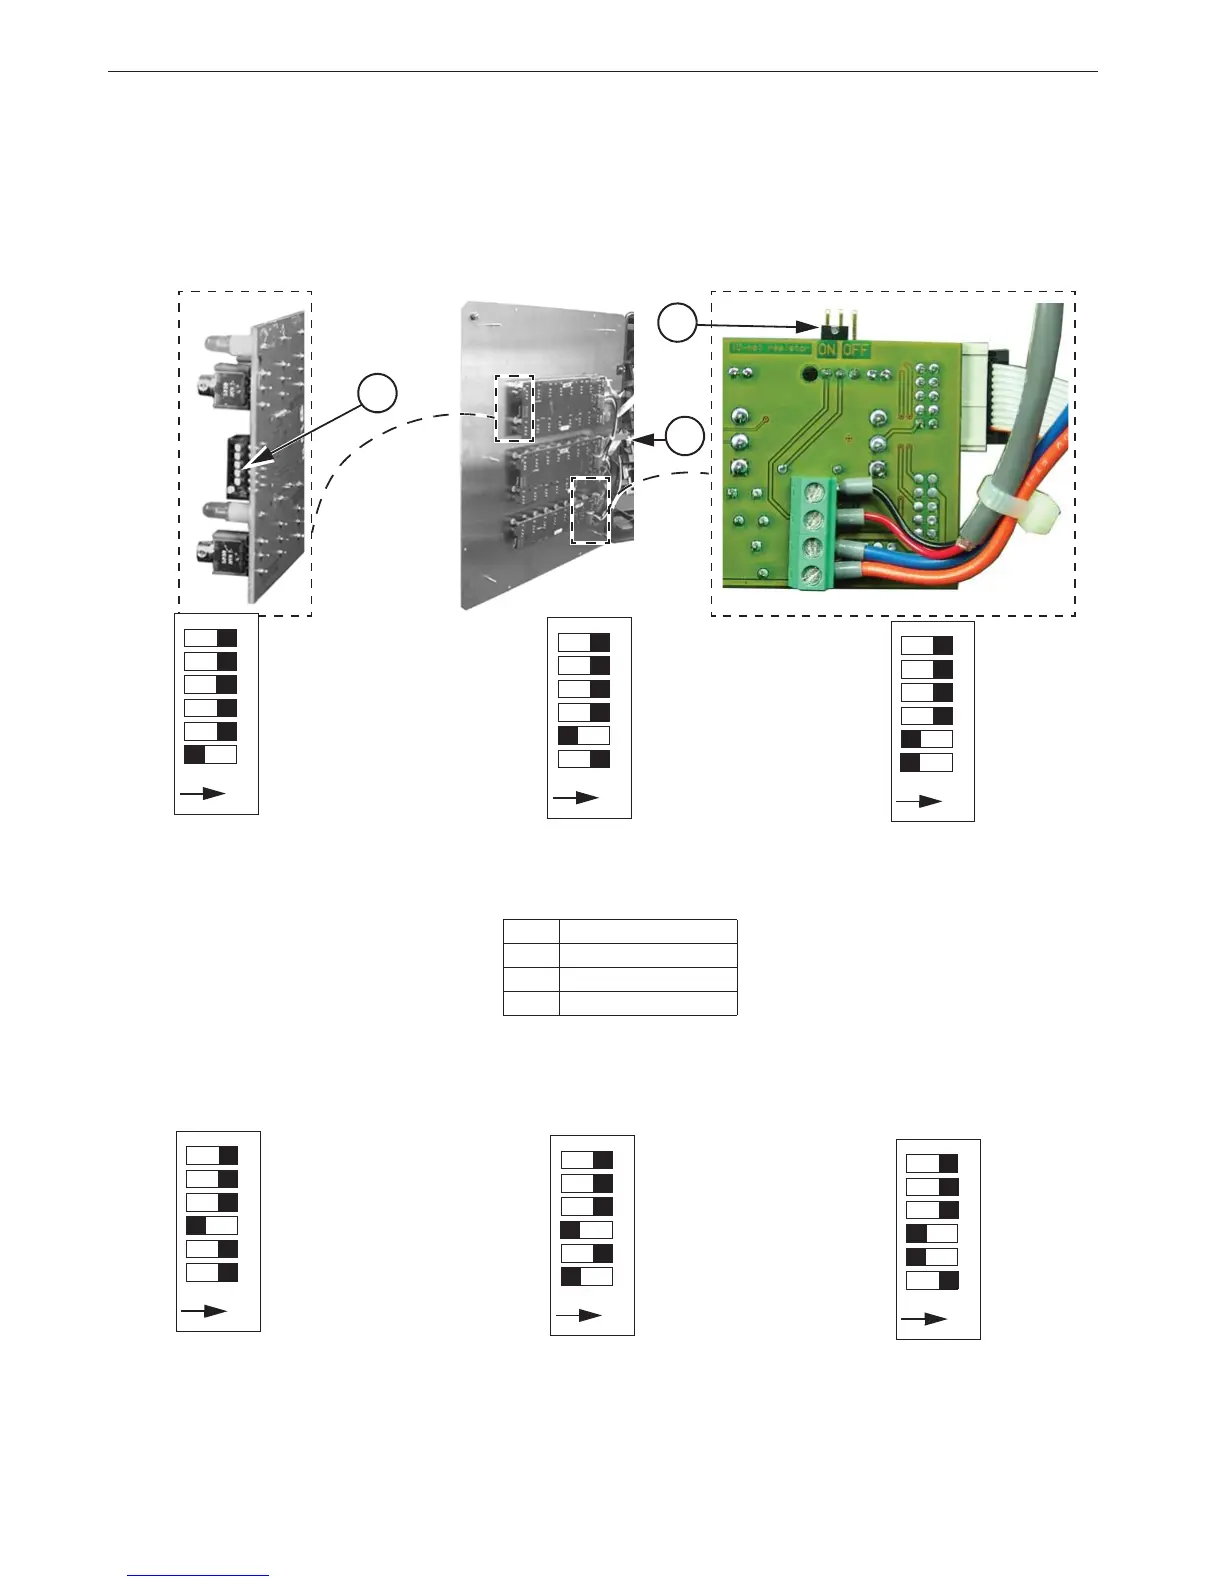
MS Board Dip Switch Positions
The MS Board Dip Switches are located on the ends of the Manual Switch Boards as shown in Figure
107 below. New Controls come from the factory preset. This information is provided only when a
replacement board is used. See Figures 41 and 42 below for Dip Switch settings for the First and a
Second Relay Box if used.
Note: If
the bottom most Board is replaced, make sure the Jumper in the upper right hand corner of the
board is in the "On" position.
ON
123456
Dip Switch Position
on 1st Board-With one
Board being used.
ON
123456
Dip Switch Position
on 2nd Board-With two
Boards being used.
ON
123456
Dip Switch Position
on 3rd Board-With three
Boards being used.
Figure 41. Dip Switch Settings 1st Relay Box
Item Description
1 Relay Box
2 Dip Switch
3 Jumper "ON" position
1
2
3
Dip Switch Settings for the Second Relay Box
ON
123456
Dip Switch Position
on 4th Board-With four
Boards being used.
ON
123456
Dip Switch Position
on 5th Board-With five
Boards being used.
ON
123456
Dip Switch Position
Boards being used.
on 6th Board-With six
Figure 42. Dip Switch Settings 2nd Relay Box