(5) Remove the drive belt (Fig. 11).
(6) Carefully return tensioner to its relaxed posi-
tion.
CLEANING
Clean all foreign debris from belt pulley grooves.
The belt pulleys must be free of oil, grease, and cool-
ants before installing the drive belt.
INSPECTION
Belt replacement under any or all of the following
conditions is required:
• Excessive wear
• Frayed cords
• Severe glazing
Poly-V Belt system may develop minor cracks
across the ribbed side (due to reverse bending). These
minor cracks are considered normal and acceptable.
Parallel cracks are not (Fig. 10).
NOTE: Do not use any type of belt dressing or
restorer on Poly-V Belts.
INSTALLATION
(1) Route and position the drive belt onto all pul-
leys, except for the crankshaft (Fig. 11).
(2) Rotate belt tensioner counterclockwise until
belt can be installed onto the crankshaft pulley (Fig.
9). Slowly release belt tensioner.
(3) Verify belt is properly routed and engaged on
all pulleys.
(4) Install drive belt shield (Fig. 8) and lower vehi-
cle.
Fig. 10 Drive Belt Wear Pattern
1 - NORMAL CRACKS - BELT OK
2 - NOT NORMAL CRACKS - REPLACE BELT
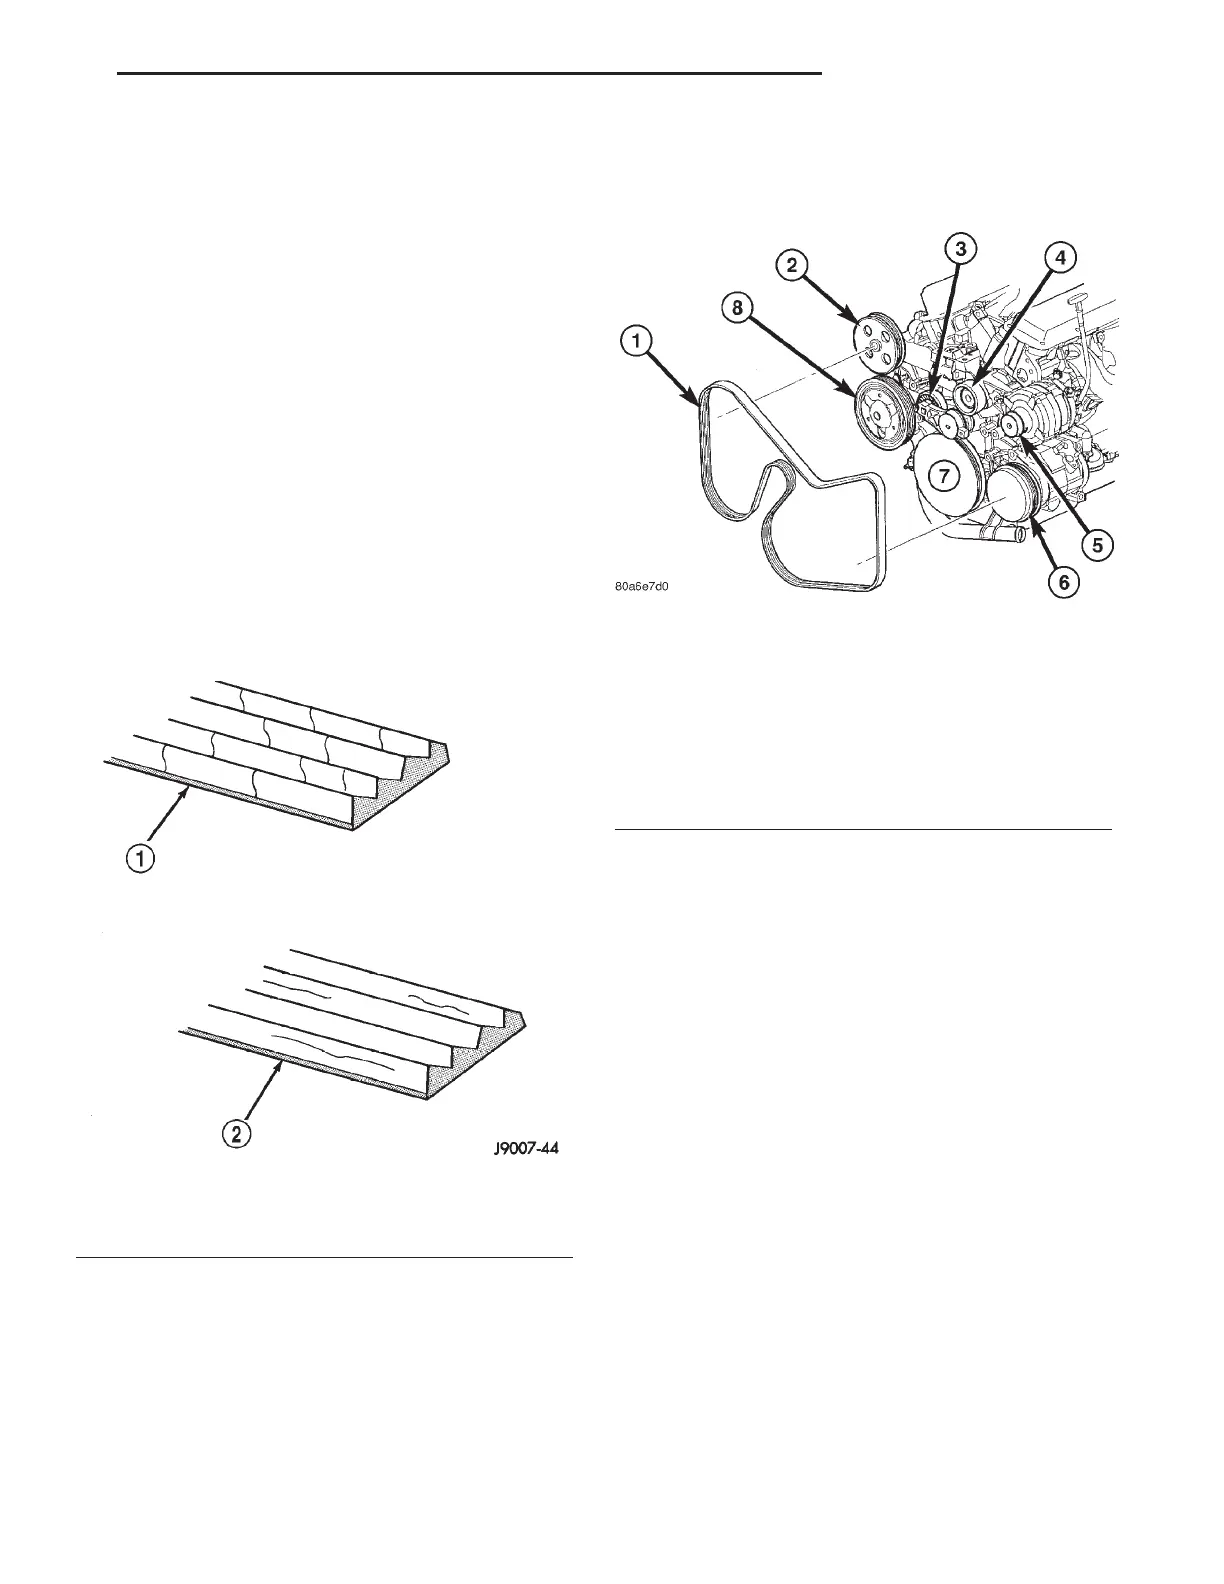
Fig. 11 ACCESSORY DRIVE BELT
1 - DRIVE BELT
2 - POWER STEERING PUMP PULLEY
3 - BELT TENIONER PULLEY
4 - IDLER PULLEY
5 - GENERATOR PULLEY
6 - AIR CONDITIONING COMPRESSOR PULLEY
7 - CRANKSHAFT PULLEY
8 - WATER PUMP PULLEY
RS ACCESSORY DRIVE 7-13
DRIVE BELTS - 3.3/3.8L (Continued)