REMOVAL
REMOVAL - BALL JOINT SEAL BOOT
(1) Remove steering knuckle from vehicle. (Refer
to 2 - SUSPENSION/FRONT/KNUCKLE -
REMOVAL)
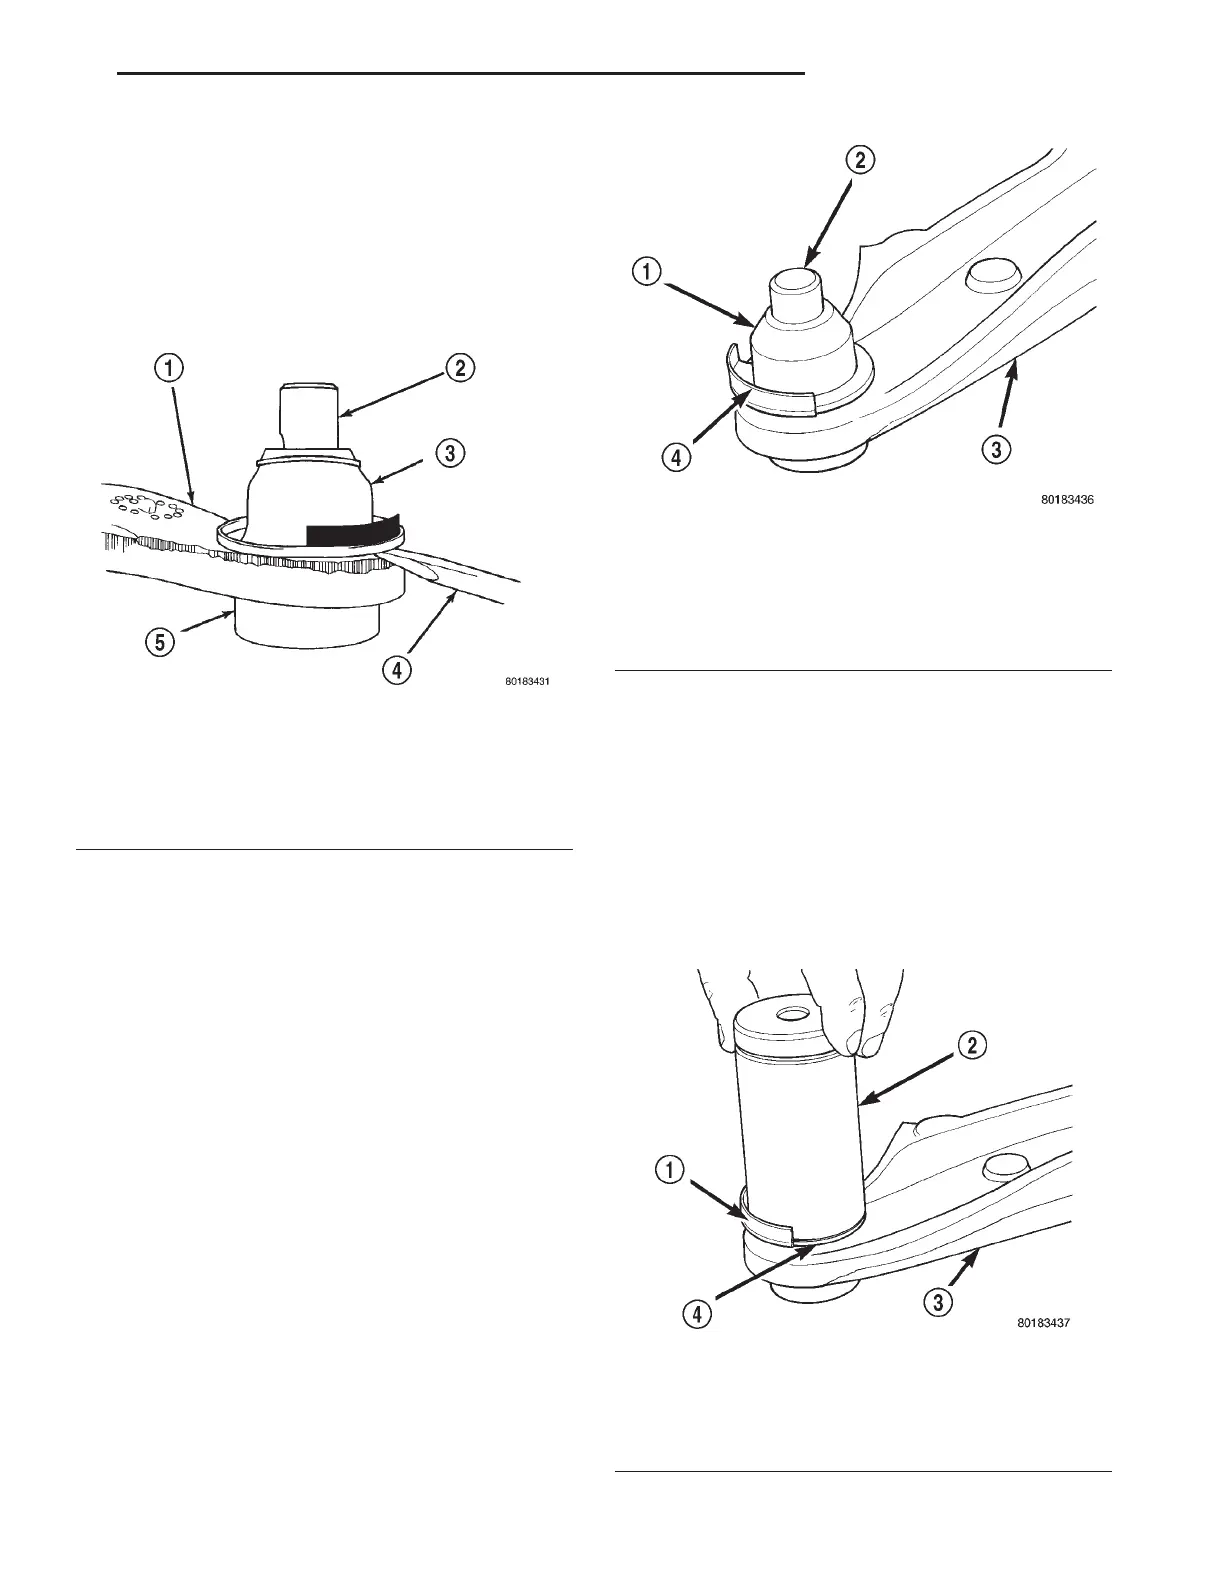
(2) Using a screw driver or other suitable tool, pry
the seal boot off of the ball joint (Fig. 17)
(3) Inspect the ball joint for evidence of dirt or
water intrusion and wipe clean as necessary. If dirt
or water intrusion is extreme and joint cannot be
properly cleaned, the lower control arm will need to
be replaced. (Refer to 2 - SUSPENSION/FRONT/
LOWER CONTROL ARM - REMOVAL)
REMOVAL - EXPORT
(1) Remove steering knuckle from vehicle. (Refer
to 2 - SUSPENSION/FRONT/KNUCKLE -
REMOVAL)
(2) Remove shield from seal boot by gently pulling
on it.
(3) Using a screw driver or other suitable tool, pry
seal boot off lower ball joint.
INSTALLATION
INSTALLATION - BALL JOINT SEAL BOOT
(1) Place a liberal dab of Mopart Wheel Bearing
Grease around the base of the ball joint stem at the
socket.
(2) Install a NEW seal boot by hand as far as pos-
sible on the ball joint. Installation of the seal boot is
to be with the shield positioned as shown (Fig. 18).
CAUTION: Do not use an arbor press to install the
sealing boot on the ball joint. Damage to the seal-
ing boot will occur if excessive pressure is applied
to the sealing boot when it is being installed.
(3) Place Installer, Special Tool 6758, over seal
boot and squarely align it with bottom edge of seal
boot (Fig. 19). Apply hand pressure (or gently tap
with a hammer) to Special Tool 6758 until seal boot
is pressed squarely against top surface of lower con-
trol arm.
Fig. 17 Ball Joint Seal Boot Removal (Typical)
1 - LOWER CONTROL ARM
2 - BALL JOINT STUD
3 - SEAL BOOT
4 - SCREW DRIVER
5 - BALL JOINT ASSEMBLY
Fig. 18 Ball Joint Seal Boot Installed Position
(Typical)
1 - BALL JOINT SEAL BOOT
2 - BALL JOINT STUD
3 - LOWER CONTROL ARM
4 - SHIELD
Fig. 19 Installing Ball Joint Seal Boot
1 - SHIELD
2 - SPECIAL TOOL 6758
3 - LOWER CONTROL ARM
4 - BALL JOINT SEAL BOOT
RS FRONT SUSPENSION 2-11
LOWER BALL JOINT SEAL BOOT (Continued)