Do you have a question about the CIGWELD WeldSkill 200AC/DC and is the answer not in the manual?
Details potential hazards associated with arc welding processes, including electric shock and arc ray exposure.
Lists key safety standards and regulations relevant to welding equipment operation and safety.
States the equipment's compliance with relevant Australian and international standards and directives.
Provides a visual reference for symbols used on the equipment and in the manual.
Highlights safety precautions and hazards specific to testing, maintaining, and repairing the equipment.
Discusses electromagnetic field considerations and precautions for safe operation.
Explains how to navigate and interpret the manual's structure, warnings, and notations.
Guides users on locating and recording the unit's identification numbers for reference.
Provides instructions for inspecting the equipment upon receipt and handling potential shipping damage.
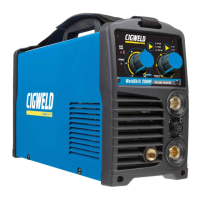
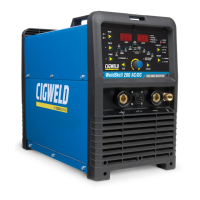
Details the CIGWELD WeldSkill 200AC/DC inverter's capabilities and features.
Outlines safe procedures for moving the welding power source.
Explains the concept of duty cycle and its relation to welding current and temperature limits.
Lists the technical specifications, part numbers, dimensions, and electrical requirements of the welder.
Defines suitable operating environments and precautions for increased hazard of electric shock.
Provides guidelines for selecting an appropriate and safe location for the welding machine.
Emphasizes the importance of correct installation for high frequency welding equipment.
Discusses how interference can be transmitted and how to minimize it.
Details user responsibilities and methods for reducing electromagnetic emissions.
Illustrates the maximum voltage and amperage output capabilities of the welding power source.
Identifies and describes the front and rear panel controls, indicators, and features of the welder.
Explains how to select and use the STICK welding mode and its programming functions.
Details the selection and use of LIFT TIG and HF TIG modes and their programming parameters.
Describes the circuitry that protects the TIG tungsten electrode from short circuits.
Provides safety procedures and user responsibilities for operating shielding gas regulators.
Guides users on connecting and setting up the welding machine for TIG welding.
Explains the installation and operation of the optional foot control for current adjustment.
Guides users on connecting and setting up the welding machine for STICK welding.
Explains the fundamental principles and technology behind inverter power supplies.
Provides a table of common faults, possible causes, and remedies for power source issues.
Guides on using common tools and safety precautions for advanced troubleshooting.
Lists essential test equipment and tools required for diagnosing and repairing the unit.
Describes how to conduct a visual inspection of internal components for damage or faults.
Details procedures for measuring DC bus voltage on the main inverter board.
Covers preliminary checks for IGBTs and PTC components on the main inverter board.
Outlines steps to check the input rectifier using a multimeter.
Explains how to measure DC bus voltage after applying power.
Provides pin functions for EMC filter PCB connectors.
Details the function of DIP switch SW0 on the control PCB for various settings.
Describes the procedure for calibrating output voltage and amperage.
Provides a technical overview of the main circuit's operation and components.
Presents the overall circuit diagram of the welding power source.
Lists essential safety precautions to follow before disassembling the unit.
Details the steps required to remove the outer casing of the welding machine.
Provides step-by-step instructions for disconnecting and removing the main control PCB.
Guides on disconnecting and removing the auxiliary power supply PCB2.
Details the process for removing PCB3, including harness disconnections.
Outlines the steps for removing PCB4, including screw and wire disconnections.
Describes the procedure for removing PCB5, involving screw removal.
Explains how to remove the front panel assembly, including terminals and wires.
Details the removal of the operator interface circuit board from the front panel.
Guides on how to remove the back panel, including screws and gas inlet.
Provides instructions for removing the main power PCB1, including screws and harnesses.
Details the procedure for removing the main power PCB2, including screws and harnesses.
Explains how to remove the power switch, cooling fan, and power cord.
Instructs on installing screws, wires, and harnesses for Main Power PCB1.
Details installing screws, wires, harnesses, and the base plate for Main Power PCB2.
Guides on reinstalling output terminals, ground wire, gas outlet hose, and screws for the front panel.
Provides instructions for reinstalling the ON/OFF switch, power cable, fan, and power cord.
Details the process of installing wires and securing PCB5 with screws.
Guides on installing screws, wires, and reconnecting yellow wires for PCB4.
Explains how to install PCB3, including studs, screws, and harness connections.
Details installing studs, harnesses, and glue for the Auxiliary Power Supply PCB2.
Guides on installing screws and plugging in all necessary harnesses for the control board.
Provides steps for installing the ground screw, panel screws, and the outer case.
Lists part numbers and descriptions for key spare components of the power source.
| Brand | CIGWELD |
|---|---|
| Model | WeldSkill 200AC/DC |
| Category | Welding System |
| Language | English |