Run a Test
33
16. Run a Test
The tester performs three tests in the following order:
● Low Voltage Test: Tests for continuity and basic isolation.
● High Voltage Test – 4250 only: Tests for thorough isolation.
● Intermittents Test: Tests for intermittent errors that could arise while the cable is being moved.
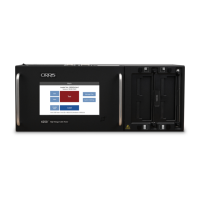
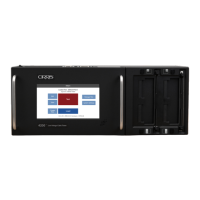
■ Test Window Overview
The test window displays user instructions, test results, and other information.
User Instruction/Test Status: The box at the top of the screen
displays instructions for the user or shows the status of the tester.
Test name: The name given when the test program was created will
display here.
Start Test button: This button is active when the Start Condition is
set to Start Button.
Abort button: Ends test at any point. The aborted test will not be
recorded as though it were never tested.
Lot: The Lot ID will act as an identier to the batch of cables being
tested. If turned o, the space next to Lot ID will be left empty.
Good/Bad/Total: Tracks number of cables tested including how many cables passed and failed.
Print: Press button to print test results if a report was selected for the test.
Test Results: This box will display one of three statuses:
● Not Tested
● Passed
● Failed
Result Details: Passes, fails, and error details from each test (Low Voltage, High Voltage, Intermittent) will appear in this
window including error details.
16.1 Perform a Test
1. From the Main Menu, verify the required test program is loaded (the name of the test program is found at the top of the
main menu screen) and then press Test.
2. If Lot ID is turned on, you may be prompted to enter an identifying series of numbers or letters. The Lot ID will be used
to identify the batch of cables being tested. For more information on Lot ID, see page 27.
3. Depending on the chosen Start Condition, attach a cable or press Start. (The bar at the top of the window will prompt
which action to take.)
Ready to Test
Not Tested
Start Test
Abort
Print
Done
Lot:
Passed: 0, Failed: 0
Total: 0
Test: NewTest