LIGHTS
10
LIGHTS
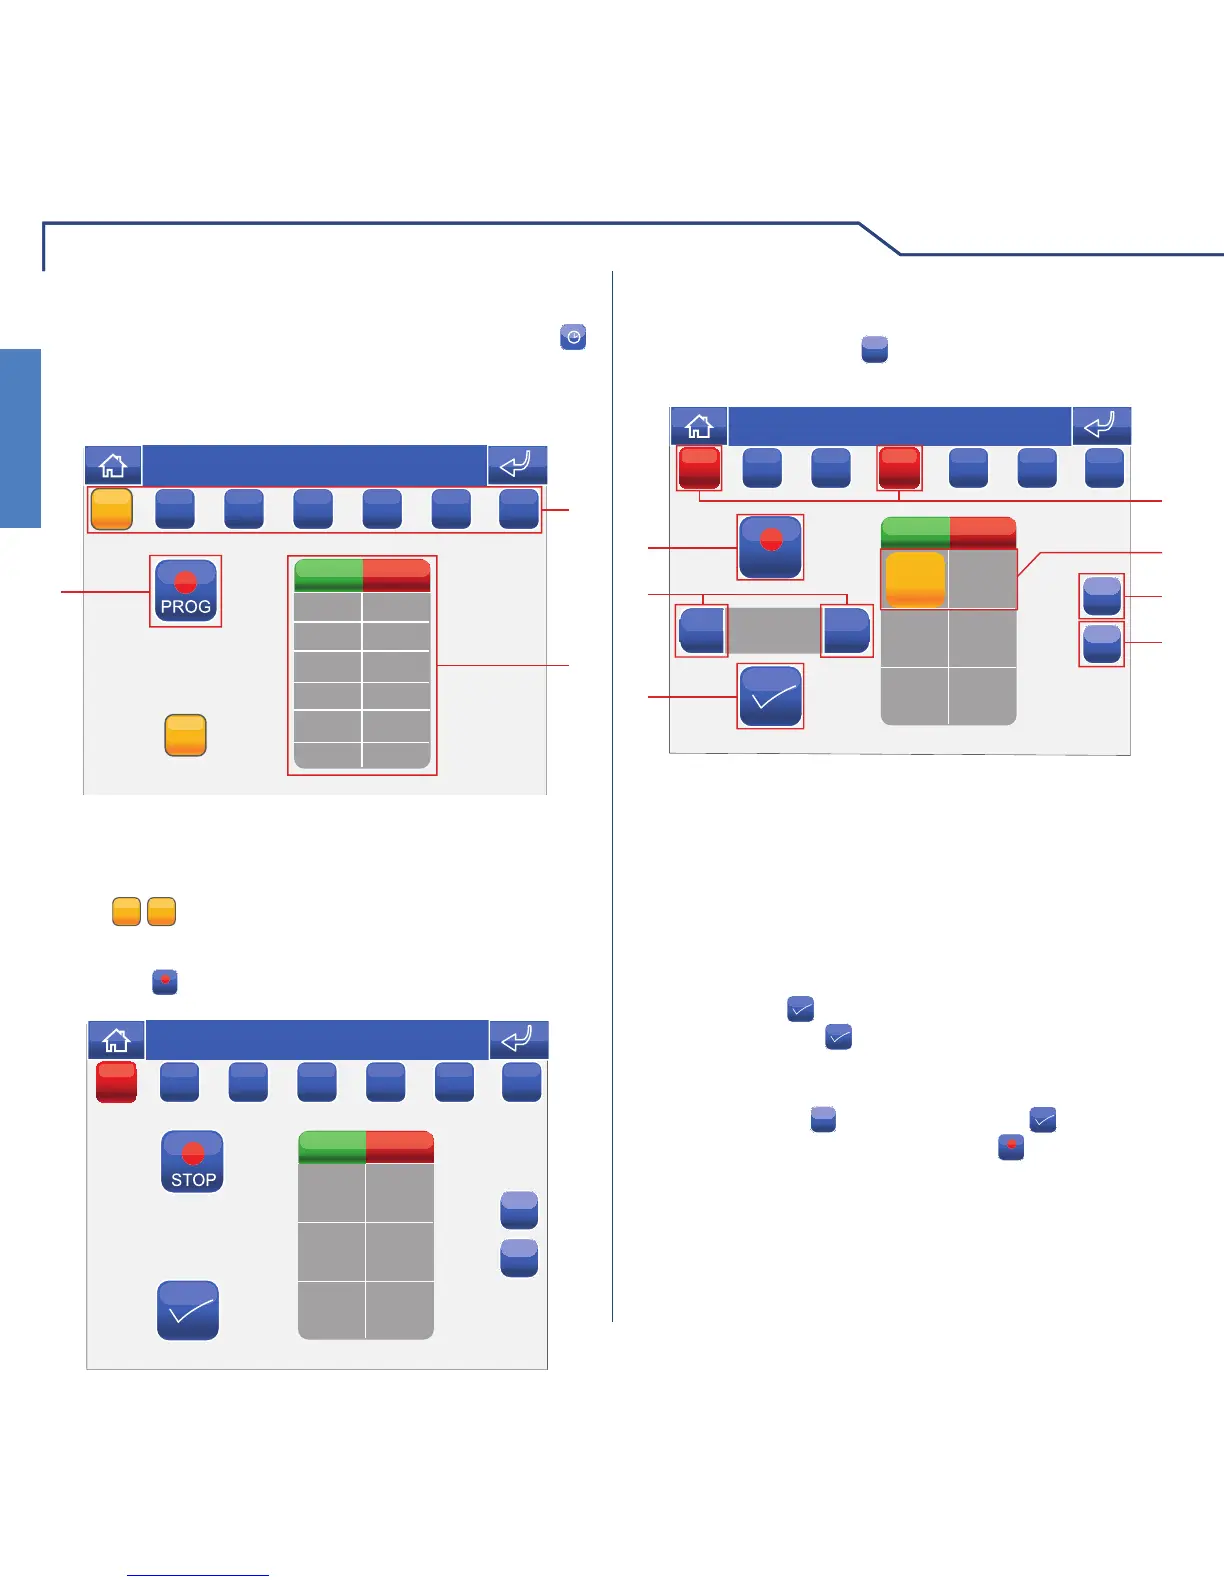
LIGHT SCHEDULING
Once you have entered the relevant area, press the
icon and then the icon corresponding to one of the lights
available (e.g. Night-stand); this will take you to the dimmer
light scheduling menu.
1 Days of the week.
2 List of logged programming.
3 Start procedure.
Press the
PROG
icon to access the programming screen.
MM
ON STATUS
TIME
Thu 05/09/09 - 16:07 0W
M
T
W
T
FSS
Select the days of the week for which you wish to
program the activity (selected days will be highlighted
in red) and press the
+
icon to add a programming
schedule to the list.
+
+
00:00
STOP
+
-
x
ON
00:00 OFF
4
1
36
5
7
2
Thu 05/09/09 - 16:07 0W
STATUS
TIME
MM
T
W
T
FSS
1 Days of the week selected.
2 Programming saved.
3 Add programming.
4 Delete programming.
5 Confi rm.
6 Selector keys to modify time and status.
7 Save.
Set the desired activity time using the selector keys
and press the
icon to confi rm. Select the desired
status and press to confi rm. Repeat the above
steps as necessary to add several programming
schedules. To delete a programming schedule, select
it and press the
x
icon, followed by to confi rm.
When you have fi nished, press the
STOP
icon to log the
information.
The
ONON
/
OFFOFF
icon enables/disables the current
schedule.