Do you have a question about the Comelit Planux and is the answer not in the manual?
Safety precautions and liability disclaimers for apparatus use.
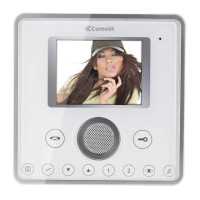
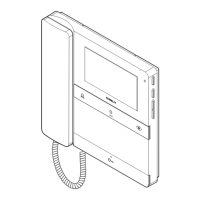
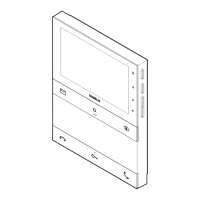
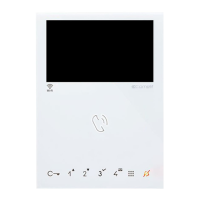
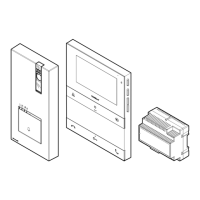
Details the physical components and layout of the Planux Manager monitor.
Explains the purpose and operation of each physical key on the device.
Guide on navigating the Planux Manager interface and accessing functions.
Instructions on how to access and navigate the Lights menu.
Manual control and basic scheduling of lights.
Programming scheduled ON/OFF times for lights in specific areas.
How to schedule dimmer lights, including brightness levels.
General procedure for programming scheduled ON/OFF times for lights.
Overview of controlling loads and generic electrical commands.
Manual control and scheduled operation of electrical loads.
Programming scheduled ON/OFF times for electrical loads.
Scheduling load operations for specific areas.
Accessing and navigating the menu for controlling shutters.
Manual control and scheduled operation of shutters.
Programming scheduled open/close times for shutters.
Scheduling shutter operations for specific areas.
Overview of the automation menu and available functions.
Programming scheduled activation/deactivation of automated functions.
Accessing and navigating the irrigation control menu.
Programming scheduled watering times for irrigation systems.
How to access and navigate the climate control settings.
Manual adjustment of temperature and climate modes.
Programming daily temperature schedules for climate control.
Setting the climate system to manual operation.
Forcing climate modes for a set duration.
Managing loads, especially during overload conditions.
Overview of the menu for monitoring energy consumption.
Explains color coding used for consumption thresholds.
Answering calls, using door lock, and activating audio.
Accessing menus and using video memory for recorded calls.
Recording, viewing, and deleting video entries.
Configuring hands-free operation and custom ringtones.
Setting volumes for ringtone, audio, and intercom.
Viewing and controlling system actuators.
Viewing and managing connected cameras.
Assigning custom names to actuators.
Assigning custom names to cameras.
Viewing and managing intercom call entries.
Assigning custom names to intercom calls.
Accessing and navigating the main setup menu.
Selecting language and locking keypad/touch-screen.
Setting date/time and viewing system information.
Viewing system conditions (Master devices only).
Accessing the menu for configuring consumption monitoring.
Configuring the toolbar and selecting meters to monitor.
Setting currency and display options for consumption data.
Setting specific rates for consumption based on time bands.
Setting maximum consumption thresholds for reporting.
Resetting all connected meters to zero.
Customizing general settings for connected meters.
Selecting units and configuring pulse increments for meters.
Adjusting meter count increments and scale values.
Entering advanced settings via installer password.
Listing available functions within the advanced menu.
Assigning specific functions to programmable keys.
Configuring automatic recording of video calls.
Adding, deleting, modifying, and renaming actuators.
Changing the access code for actuators.
Removing actuators from the system.
Managing connected cameras.
Process for adding new cameras to the system.
Changing the access code for cameras.
Removing cameras from the system.
Viewing and managing intercom call entries.
Process for adding new intercom entries.
Changing the address for an intercom entry.
Removing an intercom entry from the system.
Creating and managing selective intercom calls.
Process for setting up a new selective intercom call.
Instructions for removing or changing selective intercoms.
Overview of address-related settings.
Configuring specific bracket codes for system identification.
Configuring a monitor as primary or secondary.
Defining address ranges for monitor call reception.
Assigning intercom addresses to specific monitors.
Adjusting touch-screen sensitivity and accuracy.
Assigning functions to specific terminal board inputs.
Restoring all system settings to factory defaults.
Deleting system settings for door entry, automation, and alarms.
Updating system settings and firmware.
Guidance on obtaining product software updates.
Adjusting command transmission speed and attempts.
Specific settings required for Vedo series control units.
Accessing the main menu for alarm system functions.
Explaining the meaning of various status indicators for alarm areas.
Activating the full anti-intrusion system.
Deactivating the full anti-intrusion system.
Arming specific zones or areas of the alarm system.
Disarming specific zones or areas of the alarm system.
Viewing the current status and zones within an alarm area.
Clearing active alarms and resetting the system status.
Clearing logged alarm events from memory.
Adding, deleting, modifying, and renaming system users.
Creating new user accounts for system access.
Changing existing user passwords.
Removing user accounts from the system.
Performing tests to verify sensor and system functionality.
Accessing the system's event log for alarms.
Explaining the codes and abbreviations used in the alarm log.
Overview of the system's scenario control capabilities.
Defining and configuring new automated scenarios.
Linking specific functions (lights, climate, etc.) to scenarios.
Programming scenarios to activate automatically at set times.
Manually triggering scenarios for immediate execution.
Removing existing scenarios from the system.
Editing the parameters and functions of existing scenarios.
Overview of menu options for managing keys.
Registering, deleting, modifying, and renaming keys.
Adding new keys to the system for scenario activation.
Removing keys from the system.
Assigning custom names to registered keys.
Changing the function associated with a specific key.
Linking specific scenarios (entry/exit) to keys.
Triggering scenarios by passing a key over the sensor.
| Buttons | Touch-sensitive |
|---|---|
| Colour | White |
| Type | Video Intercom |
| Display | LCD |
| Mounting | Wall-mounted |
| Power Consumption | 5W |
| Humidity | 10% to 90% non-condensing |
| Material | Plastic |