CVC TECHNOLOGIES, INC. CVC 310 OPERATION MANUAL
9 - 6
9.2 Hot Stamp Printer Installation (Optional)
The hot stamp printer is an optional for the machine. The printing and labeling are accomplished
synchronously; the printer must be properly adjusted and ready to operate before starting labeling.
a. Compressed air connection: Connect the compressed air hose to “AIR INPUT” (magnetic valve),
and turn on the air compressor.
b. Air pressure: 3~4 kg/cm
2
(40 ~ 50 psi)
c. Place the types in the type chase. Fix and lock the type with locking springs.
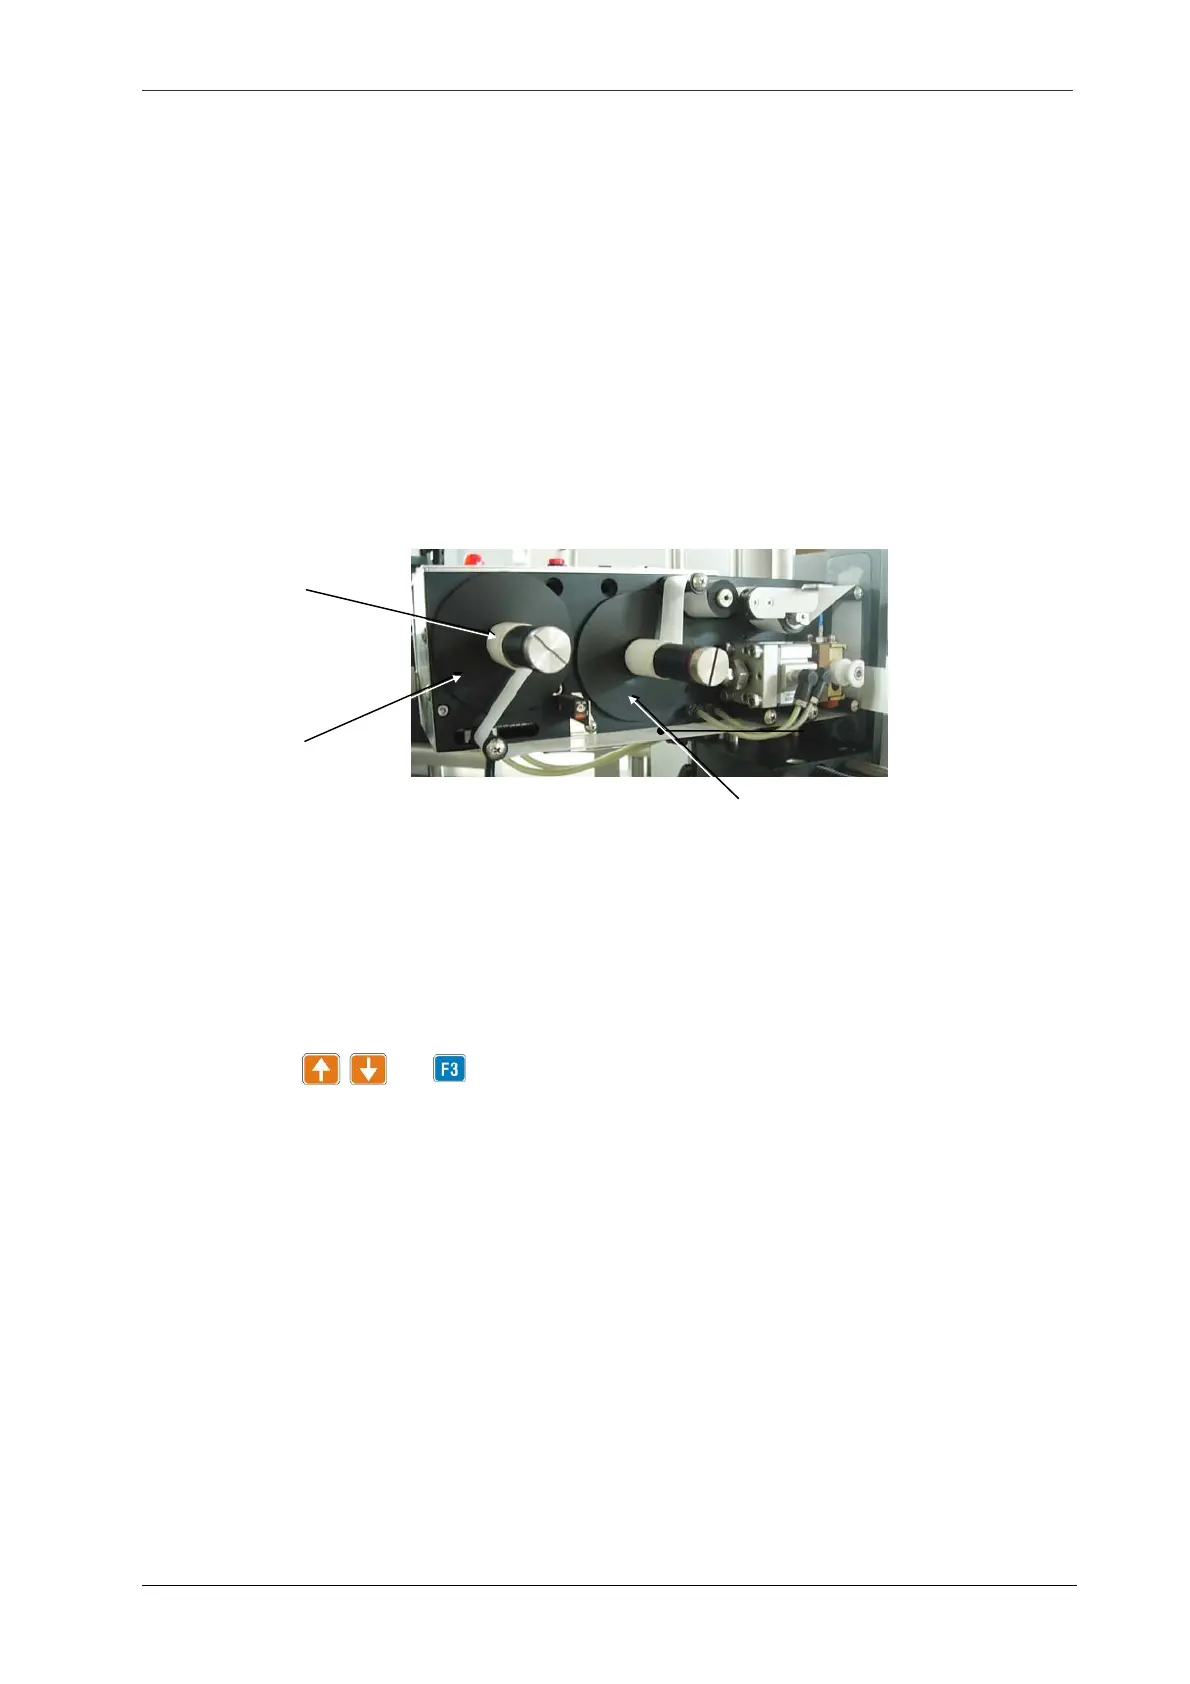
d. Install hot stamp foil tape on foil spool disk (Fig 9.2-1).
e. Move hot stamp printer to the proper position with stamp position adjustment knob.
f. Turn on the heating switch (Power switch).
g. Turn on the main power switch of the machine, and then search the print time setting function
using the keys and . The print time is normally set between 10 and 40.
h. Set the temperature controller (heat temp) at 130 ℃ (266 ℉). If labeling speeds more than 80
bottles per minute, increase the temperature to 140 ℃ (284 ℉).
- Temperature indicator (out) lights up when the hot stamp is heating up.
- Allow 3 to 5 minutes for the "G/Y" light to turn to green from yellow. The green color indicates the
required temperature has been reached.
- Both the setting of F3 print time and temperature controller must be synchronized. F3 print time
is set at 10 ~ 40 for temperature controller between 160 ~ 165 ℃ (320 ~ 329 ℉).
- G/R indicator: The lamp is not lit while the print temperature is constant and remains at the
required level. And the indicator will keep flashing if the temperature controller is not functioning,
Fig 9.2-1
Foil tape
Foil spool dis
Foil rewind spool dis