40
CURRENT TIME SETTING
Setting the current day of the week and
the current time
[Operating Procedure]
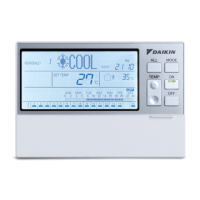
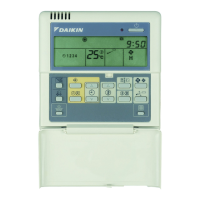
1. Press the CLOCK button (1) once while the ALL
screen or INDIVIDUALLY screen is displayed.
2. The Time setting screen appears.
3. Press the or button (2) to select an item to
set.
4. While the setting screen is display, make a setting
with the or button (3).
5. Press the SET/CANCEL button (4) once to com-
plete the setting procedure.
(After the setting is completed, the display returns
to the operation screen shown prior to the setting
procedure.)
6. If no button is operated for 1 minute or the CLOCK
button (1) is pressed, the display returns to the ALL
screen when the setting was made in the ALL
screen, or to the INDIVIDUALLY screen when the
setting was made in the INDIVIDUALLY screen.
NOTE
1. Operate buttons while the backlights are lit.
2. In each of steps 2 through 4, if no button is operated
for 1 minute, the display returns to the ALL screen
when the setting was made in the ALL screen, or to
the INDIVIDUALLY screen when the setting was
made in the INDIVIDUALLY screen.
In the above-mentioned case, the setting being
entered will not be applied.
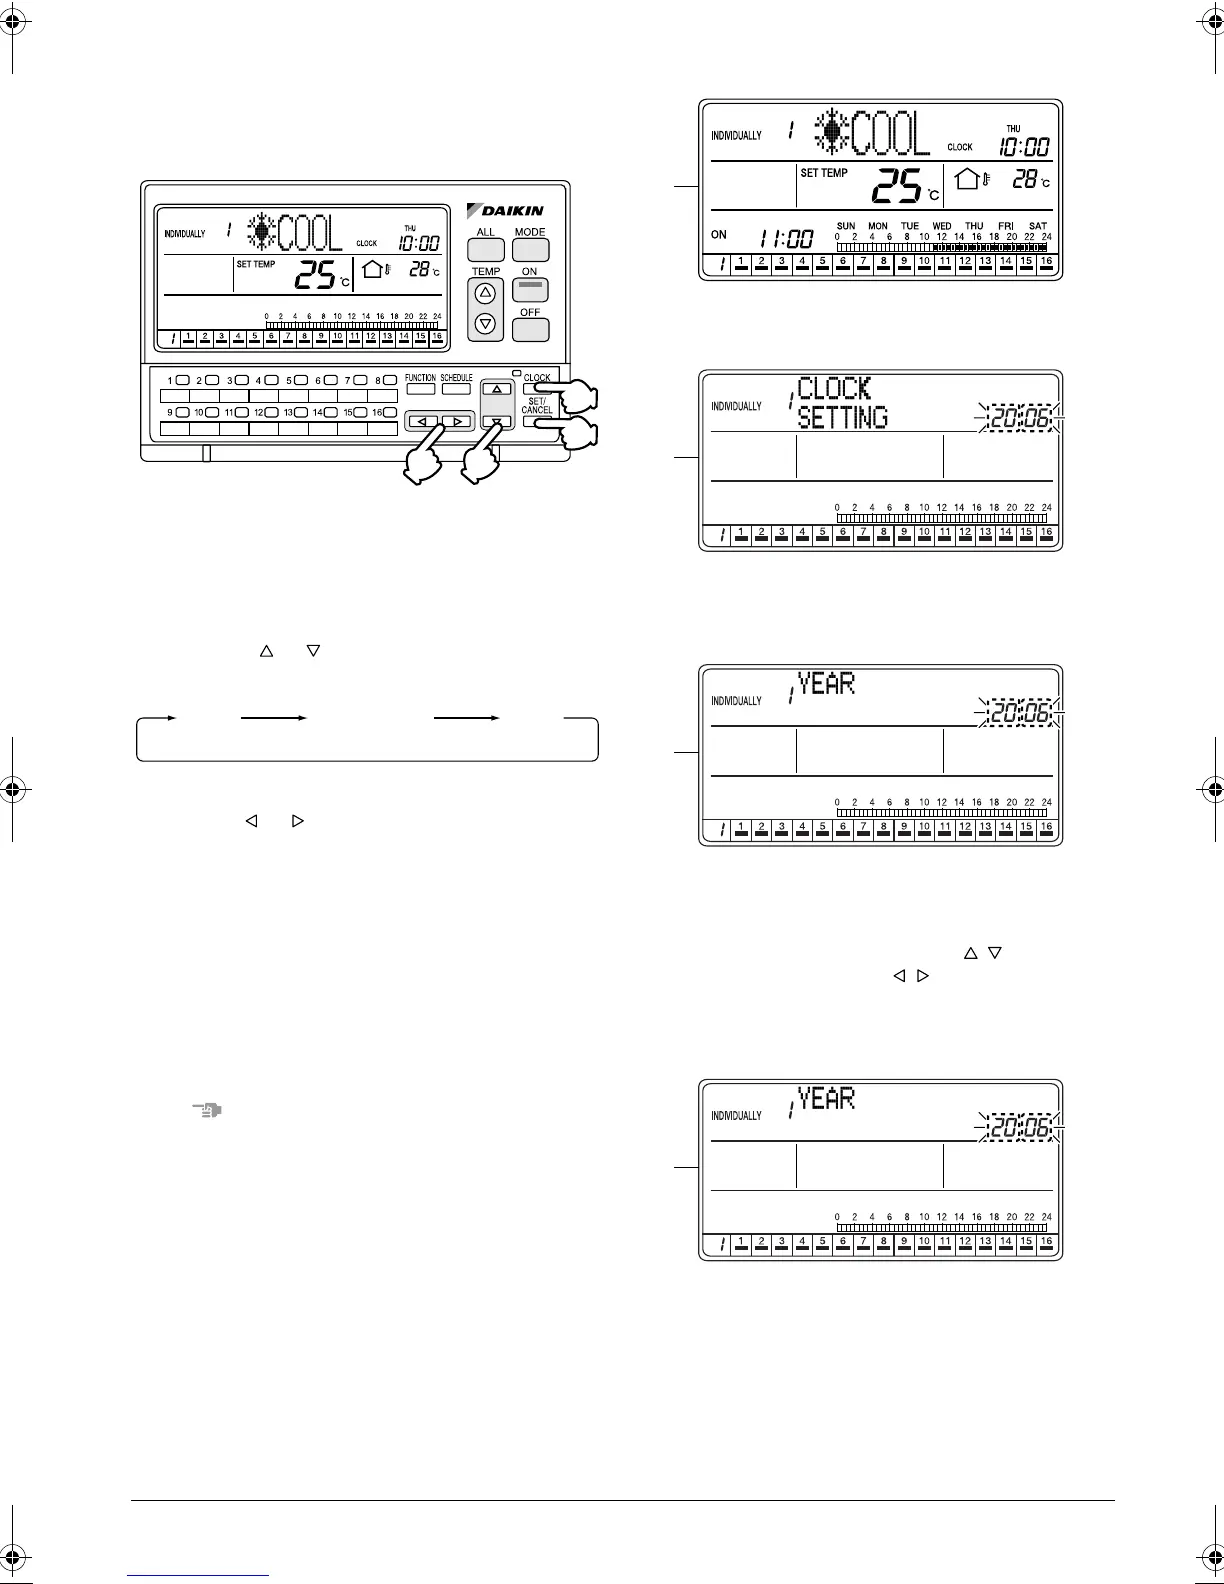
[Screen Display]
A. While the ALL or INDIVIDUALLY screen is dis-
played, press the CLOCK button (1) once.
B. The Setting Time screen appears.
The display shows “CLOCK SETTING” for 2 sec-
onds, and then indicates “YEAR”.
C. The “YEAR” setting screen appears.
If no button is operated for 2 seconds while the dis-
play shows screen C on page 40 to screen I on
page 41, a guidance message, “ BUTTONS:
SET Y/M/D AND TIME, BUTTONS: SET
TIME, SET/CANCEL BUTTON: SET,” appears
and scrolls in the operation mode display section
(dot matrix).
(2)
(3)
(1)
(4)
YEAR MONTH/DAY
TIME
A
B
C
D
01_EN_3P124623-10N.fm Page 40 Monday, January 28, 2008 4:58 PM