30
H. The key lock is cancelled, and the display returns
to the ALL screen if the key lock was cancelled in
the ALL screen, or to the INDIVIDUALLY screen if
the key lock was cancelled in the INDIVIDUALLY
screen.
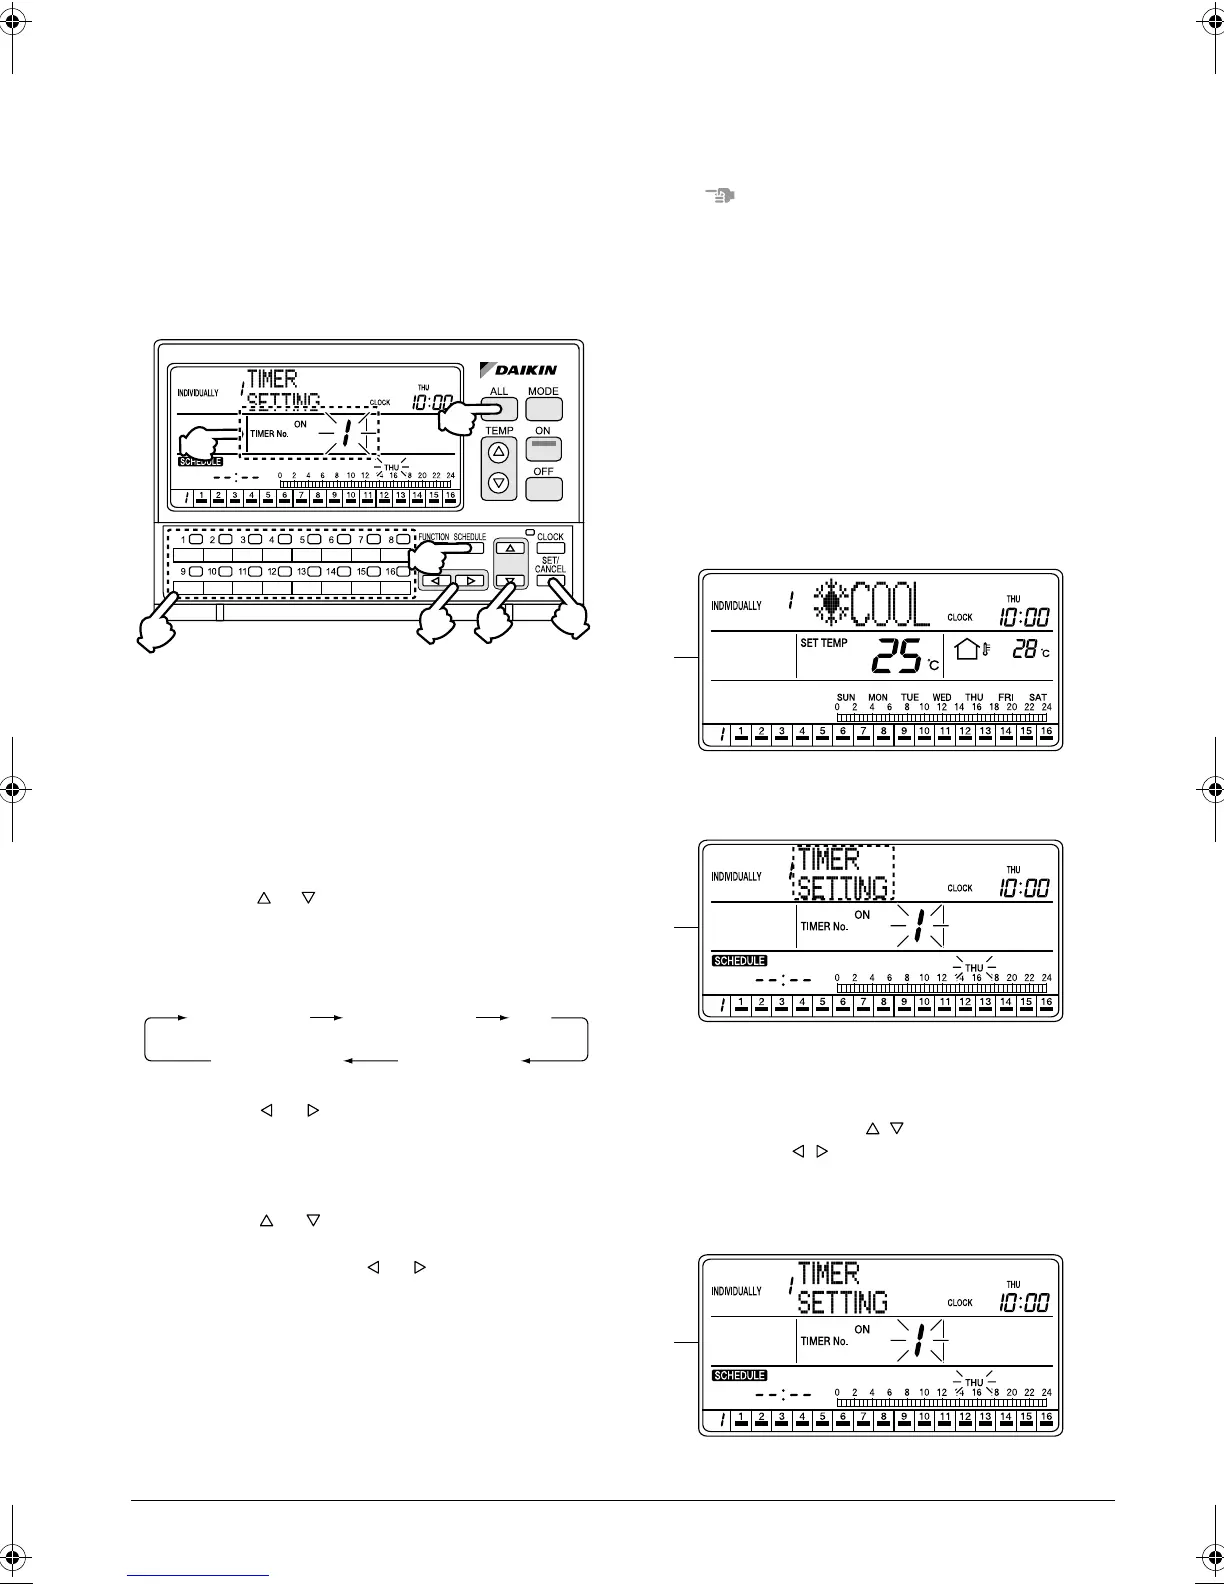
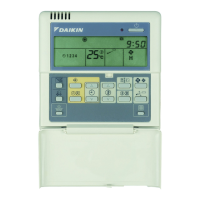
SCHEDULE SETTING
Programming ON time and OFF time
for each day of the week
[Operating Procedure]
1. While the ALL or INDIVIDUALLY screen is dis-
played, press the SCHEDULE button (1) once.
2. The Schedule setting screen appears.
3. Using the ALL button (3) or one of the individual
group selection buttons (4) (1 - 16), select the air
conditioner (group) to be set.
4. Using the or button (2), select a Timer No. (7).
To set ON time, select TIMER ON. To set OFF
time, select TIMER OFF.
Up to 4 timer settings can be entered.
5. Press the or button (5) to set the day of the
week.
6. Press the SET/CANCEL button (6) once to apply
the settings.
7. Using the or button (2), select “SCHEDULE
SETTING”. The display changes to the Time set-
ting screen. Press the or button (5) to set
time.
8. Press the SET/CANCEL button (6) once to apply
the time setting. (All timers will be set.)
9.
If no button is operated for 1 minute or the SCHED-
ULE button
(1)
is pressed, the display returns to the
ALL screen when the setting was made in the ALL
screen, or to the INDIVIDUALLY screen when the
setting was made in the INDIVIDUALLY screen.
NOTE
1. Operate buttons while the backlights are lit.
2. In each of steps 2 through 7, if no button is operated
for 1 minute, the display returns to the ALL screen
when the setting was made in the ALL screen, or to
the INDIVIDUALLY screen when the setting was
made in the INDIVIDUALLY screen.
In the above-mentioned case, the setting being
entered will not be applied.
3. In step 4 (Timer No. (7) and “day of the week” set-
ting screen) and step 7 (Time setting screen),
pressing the SET/CANCEL button (6) moves the
screen forward for the next setting step.
[Screen Display: Timer ON Setting]
A. While the ALL or INDIVIDUALLY screen is dis-
played, press the SCHEDULE button (1) once.
B. The Schedule setting screen appears.
If no button is operated for 2 seconds while the dis-
play shows screen B to screen F on page 30, a
guidance message, “ BUTTONS: SELECT
TIMER No., BUTTONS: SELECT DAY OF
THE WEEK, SET/CANCEL BUTTON: SET,”
appears and scrolls in the operation mode display
section (dot matrix).
(1)
(3)
(7)
(6)
(4)
(2)
(5)
TIMER 1 ON
TIMER 1 OFF
TIMER 4 ONTIMER 4 OFF
·····
A
B
C
01_EN_3P124623-10N.fm Page 30 Monday, January 28, 2008 4:58 PM