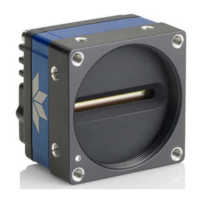
Linea SWIR GigE Series Camera Using Linea SWIR GigE with the Sapera API
19
Using Linea SWIR GigE with the
Sapera API
A Linea SWIR GigE camera installation with Teledyne DALSA’s Sapera API generally follows the
sequence described below. Detailed installation instructions follow this overview.
Network and Computer Overview
• The camera requires a computer with a GigE network adapter. See the previous section
Connecting the Linea SWIR GigE Camera.
• Laptop computers with built in GigE network adapters may not stream full line rates from the
camera. Thorough testing is required with any laptop computer to determine the maximum
frame rate possible. Note: Refer to the “Network Imaging Package for Sapera LT” manual
(NetworkOptimizationGuide.pdf) found by clicking Windows Start and scrolling down to
Teledyne DALSA.
• The camera connects through a Gigabit Ethernet switch. When using VLAN groups, the Linea
SWIR GigE and controlling computer must be in the same group.
• In a Sapera development environment, Sapera LT 8.50 or later is required with the GigE Vision
Module software package.
• All GigE Vision support is automatically installed in Sapera LT 8.50 or later.
• If third party GigE Vision Compliant software is used, Sapera or Sapera runtime is not required.
Refer to third party instruction manual.
• The Windows Firewall exceptions feature is automatically configured to allow the Sapera GigE
Server to pass through the firewall.
• Computers with VPN software (virtual private network) may need to have the VPN driver
disabled in NIC properties. This would be required on the NIC used with the Linea SWIR GigE.
Testing by the user is required.
• When a Linea SWIR GigE is connected a small camera icon is added to the Windows tray
(adjacent to clock) or in the tray pop up (Show hidden Icons). Right click the icon and select
‘SHOW Status Dialog Box’ to confirm camera connection.
• Note: The icon may remain hidden in Windows until a camera is connected.
• A firmware update may be required for a new camera. See File Access via the CamExpert Tool
(Quick Camera Firmware Upgrade) for additional information.
• Use CamExpert (installed with either Sapera or Sapera runtime) to test the camera installation.
Set the Internal Test Image Generator.
Note: to install Sapera LT and the GigE Vision package, logon to the workstation as an administrator or with
an account that has administrator privileges.
 Loading...