2. Follow the procedure in after working inside your computer.
Removing the long Compression Attached Memory (CAMM)
module
Prerequisites
1. Follow the procedure in before working inside your computer.
2. Remove the base cover.
About this task
NOTE: For models shipped with a long CAMM module
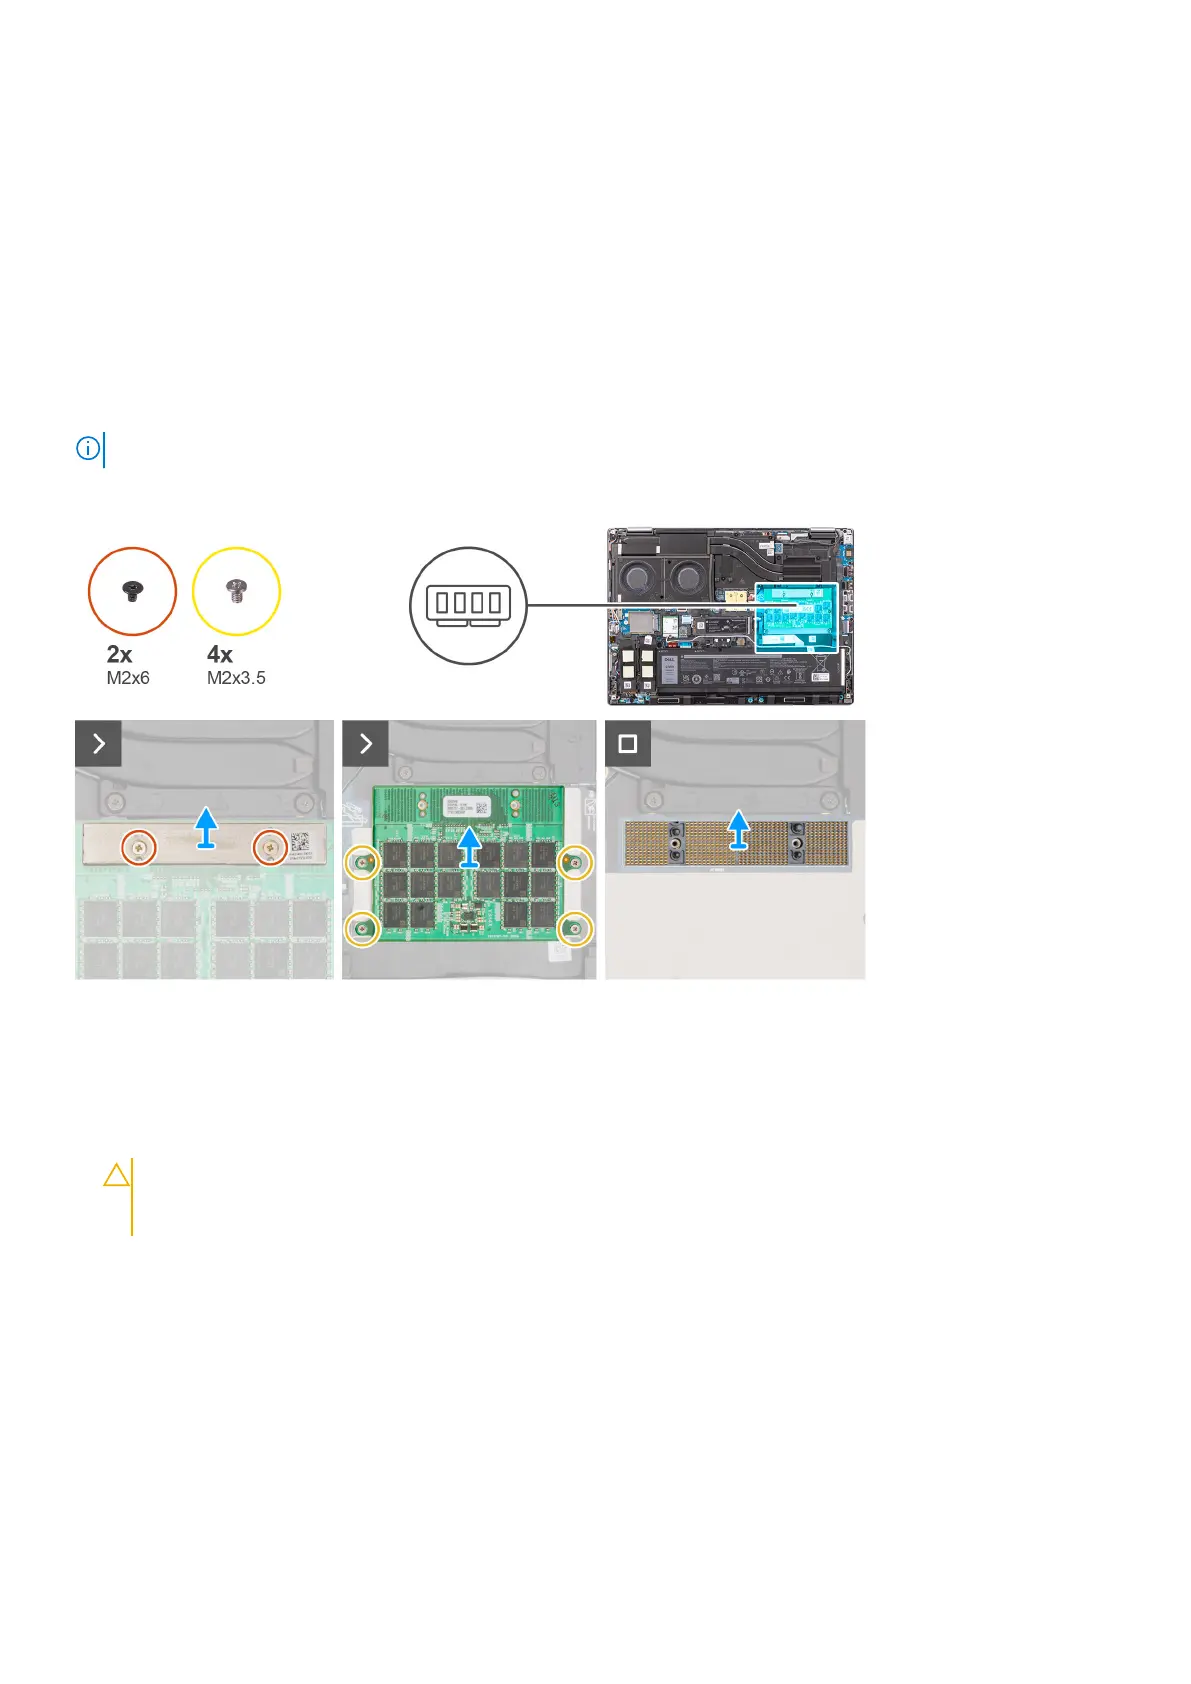
The figure indicates the location of the long CAMM module and provides a visual representation of the removal procedure.
Steps
1. Remove the two (M2x6) screws that secure the memory bracket on the CAMM module.
2. Lift to remove the memory bracket.
3. Remove the four (M2x3.5) screws that secure the CAMM module to the system board.
4. Lift to remove the CAMM module from the system board.
CAUTION:
When handling the memory connector DO NOT touch the pins on the connector module, the pins
are fragile and any direct contact with the pins may damage them. Only hold the connector from the sides to
avoid contact with the pins.
30 Removing and installing components