50 Pictures for illustrating purposes only
ELECTROVAP MC2 STEAM BATH
Maintenance - Cleaning of steam cylinder
The ELMC steam generators are currently fitted with disposable
cylinder(s).The latter can however be easily substitued for cleanable
type at customer’s choice.
Drain the steam cylinder(s) fully using the manual drain key.
When the cylinder(s) is/are drained fully (a « DRAINING CYCLE
OVER » will appear on the display). Isolate the power both at the
general switchboard and at the humidifier (rocker power switch).
The steam cylinder(s) may be very hot. Allow it/them to cool down
before removing.
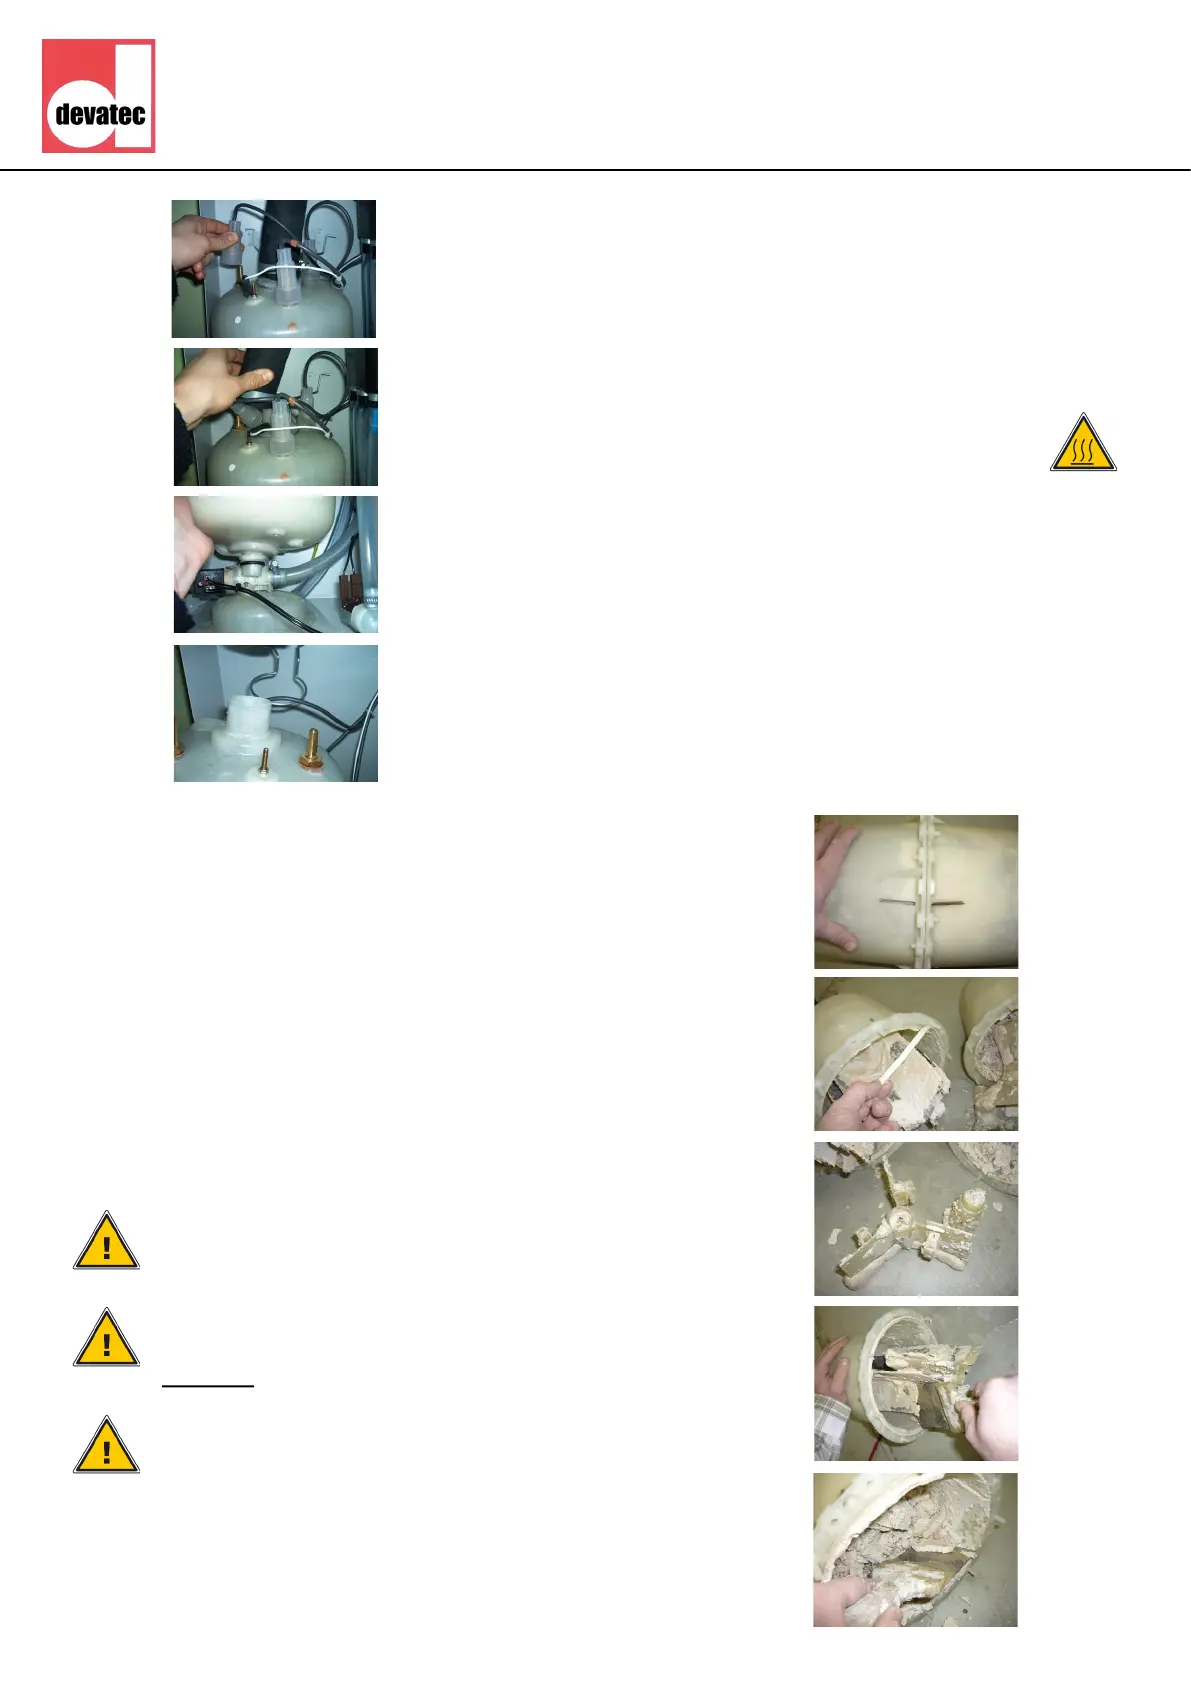
Remove the front panel from the generator to access the cylinder
compartment. Remove power and high water level electrode cables
from top of the cylinder(s) (picture 1).
Disconnect the steam hose(s) from the top of the cylinder(s) (pict. 2).
Lift the cylinder upwards until it is clear off the drain valve. Ensure that
the gasket remains in the drain valve (picture 3).
Release the top of the cylinder from the retaining clip and pull out the
cylinder (picture 4).
The disposable cylinder(s) will be merely replaced by new ones either
disposable or cleanable.
Retighten gently the steam hose on the cylinder outlet when the
cylinder has cooled down only to prevent deformation.
1.
2.
3.
4.
This method is intended for use with the cleanable cylinder only.
• Mark the edge of the cylinder halves so that they can be
matched up when reassembled (picture 5).
Remove the maintaining nuts and bolts, split the cylinder halves
and remove the gasket and the strainer that must be cleaned
(pict 6).
• Scrap mineral deposits off the electrode plates and the shells (a
weak descaling solution can also be used) (pictures 7, 8 & 9).
• Rince the electrodes, the cylinder shells and the divider. It is
important that the strainer at the cylinder bottom be also
cleaned.
Take care : never chock the shell rims to get rid of the deposits
Relocate the strainer into the cylinder bottom. Replace the cylinder
gasket, and fit it inside the groove of the lower shell and attach the
upper shell with the electrodes .
When re-assembling, take care to align both shells. Refit the bolts
and nuts. Retigthen them gently (when the cylinder is still cold). Rinse
the drain valve ‘o’ ring and grease it or replace it if needed.
Important
At this stage, the drain valve must be maintained.
NB : Refit the cylinder to the steam generator once the drain valve
is maintained.
5.
6.
7.
8.
9.
REPLACING THE STEAM CYLINDER
CLEANING THE CLEANABLE STEAM CYLINDER