page 10
Digital Projection M-Vision Laser 18K Series
Installation and Quick-Start Guide
REMOTE CONTROL
Rev D October 2019
17
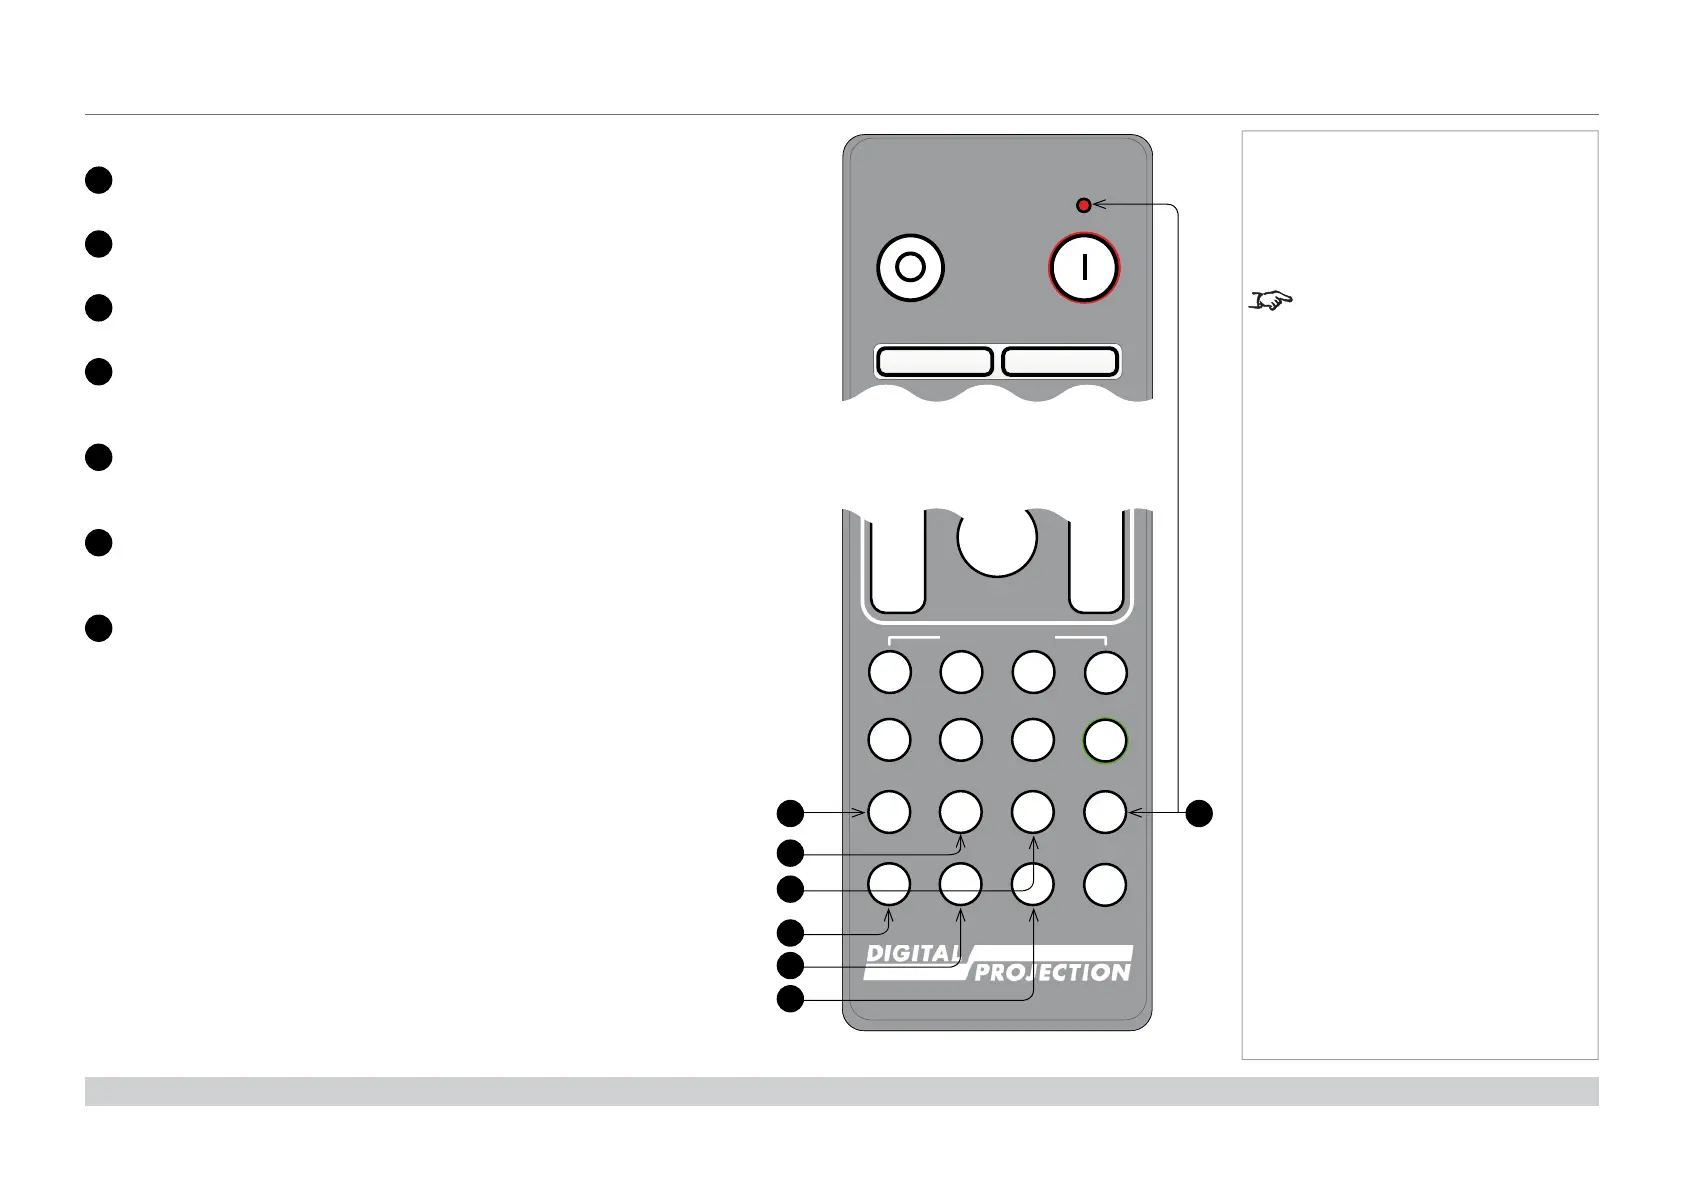
DISPLAYPORT 1 / R / numeric input 4
Select DisplayPort 1 input.
18
HD-T / G / numeric input 5
Select the HDBaseT input.
19
3GSDI / B / numeric input 6
Select the 3G-SDI input.
20
VGA / 3D / numeric input 7
There is no VGA input on this projector.
Use with
ALT to toggle the 3D Format setting between Off and Auto.
21
COMP1 / EYE / numeric input 8
There is no Component 1 input on this projector.
Use with
ALT to switch between left and right eye 3D dominance.
22
COMP2 / PIP / numeric input 9
There is no Component 2 input on this projector.
Use with
ALT to switch on Picture In Picture (PIP) mode.
23
ADDR / ALL (with red indicator at the top)
Assign and unassign an IR remote address.
To assign an address:
1. Press and hold this button until the indicator starts fl ashing.
2. Release this button and while the indicator is still fl ashing, enter
a two-digit address using the numeric input buttons. The indicator
will fl ash three times quickly to confi rm the change.
To unassign an address and return to the default address 00,
• Press and hold ALT and this button simultaneously until the
indicator fl ashes to confi rm the change.
Notes
This projector does not use the
following options on the remote:
HDMI 3 and HDMI 4
DVI, VGA, COMP 1 and COMP 2.
Remote control bottom
HDMI1
AL T
IN
OUT
IN
OUT
SHIFT
213
HDMI2 DVI
DisplayPort1
HD-T 3GSDI
VGA COMP1 COMP2
HDMI3
TEST
HDMI4
DisplayPort2
RGBALL
3D EYE PIP SWAP
456
7890
ALT
ADDR
ABCD
USER PRESET
23
18
19
17
20
21
22
Pic Mute
OPEN
CLOSE
OFF ON
OSD
Remote control top
 Loading...


