Appendix B: Transmitter Installation
iConnect Installation Manual
110
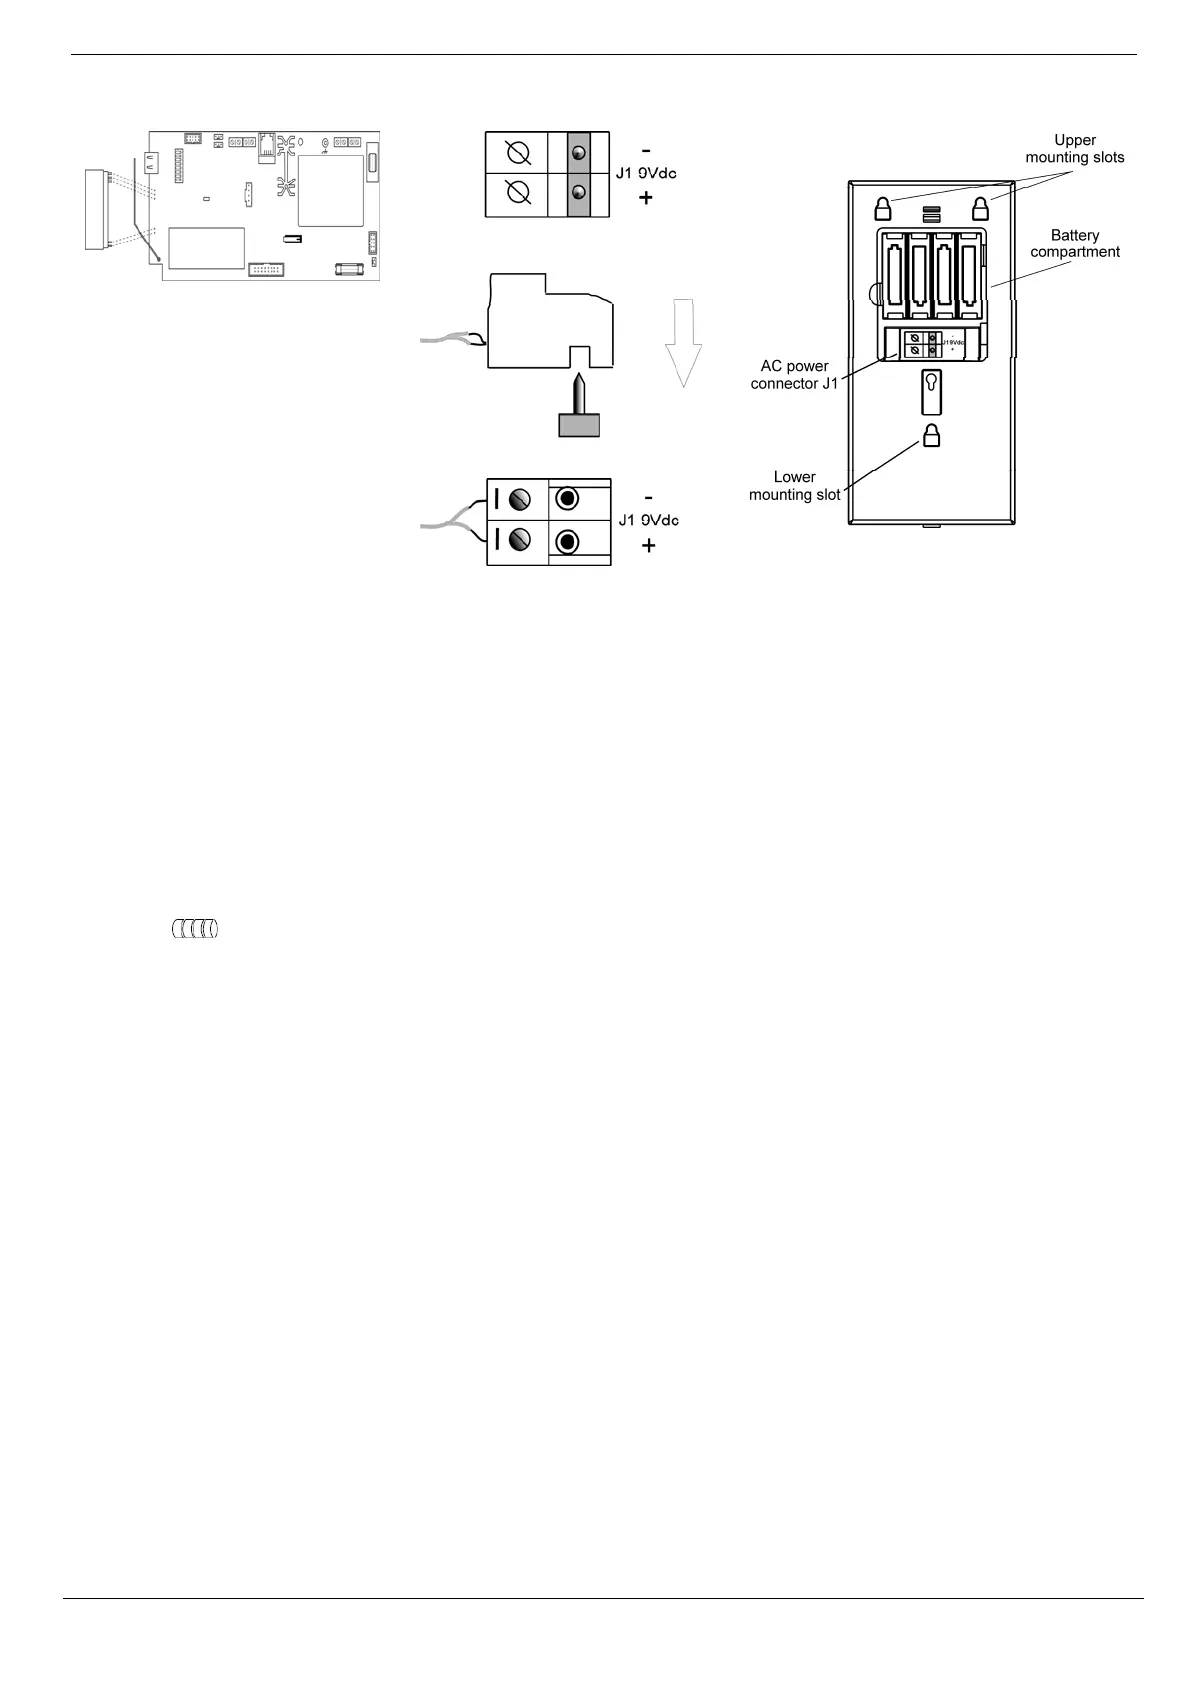
Figure B- 24: Plugging in the On-
Board Transmitter
Figure B- 25: Figure B.18: AC
Connection
Figure B- 26: Rear View
Connecting the AC and Battery power:
1. Open the Battery Compartment to gain access to the batteries and AC power connector – see p. 110,
Figure B- 26.
Below the batteries you will see the J1 9VDC connector – see p. 110, Figure B- 26.
2. Connect the Adaptor 230/9Vto the J1 9VDC connector of the EL-2724 observing the correct polarity – see p.
110, Figure B- 25.
3. Install the batteries (Model No. BT1218) observing correct polarity.
Note: If the AC power has been applied for 48 hours but the Battery Status icon is still showing "low battery"
, replace the batteries as explained above.
RF Transmitter
To support the EL-2724, the Control System’s main board must have the plug-in RF transmitter (ELPN 5200736)
installed. Plug the on-board transmitter into the Control System’s main board as shown in p. 110, Figure B- 24.
Setting the Control System Parameters to Support the EL-2724
On the Control System, enter the installer code and make the following settings:
1. Set the Wireless siren type [9152] to 2-way siren/KPD.
2. Set the Wireless siren Exit tones to Wireless siren [9311], select Enabled.
3. Set the Wireless siren Entry tones to Wireless siren [9321], select Enabled.
4. Set the Wireless siren Arm tones to Wireless siren [9331], select Enabled.
5. Set the Wireless siren Disarm tones to Wireless siren [9341], select Enabled.
EL-2724 is a two-way device that requires two registration procedures. First, register the Control System to the EL-2724,
then register the EL-2724 to the Control System.
Control system registration to the EL-2724
Registration of the Control System to the EL-2724 allows the EL-2724 to recognize transmissions from the Control
System. There is a five-minute time limit for the Control System registration to the EL-2724. The time starts to count
down when you power up the system.
PLUG-IN TX