Appendix D: Installing IP Cameras (Relevant to GPRS/Ethernet & ELAS Configuration)
iConnect Installation Manual
127
Appendix D: Installing IP Cameras (Relevant to
GPRS/Ethernet & ELAS Configuration)
IP cameras installed on the protected site may be accessed by the user via the Web Application – see p. 119, Appendix
C: Web User Application. For a list of supported IP cameras, please contact your distributor.
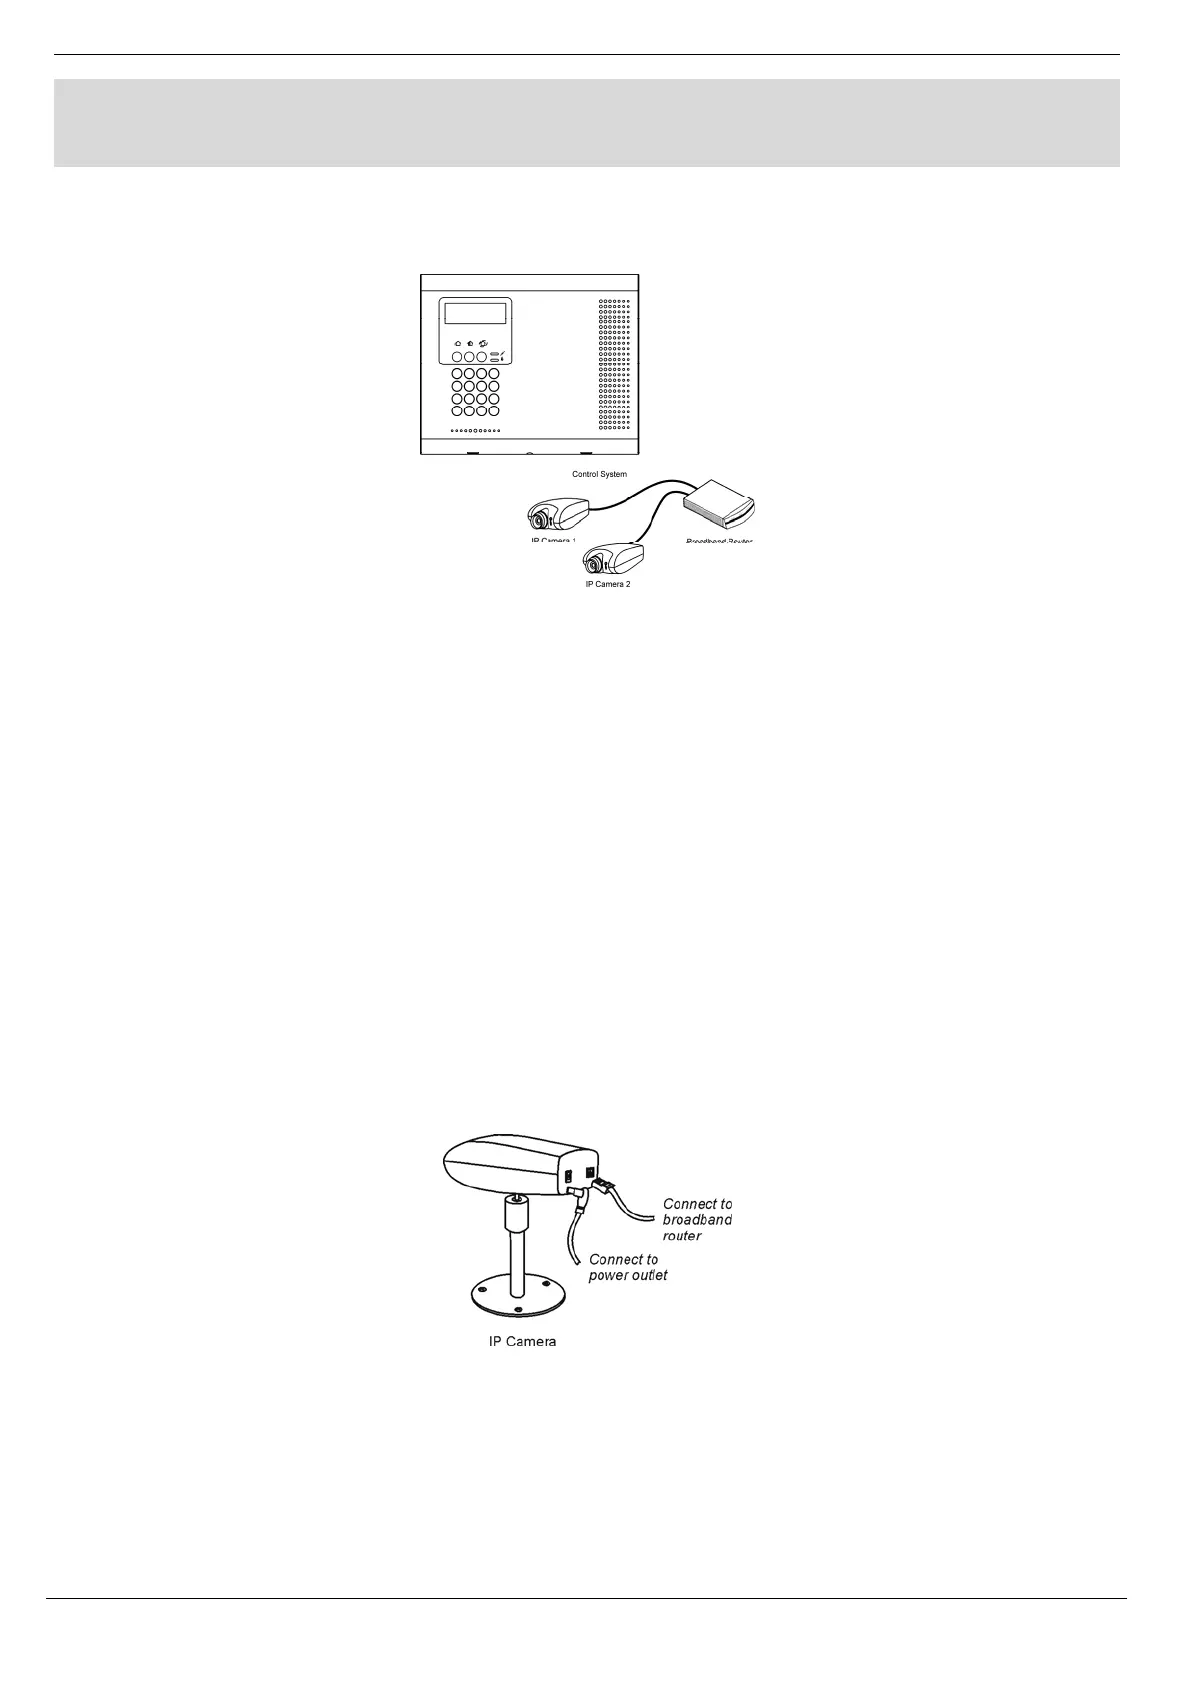
Figure D- 1: Typical IP Camera Installation
The following section gives an example installation procedure for one of our supported IP cameras. The exact
procedure may vary depending on your router and camera model. For relevant and detailed installation procedure,
please refer to the installation manual supplied with the camera and the router.
To enable video monitoring using IP cameras, the following steps are required:
Port forwarding must be configured on the router to allow the user outside access to the IP camera.
An administrator must enter the camera’s IP address and port in the Control System’s record in the
ELAS database.
Port Forwarding
The Broadband Router has an IP address that allows data to be sent and received over the Internet. The IP address is
divided into ports. These ports are effectively the path through which the data is sent or received allowing multiple
tasks to be performed simultaneously via the router.
When a few IP network devices are connected to the router, to ensure a connection to the correct device you must configure the
router’s Port Forwarding options. This allows data that has reached the router (with an external IP address) to reach its required
destination on the internal network (i.e. behind the router).
IP Camera Installation
Figure D- 2: Connecting the IP Camera
To install an IP camera:
1. Connect the camera’s Ethernet port to the router.
2. Connect the camera to the power supply via the camera’s power jack; the camera waits to automatically
receive an internal IP address. When the camera receives an IP address, the camera indicates that it has
connected (for example, a green flashing LED – refer to the camera manufacturer’s installation instructions for
further details).