2 System Installation
iConnect Installation Manual
14
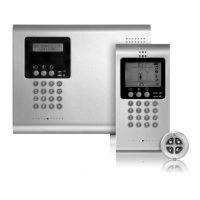
Figure 2-7: Hardwire LCD Keypad (Back Cover Off)
To install hardwire LCD keypads:
1. Disconnect all power, both AC and battery, from the Control System.
2. Remove the back cover of the keypad. To do so, press the snap (located at the bottom of the keypad)
using a small flat-head screwdriver and carefully pull the back cover away from the front of the
housing.
3. Place the back cover of the keypad in position against the wall and mark the upper and lower
mounting holes.
4. Install wall anchors in the appropriate positions.
5. Thread the cable from the Control System through the wiring hole on the back cover and attach the
back cover to the wall using four screws.
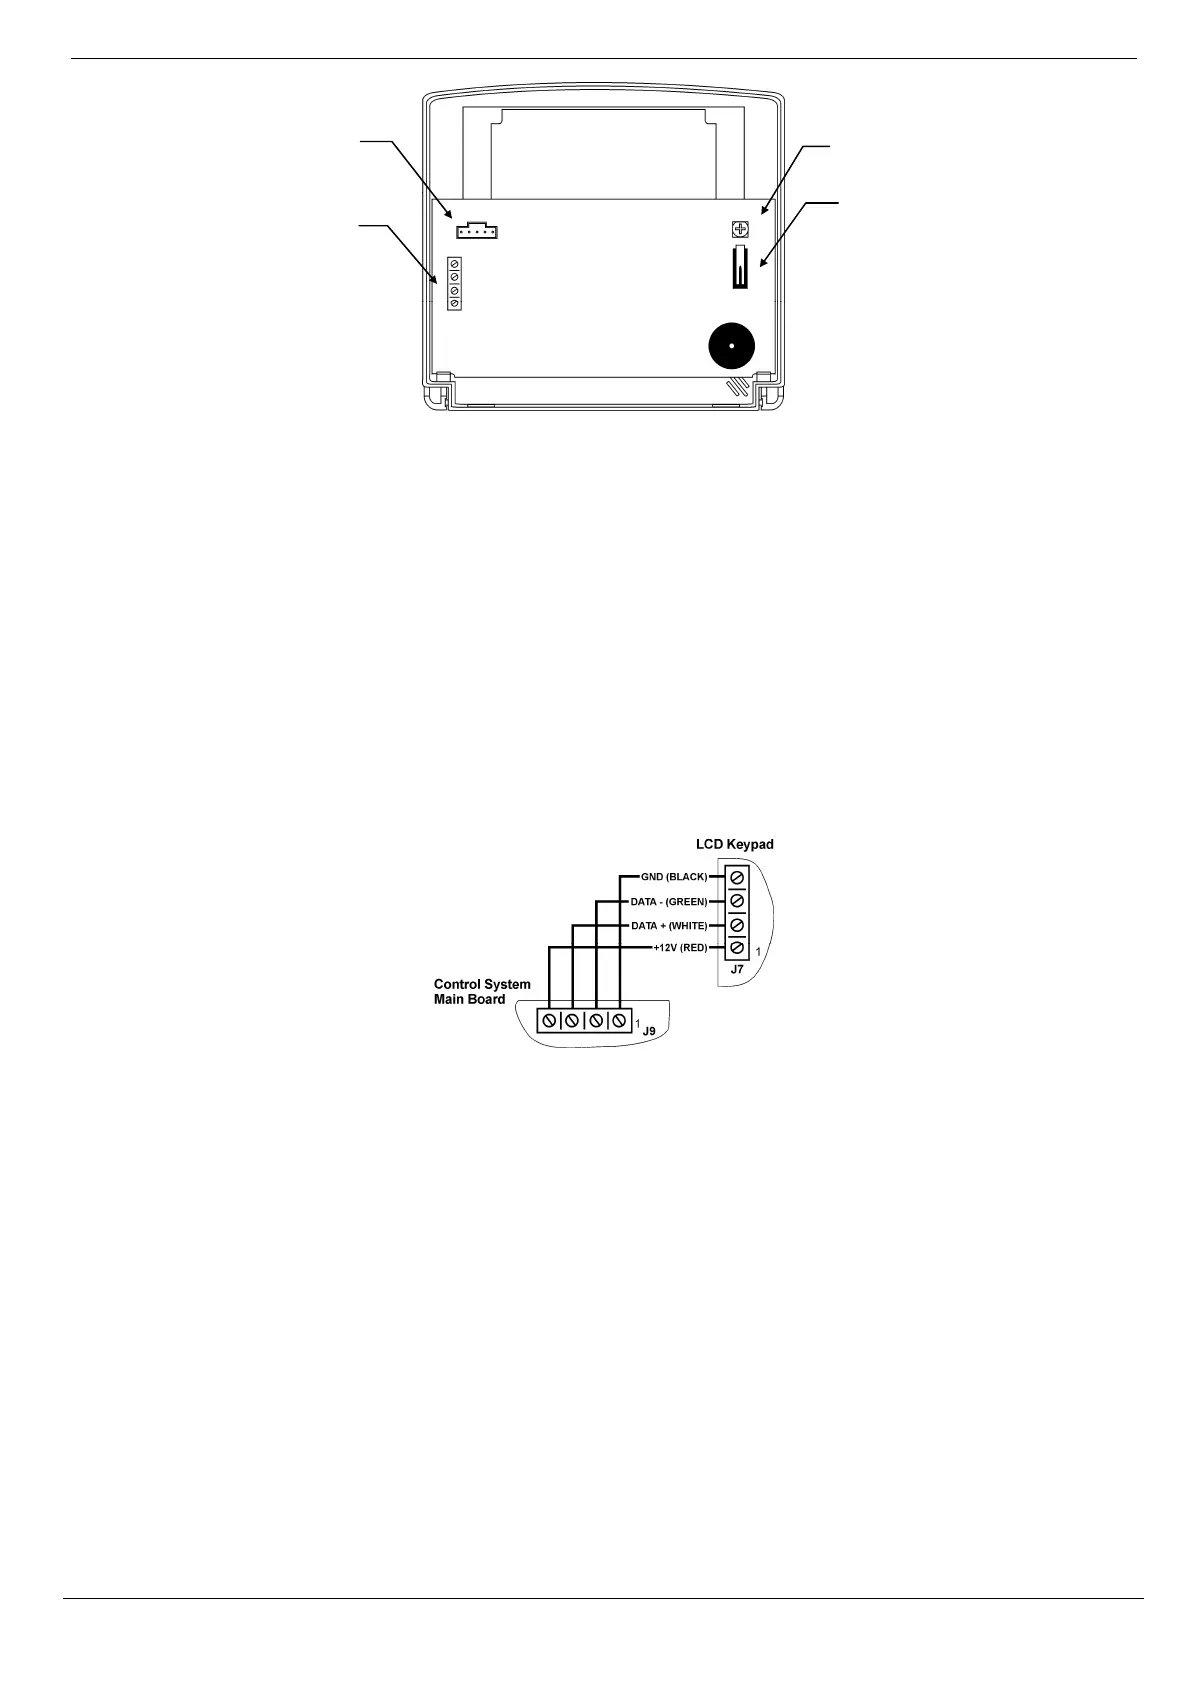
6. Connect the terminal block on the keypad to the appropriate terminal block on the Control System’s
main board as shown in Figure 2-8.
Figure 2-8: Connections for Hardwire LCD Keypad
7. Reapply power to the Control System.
8. Set the keypad address as follows:
a. Make certain the keypad’s tamper switch is open.
b. On the keypad, press keys 1, 3 and 5 simultaneously.
c. Use the arrow keys (/) to select the keypad address.
d. Press .
9. Position the front cover’s top holding hooks onto the back cover and snap the front cover closed.
10. After installing hardwire keypads, perform the Find Modules function – see p. 83, 13.5 Find Modules.
2.5. Internet Communication Setup (Not Relevant to PSTN-only
Configuration)
After you have powered up the system, the GPRS or LAN startup sequence (depending on your Control System
configuration) is initiated. During this sequence, the GPRS or Ethernet module receives the parameters programmed in
the Control System's Internet Options – p. 77, 11 Internet Options. After the startup sequence is complete, the GPRS or
LAN attempts to connect to the ELAS GPRS/LAN Proxy.
LCD Contrast
Potentiometer
Flash
Programming
Connector
Terminal
Block
Tamper Switch