Appendix B: Transmitter Installation
iConnect Installation Manual
114
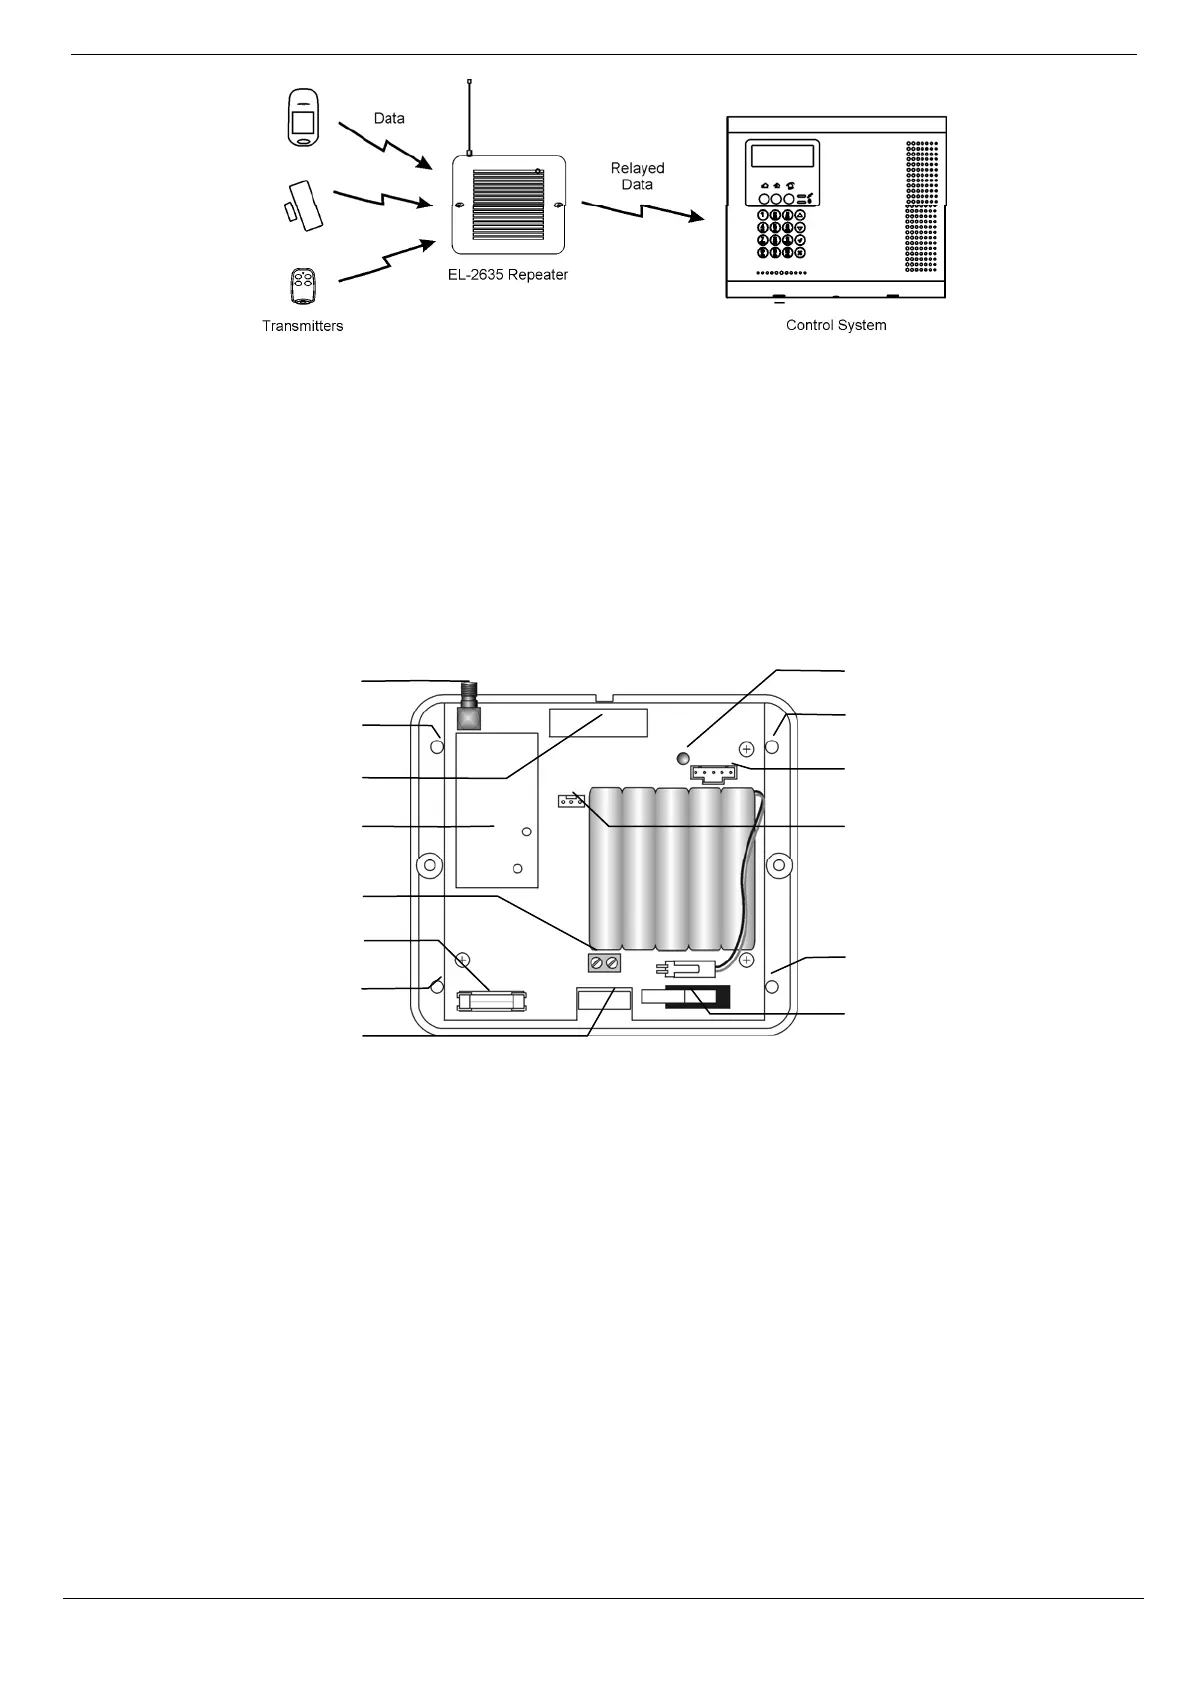
Figure B–30: Typical Single Repeater Application
Installation Procedure
1. Register all wireless devices to the iConnect Control System – see p. 43, 7.2.1 Registering Wireless
Devices.
2. Define the Repeater option for each zone that is intended to transmit via the repeater as "Use Repeater"
– see p.47,
7.3.8 Repeater.
3. Open the EL-2635’s plastic housing. To do so, remove the two cover screws and lift the front cover
away from the base.
Figure B- 31: EL-2635 (cover removed)
4. Connect the antenna provided to the antenna connector.
5. Connect the backup battery pack to the Battery connector.
6. Connect a to the Power Input terminal block (polarity is not important when connecting AC to the
terminal block).
7. All registration and test functions, described in the following sections, are performed from the LCD
programming keypad model no. 5200250 shown in Figure B- 32 (p. 115). Connect the programming keypad
to the Programming Keypad connector.
Note: The repeater’s programming keypad is not able to operate on battery power only.
8. Register the repeater to the Control System using the following procedure:
a. Set the Control System to Registration mode as follows:
a. From the Programming menu, select Devices, Repeaters [914].
b. Select the repeater you want to register (1-4).
c. From the repeater’s sub-menu, select Register [#1].
b. Send two Status transmissions from the repeater as follows:
Antenna
Connector
Programming
Keypad
Connecto
Lower
Mounting
Hole
Upper
Mounting
Hole
Lower
Mounting
Hole
LED Indicator
Receiver
Tamper
Switch
AC Power
Protection
Fuse
Upper
Mounting
Hole
Transmitter
Flash
Programming
Connector
Power Input
Terminals
Wiring
Hole