• Check the fitting for any possible damages and replace it, if necessary.
• Insert the new lower electrode (graphite tip) into the fitting.
• Secure the fitting and the lower electrode with the 4 screws.
• Turn the main switch of the analyser to position 2.
The lower electrode (graphite tip) has been replaced.
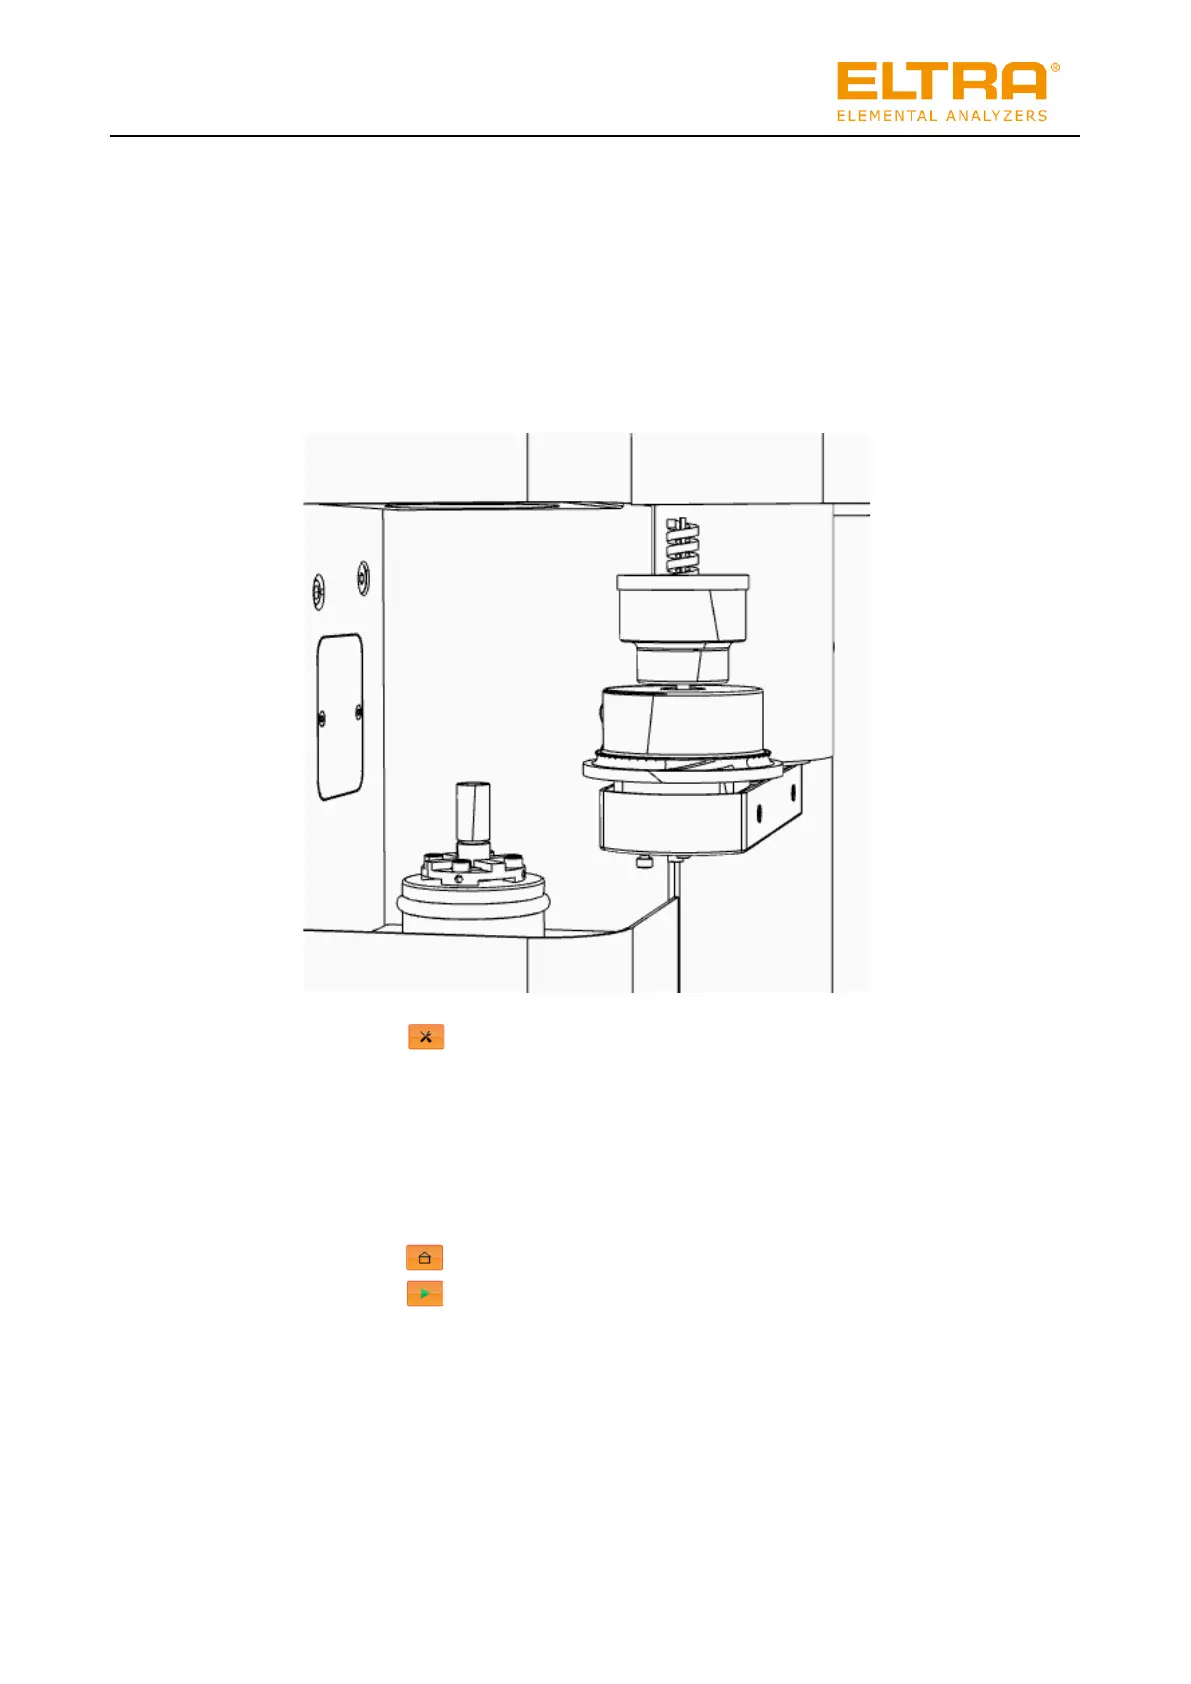
10.8 Replacing the brush of the auto cleaner
1. Open the service menu in the Elements software (min. administrator rights necessary).
2. Confirm the key. The auto cleaner moves to the service position.
3. Turn the main switch of the analyser to position 0.
4. Loosen the grub screw on the side of the brush.
5. Pull the worn brush upwards off the motor shaft.
6. Place the new brush on the motor shaft from above. Ensure that the brush is pushed
through the hole in the dust trap and that the dust trap can still move freely afterwards.
7. Tighten the grub screw on the side of the brush.
8. Turn the main switch of the analyser to position 2.
9. Actuate the key to move the auto cleaner to the park position.
10. Actuate the key to perform cleaning and check correct function.
The brush of the auto cleaner is replaced.