Assemble components in your cabinet
15
Assemble components in your cabinet
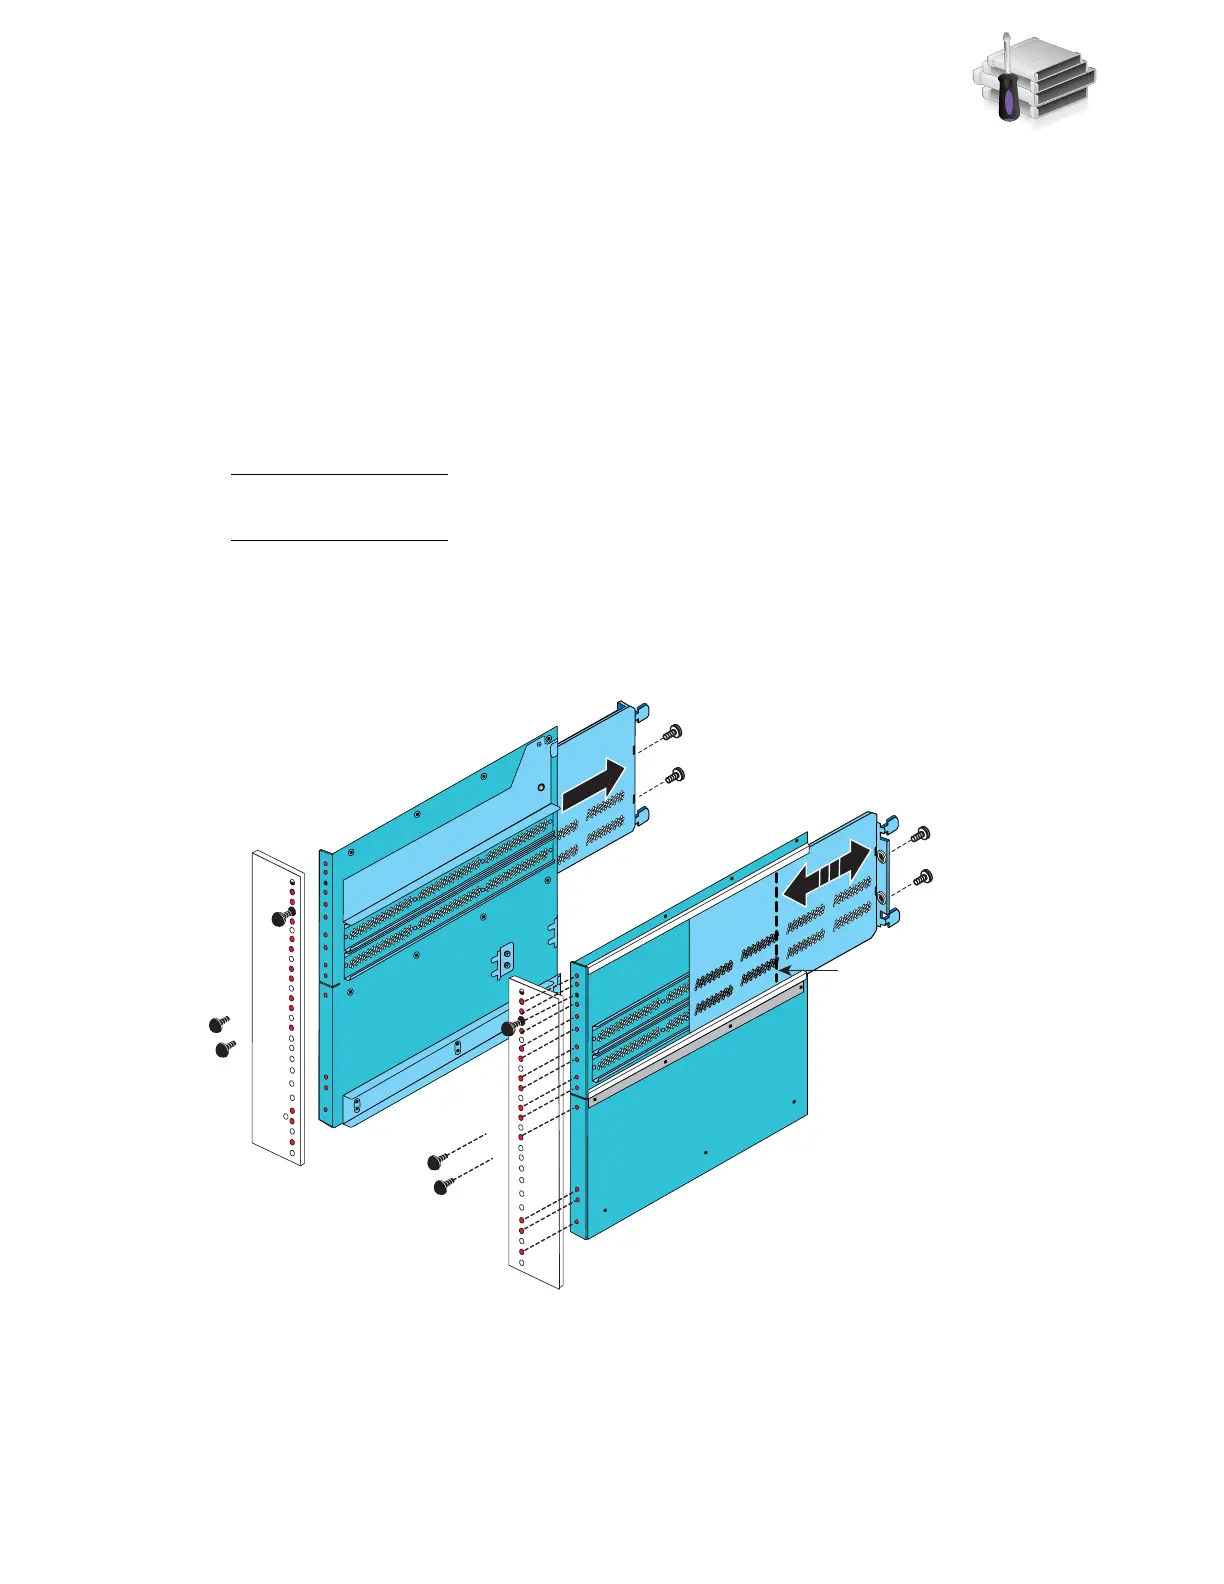
Installing rails
1. Slide the 8U ganged rail into the appropriate location in the site rack (for space considerations
find the lowest available space) as shown in Figure 4.
2. Insert the alignment pins into the holes in the back of the rack. The rails must be level front to
back and with the companion rail left to right.
3. Install the screws to hold the ganged rail in place.
Note: These screws were previously removed from the mini-rack that held the ganged rails in
the mini-rack.
Wait until all screws are in place before you tighten the screws.
4. Optional, if you have a second blade enclosure, install the 2U rails immediately above the
ganged rails.
Figure 4 Installing rails
Maximum
rail extension
VNX-000183
Front