Assembling the DAEs
49
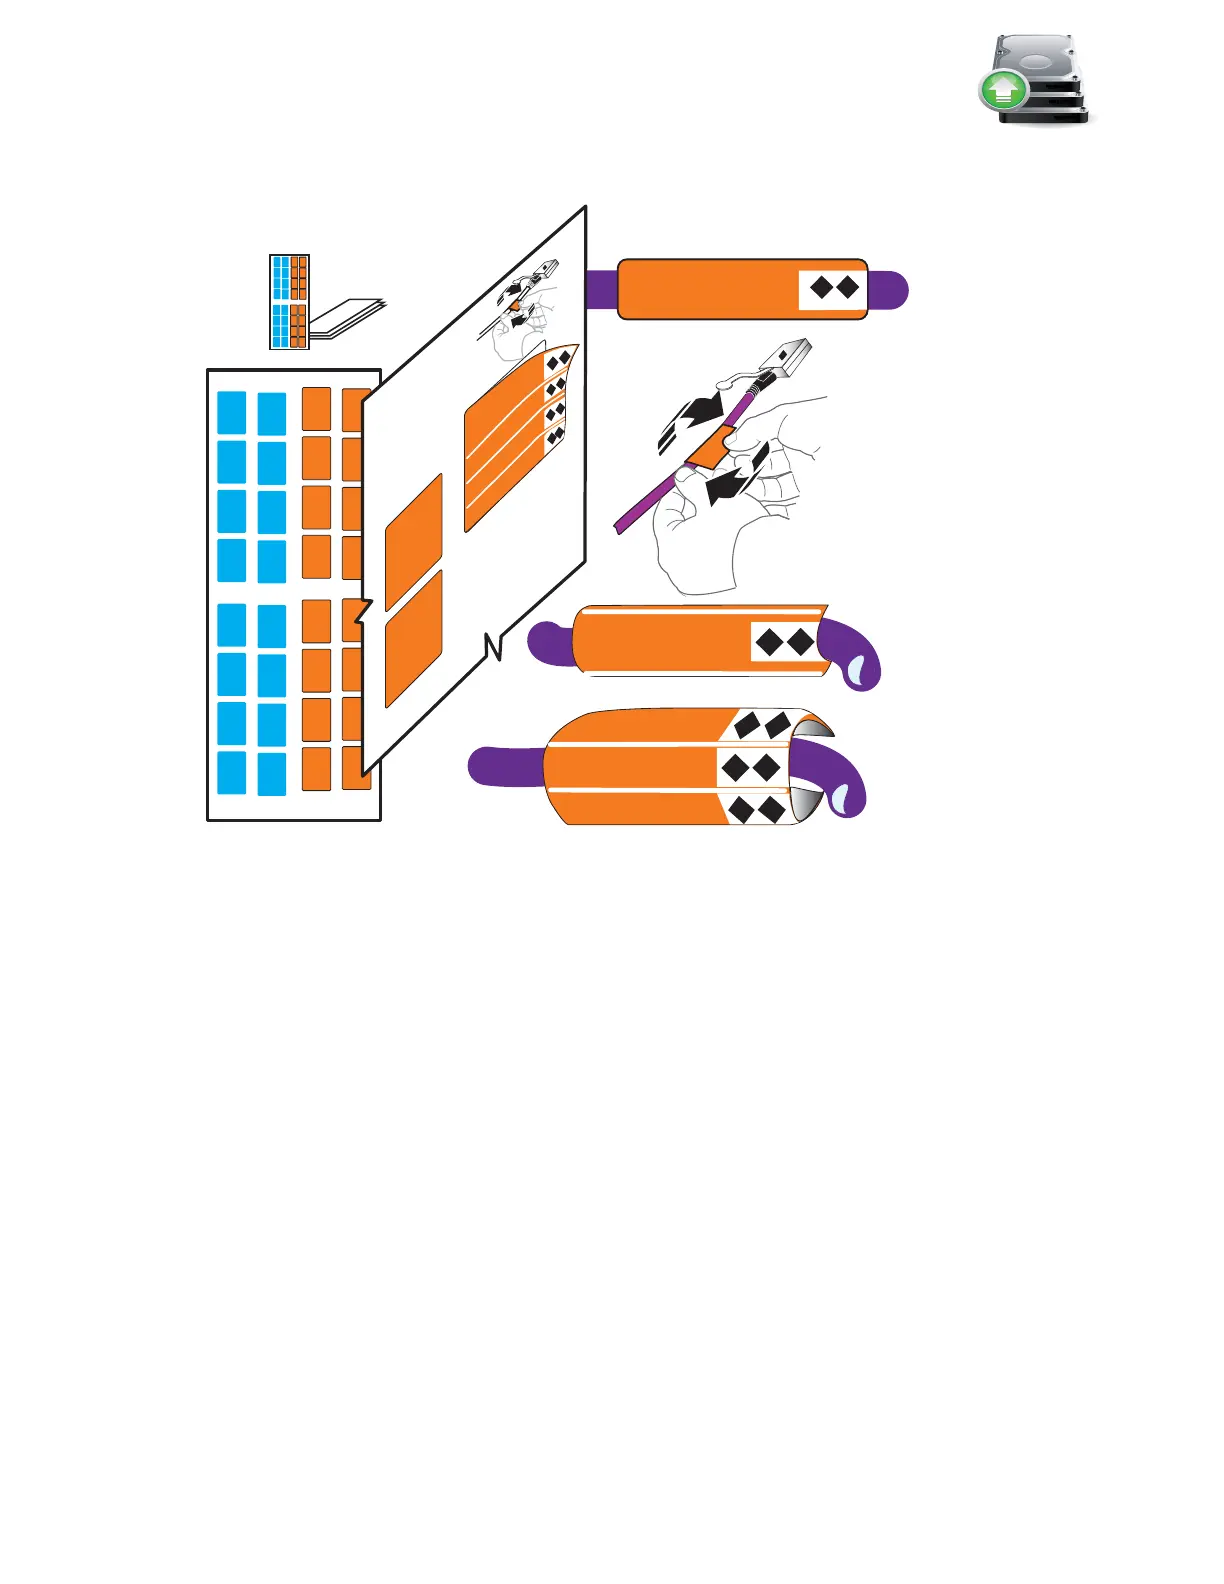
c. Continue for all the SAS cables for your system.
Figure 39 Attach labels to the SAS cables
Install the DAE rails
A 2U DAE will use 2U rails and the 3U DAE will use 3U rails. The DAE rails should be installed
above the topmost blade enclosure in the cabinet. The rails must be aligned carefully so that they
are level front to back and with the companion rail left to right.
Arranging DAEs in your cabinet, you should consider rack space, I/O load balancing across the
disks, and convenience. For more on racking and cabling options, see the
VNX5500 Hardware
Information Guide
.
The following procedure shows you how to install 3U DAE rails and a 3U DAE.
1. Insert the adjustable rail slide and seat both alignment pins into the rear channel of your
cabinet as shown in Figure 40 on page 50.
2. Extend the rail and align the front of the rails.
3. Insert two retention screws in the front and two retention screws in the back of each rail.
Labels
VNX-000687
SPA SAS 0
SP A SAS 0
SP A SAS 0
SP A SAS 0
SP A SAS 0
SP A SAS 0
SPA SAS 0
SPA SAS 0
SPA SAS 0