5-42 Assembly\Disassembly
CadJet 3D Service Manual
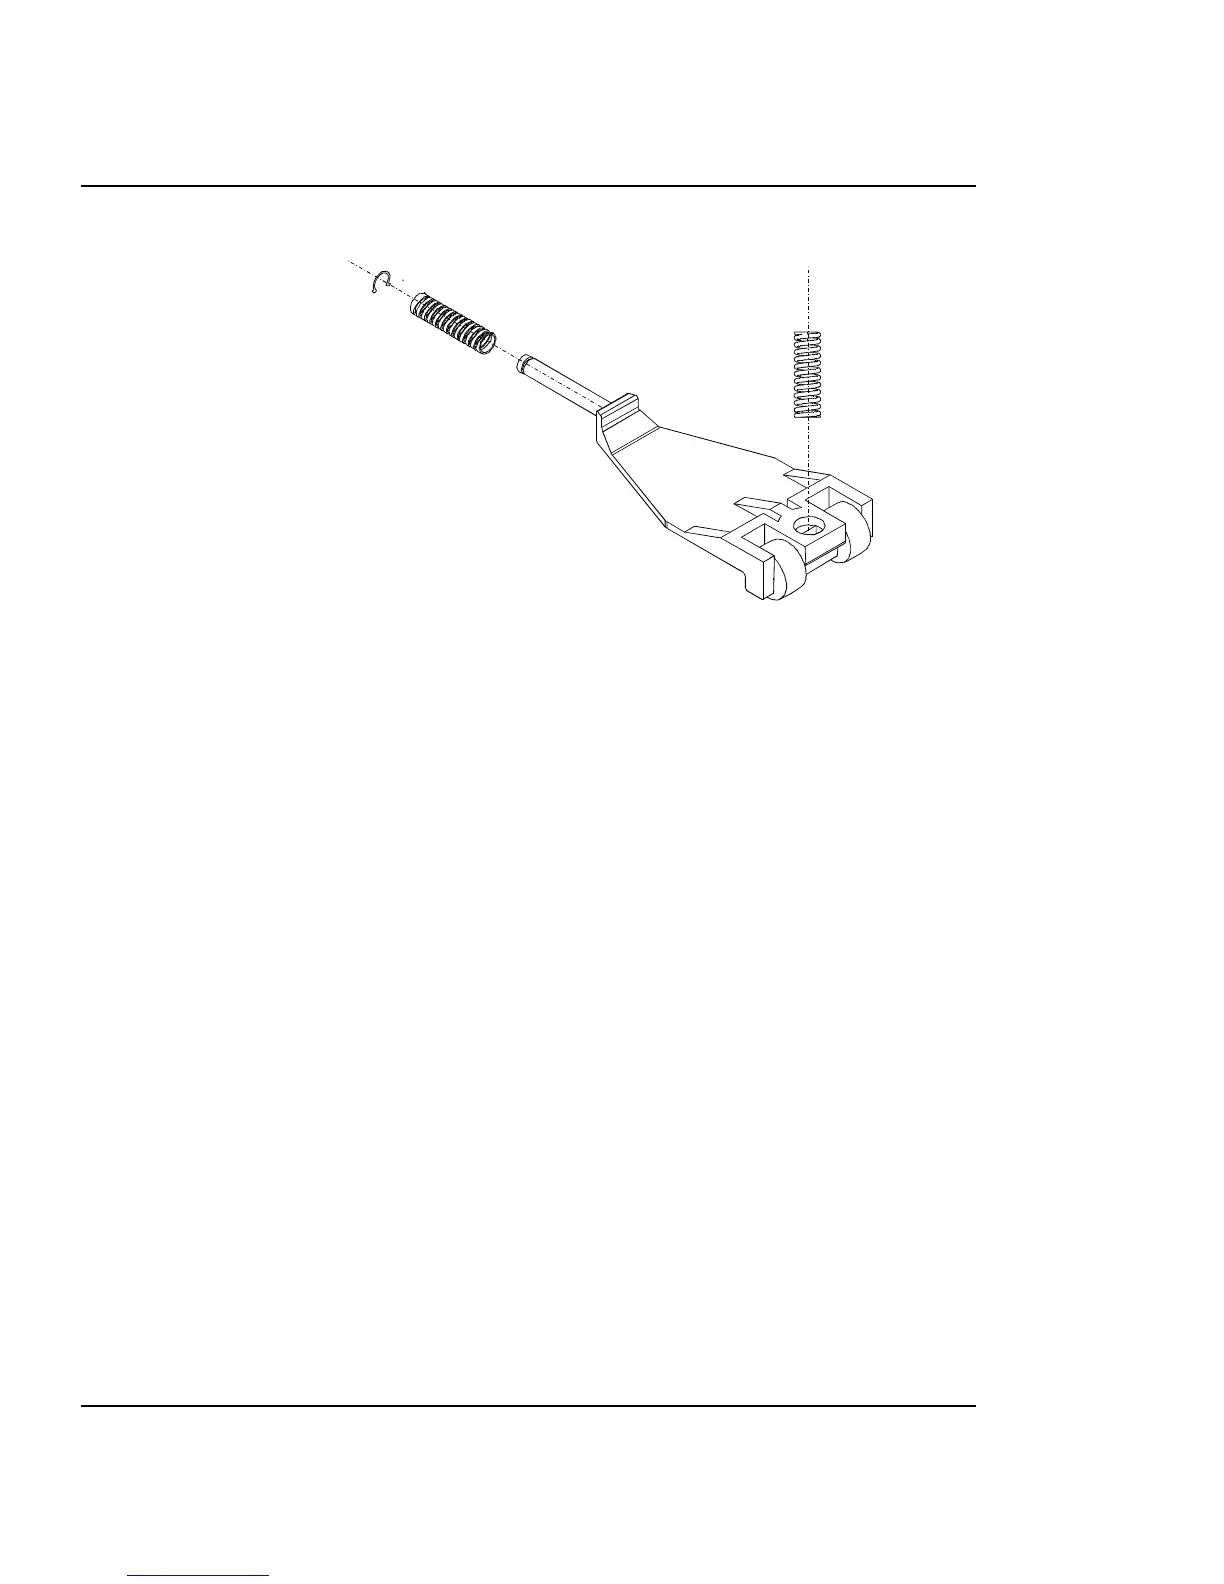
Figure 5-23. Pinch Roller.
9. Spin the back of the pinch roller to either side and remove the back
spring.
10. Carefully tilt the back of the pinch roller upwards. This brings the
front of the pinch roller down, away from the Slide Shaft. Carefully
remove the spring that is going into the Slide Shaft from the top of
the pinch roller.
11. Remove the pinch roller.
12. From the bottom of the Y-Arm Assembly, remove the four screws
that secure the Slide Shaft and its two supports from the Y-Arm
Assembly.
13. Using a #1 Phillips screwdriver, remove the two screws that secure
the Auto-Load Sensor to the Y-Arm. Remove the Auto-Load Sensor
wires from the four wire clamps on the back part of the Y-Arm
Bracket.
Install the Y-Arm Assembly, Pinch Rollers, Slide
Shaft, and Auto-Load Sensor
1. Install the Auto-Load Sensor Assembly into the back part of the Y-
Arm Bracket using a #1 Phillips screwdriver. Torque to 6 in-lbs.
 Loading...