PlasmaQuant 9100 (Elite) Maintenance and care
75
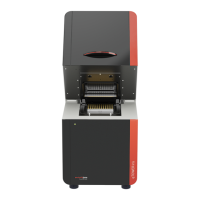
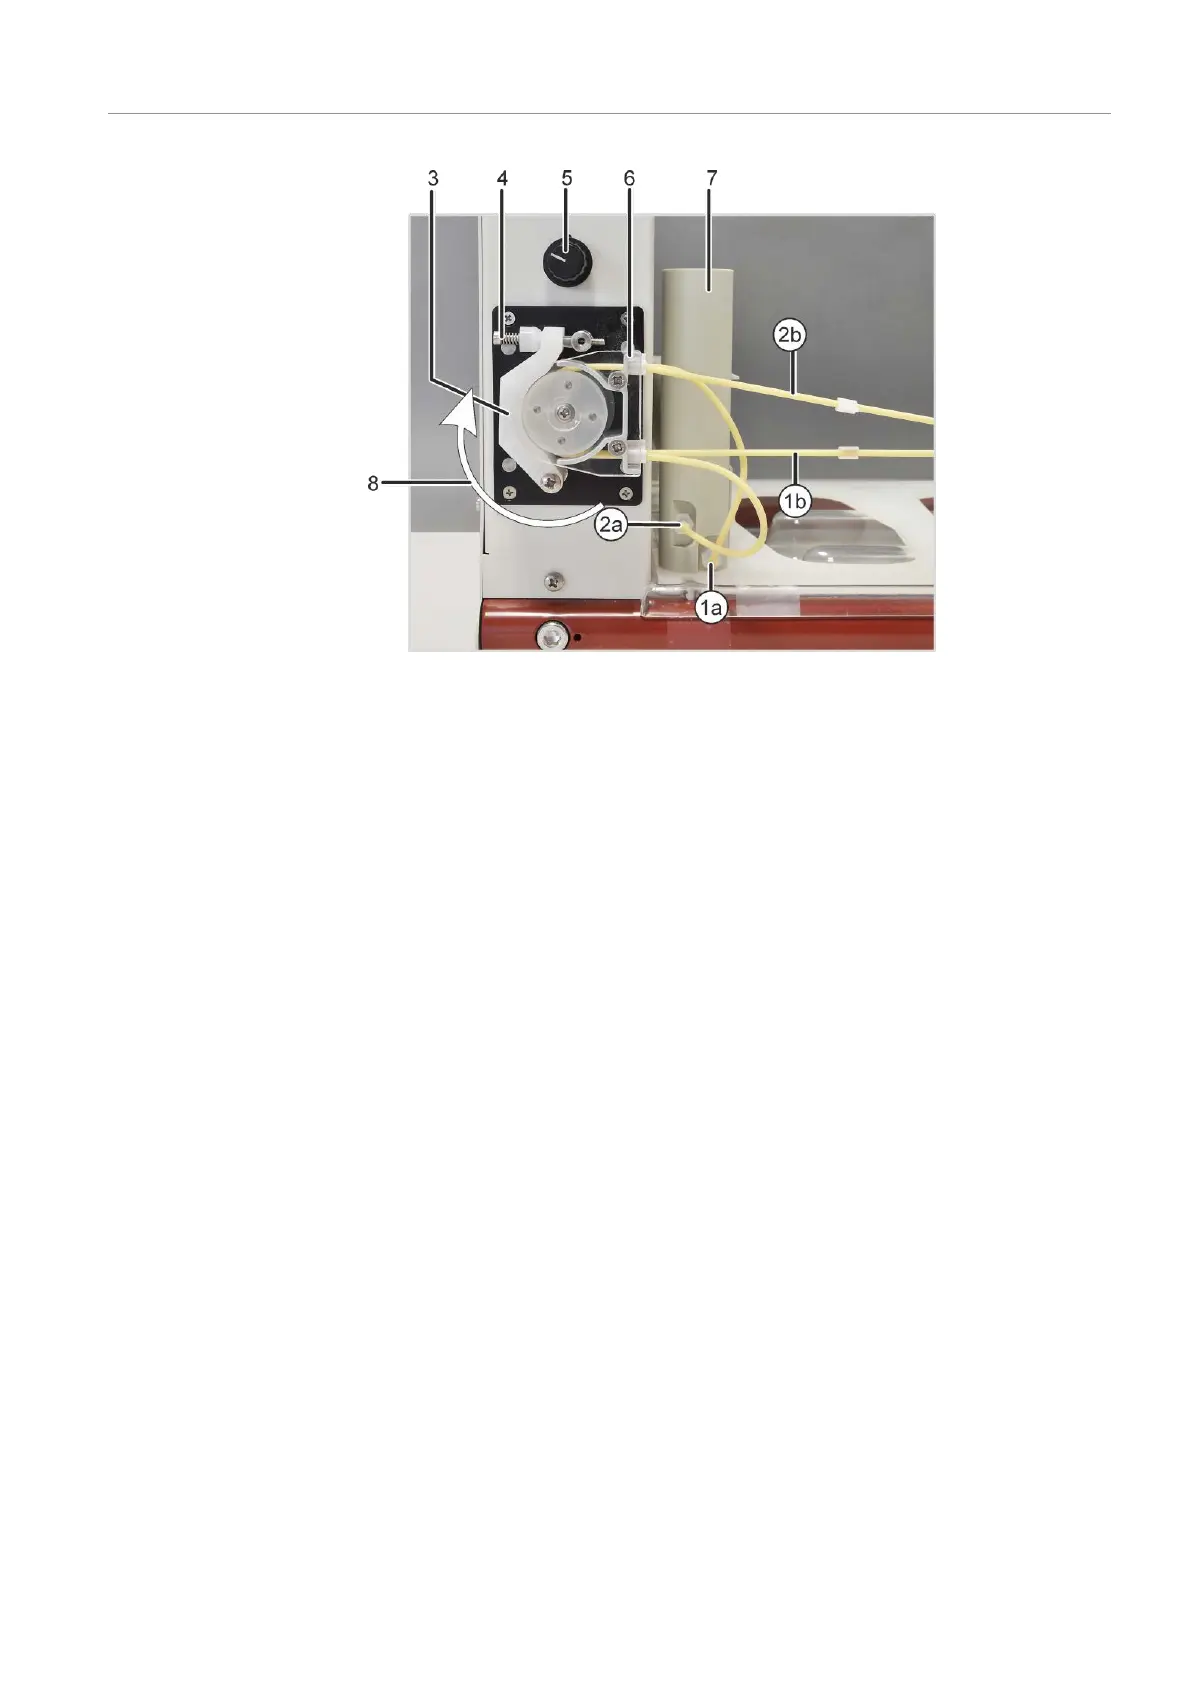
Figure36Purging vessel and pump on the sampler
1a Intake connection for purging solu-
tion on the purging vessel
1b Purging solution hose
2a Waste connection on the purging
vessel
2b Hose to the waste container
3 Clamping bracket 4 Clamping lever with spring
5 Pump speed controller 6 Hose block for clamping the pump
hoses
7 Purging vessel 8 Pump direction
Setting the contact pressure
and flow rate
The effective pressure on the hose is set via the clamping lever. To maximize both the
service life of the hoses and the pump performance, set the contact pressure as follows:
} Loosen the screw on the clamping lever so that the clamping brackets no longer
press on the hoses.
} Place the intake hose in purging solution. Insert the waste hose in the waste bottle.
} Switch on the basic device and the sampler via the power switch. Start the control
software.
} Click the
[Autosampler]
button and switch to the
Function Tests
tab in the
Autosam-
pler
window. Activate the
Wash pump
option and exit the window with
[OK]
.
} Tighten the screw on the clamping lever until the purging solution begins to flow.
Tighten the screw by one further turn.
} Set the contact pressure on the pump hose for waste in the same manner.
} Adjust the flow rate of the pump via the rotary knob. The liquid level in the sampler
must stay constant. Too much purging solution should not be allowed to spill over.
} Deactivate the
Wash pump
option in the
Autosampler
window.
 Loading...