SS500/SS2000 Analyzer
B–12 4900002285 rev. B 3-25-20
17. Hand tighten pressure sensor clockwise into the flange until no
longer moving freely. Refer to Figure B–9.
18. Using the 9/16” wrench to hold the flange in place, turn the sensor
clockwise with a 7/8” wrench until tight. Two or three threads on the
pressure sensor should still be visible.
19. Remove the black connector from the pressure sensor and discard.
20. Connect the new harness/cable to the new pressure sensor.
21. Conduct a leak test to determine that the new pressure sensor is not
leaking.
Make sure the black connector at the bottom of the pressure
sensor is facing up from the measurement cell. Refer to Figure
B–10.
If the new model pressure sensor cable is currently installed in the
SCS, reattach the cable to the pressure sensor after the cell has
been remounted.
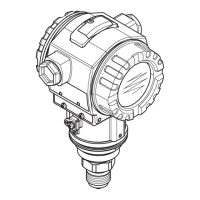
Do not allow cell to exceed 10 PSIG or damage could occur.
Figure B–9 Replacing pressure sensor
Figure B–10 Newly installed pressure
sensor positioning
 Loading...
