Envision One cDLM® User Manual
TS-MAM-EnvisionOneCDLMUserManual-V5.0-FN-EN , 2021-12-15
7 Hardware Setup
7.1 Connecting the Printer
7.1.1 Plug & Play
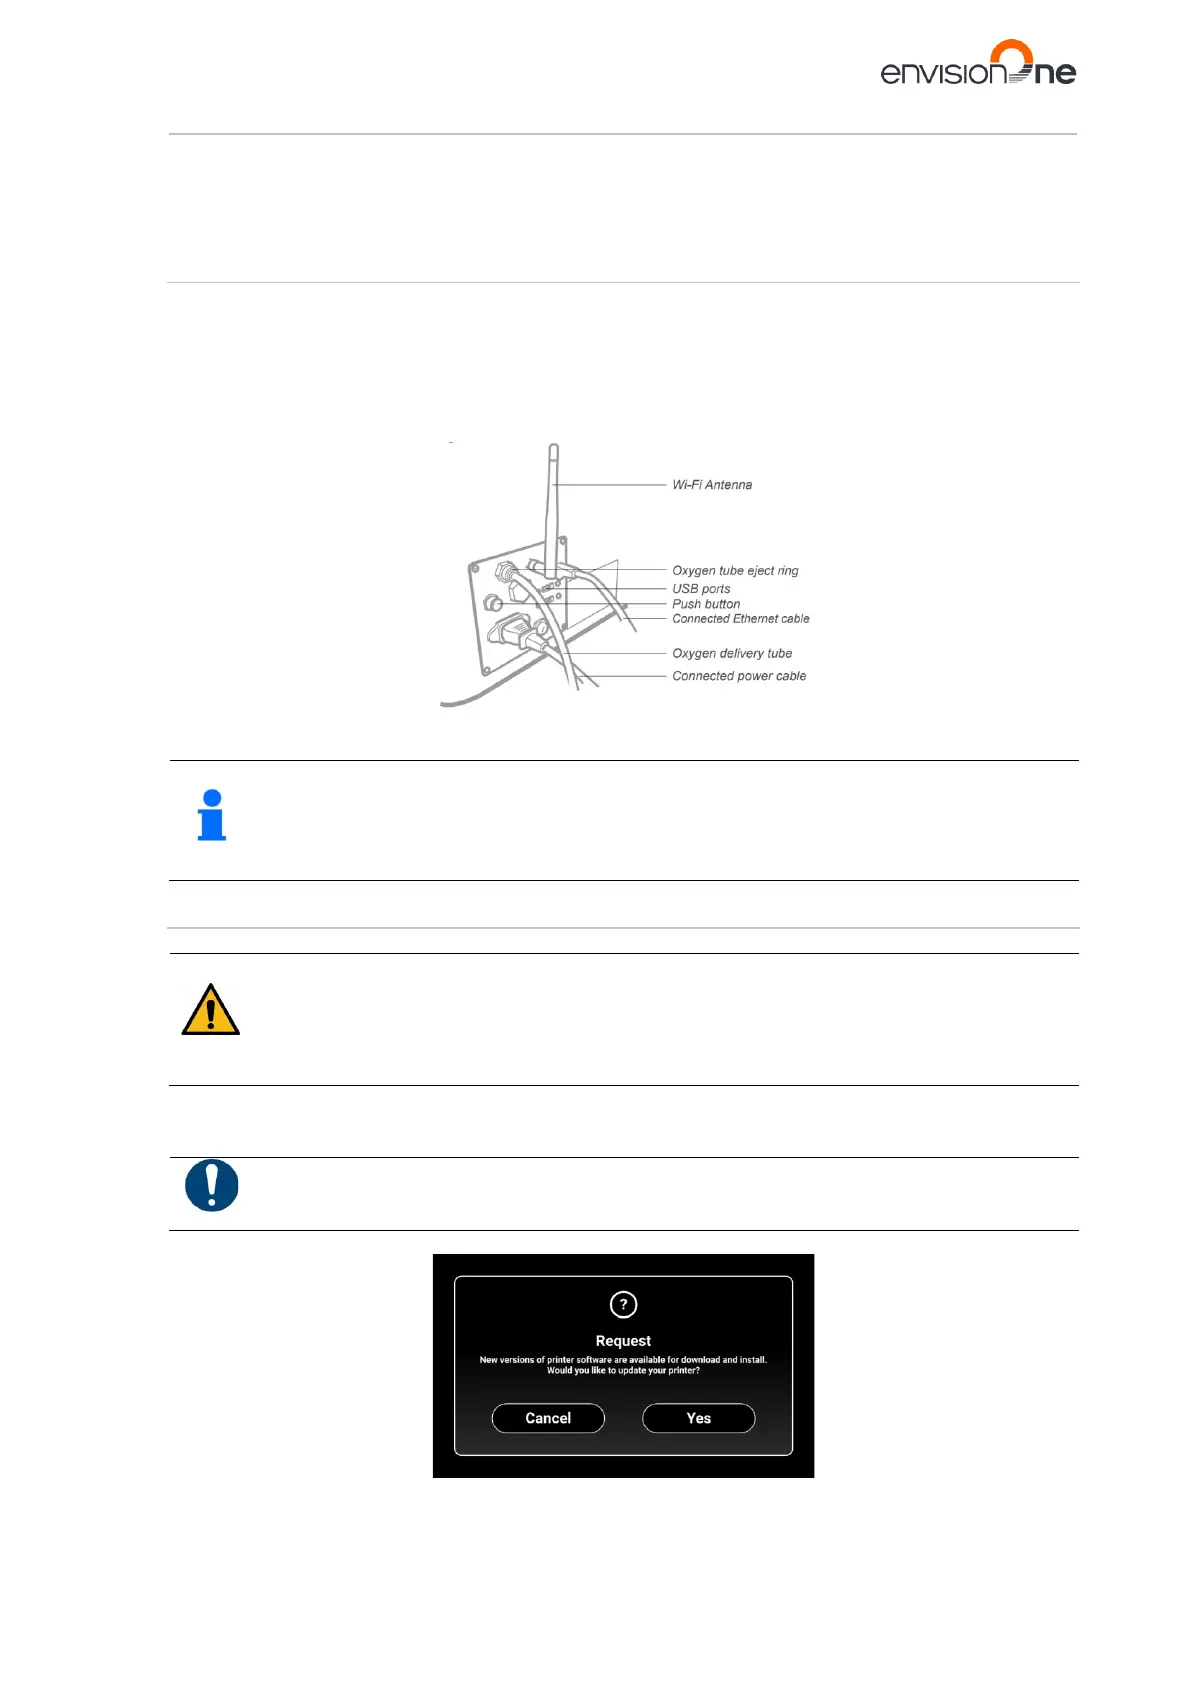
Match all of the connections in the diagram below, except for the oxygen delivery tube, which connects to the
oxygen concentrator. This tube should not be installed until the concentrator is primed (30 minutes after turning on).
• The white antenna: Wi-Fi
• The blue cable: CAT 6 Ethernet cable
• Large black plug: Power
Figure 11: I/O panel
There are two USB ports on the back of the printer. There is a USB drive that comes with the printer
which includes information on printer operation and setup.
We recommend you save a backup copy of the data on your USB drive in a separate place, such as
cloud-based storage, external hard drive, a backup computer, etc.
7.1.2 Switching the Printer On
Risk of injury!
Risk of injury from crushing caused by moving printer parts.
The printer may only be operated by instructed and specially trained personnel.
The printer may only be operated if the protecting devices are working properly.
To switch the printer on, press the power button on the front of the printer and hold it for two seconds.
→ The button illuminates and the screen switches on.
→ After a booting sequence, controller software is opened automatically.
IMPORTANT
Do not try to touch or open anything on the screen before the Controller Software has finished booting!
This can cause damage to the files on the printer!
If there is an available update for the printer, the following message appears: