Envision One cDLM® User Manual
TS-MAM-EnvisionOneCDLMUserManual-V5.0-FN-EN , 2021-12-15
Risk of damage to the printer!
Do not pour material from your material tray into the bottle it came from! This can potentially
contaminate the whole bottle of material and ruin it!
Never use chemicals inside the material tray!
This will contaminate and ruin any material you put into the material tray!
Always wear nitrile gloves when handling the domeless material tray.
Time needed: Approximately five minutes
Maintenance frequency: Weekly
The material tray is a consumable with an approximate lifespan of
up to 1000 hours of print time or 3 months of use, whichever comes
first. Order a new material tray before the current tray expires or
becomes damaged.
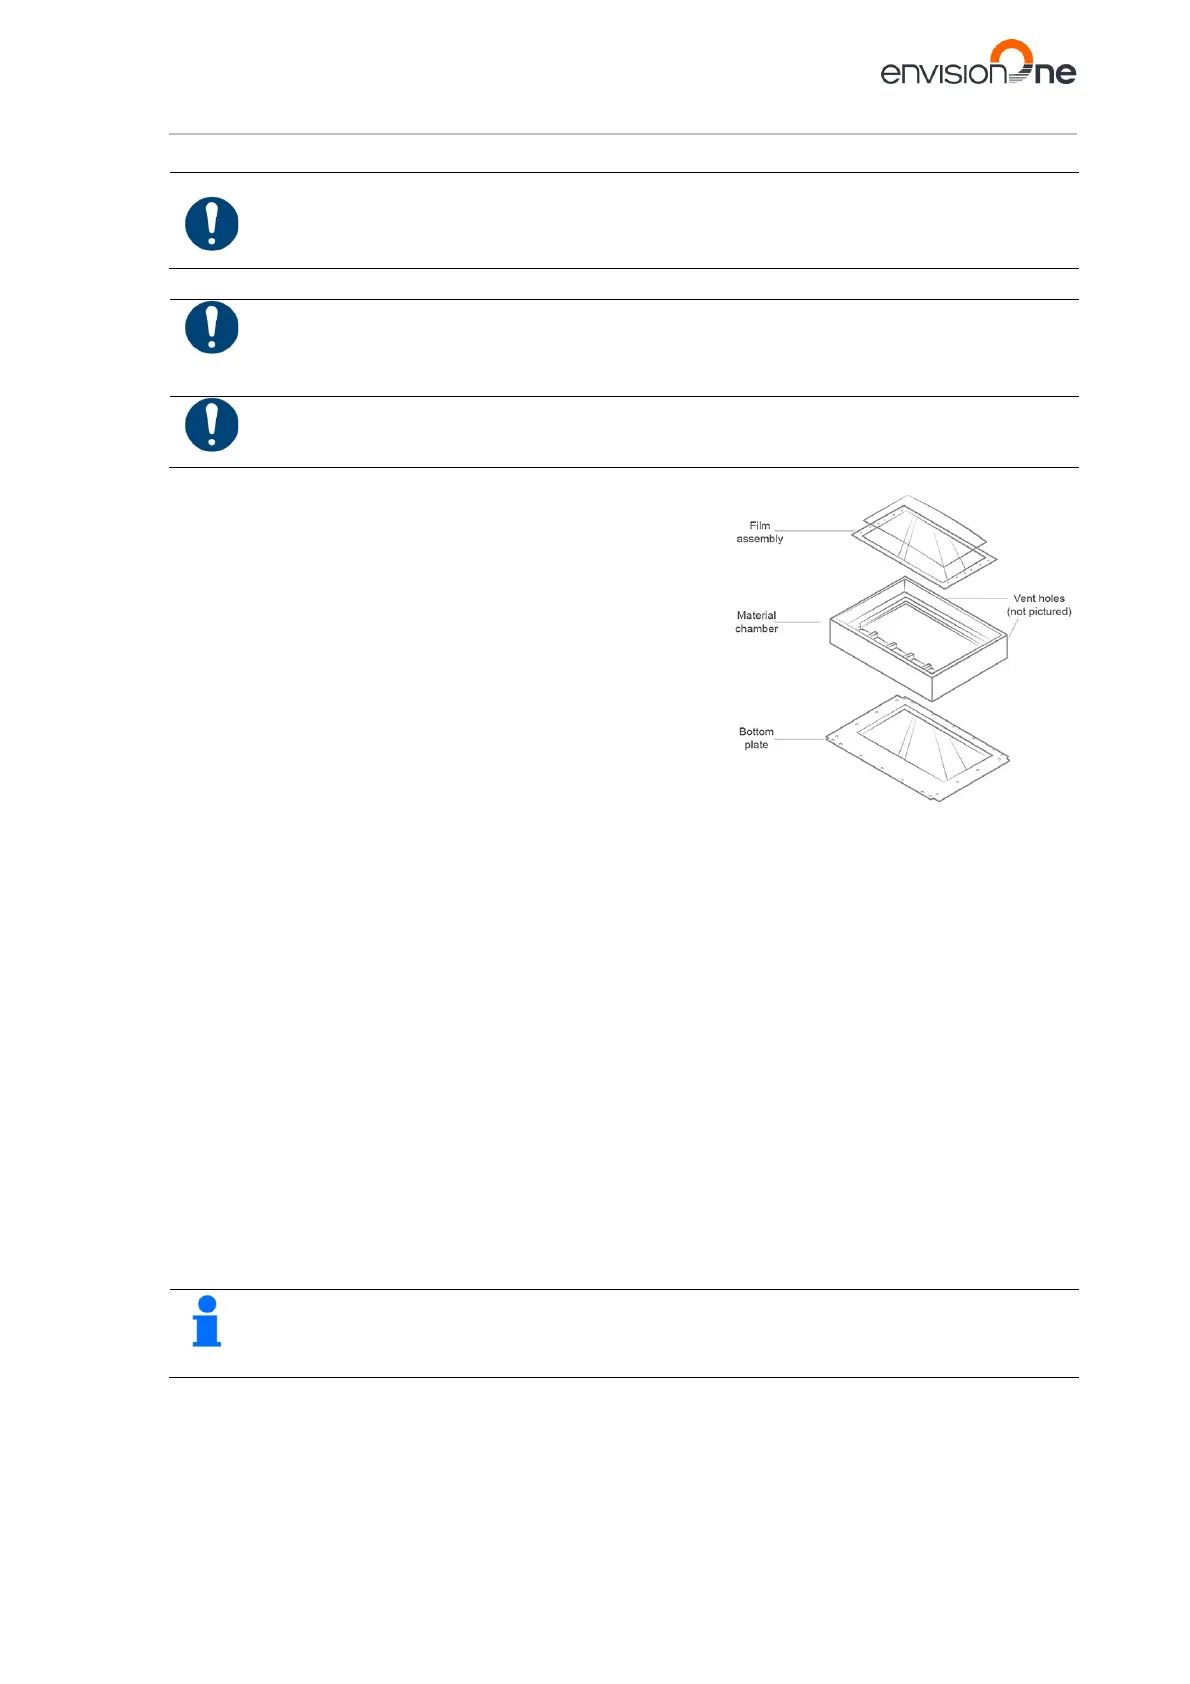
The Film Assembly is located inside the material chamber and is
comprised of a film, a glass panel, and a metal frame.
1. Check the film at the bottom of the material tray whenever
the material is removed.
2. Look for pinholes, punctures, ripples, and other signs of
stress. A slightly cloudy film is normal and will not affect the
print quality.
3. Use Manual Debris Removal to remove cured material from
the surface of the film assembly at the end of a print, or access it using the following sequence – Home >
Settings > Manual Debris Removal.
4. Once the exposure time is set on the Manual Debris Removal page, tap Expose – the projector will expose
the full printing area to light for the set exposure duration. Use the rubber spatula from the Starter Kit to
gently remove the cured material from the surface of the film assembly.
The Material Chamber is the vessel to hold the material in the printer during operation. It comprises of two sections:
the upper chamber and the lower chamber.
1. Use a clean dry paper towel to clean the material chamber. Using chemicals or alcohol to clean anything
that comes in contact with material may cause contamination, resulting in printing issues.
2. When switching to a new type of material, carefully clean corners with the paper towel or a Q-Tip to prevent
contamination. Reinstall the material tray on the printer as soon as possible after cleaning. Leaving the
material tray exposed to light can cause small particles of material to cure. This can prematurely age the
material tray and contaminate new material when the tray is used again.
The Bottom Plate is under the material chamber and consists of a glass panel and a metal frame.
1. Check the glass on the bottom of the tray for smears or fingerprints, which can affect print quality.
2. Wipe the glass on the bottom of the material tray with an ammonia-free glass cleaner when needed.
If the glass cracks or is badly scratched, then the material tray will need to be replaced.
The Vent Holes are located on blocks at the back of the domeless material tray. When the material tray is installed,
these vent hole blocks lineup with two corresponding holes on the printer. When the printer is powered on, the
oxygen flows to and from the material tray via the vent holes. The vent holes must remain clean in order to form a
seal.
Use a dry paper towel to clean the vent hole blocks.
Figure 17: Domeless material tray