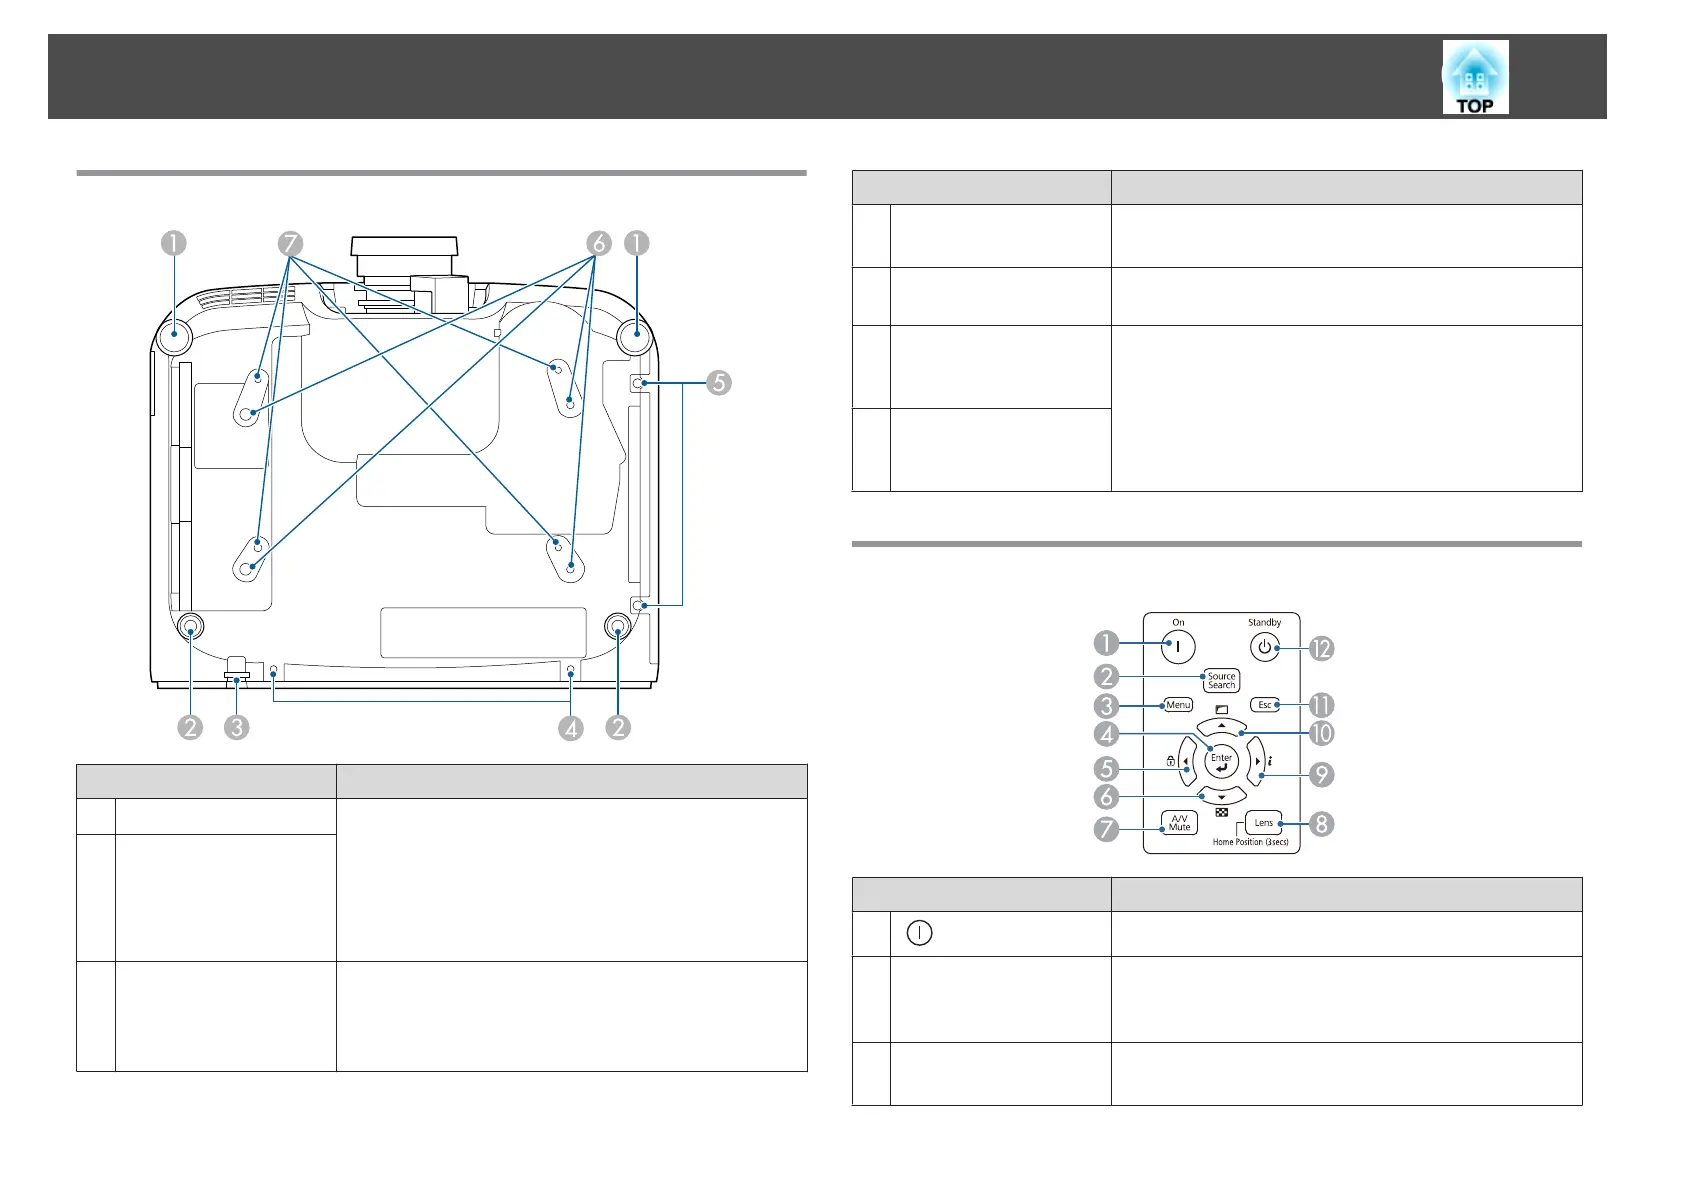
Base
Name Function
A
Front feet
When setup on a surface such as a desk, extend and retract
the feet to adjust the height or tilt of the image.
s "Adjusting the Height of the Projected Image (for
Normal Installment)" p.41
s "Adjusting the Horizontal Tilt (for Normal
Installment)" p.42
B
Rear feet
C
Security cable
installation point
Pass a commercially available anti-theft wire lock or a wire
to prevent the projector from falling through here and lock
it in place.
s "Anti Theft/Fall Prevention" p.119
Name Function
D
Screw holes to fix the
cable cover
Screw holes to fix the cable cover in place.
s "Attaching the Cable Cover" p.55
E
Air filter cover fixing
screw
Screws to fix the air filter cover in place.
F
Ceiling mount fixing
points (ELPMB47/
ELPMB48, 4 points)
Attach the optional ceiling mount here when suspending
the projector from a ceiling.
s "Installing the Projector" p.27
s "Optional Accessories and Consumables" p.233
G
Ceiling mount fixing
points (ELPMB22, 4
points)
Control Panel
Name Function
A
[ ] button
Turns the projector on.
B
[Source Search]
button
Changes to the next input source that is sending an image.
s "Automatically Detecting Input Signals and Changing
the Projected Image (Source Search)" p.61
C
[Menu] button
Displays and closes the Configuration menu.
s "Configuration Menu Operations" p.136
Part Names and Functions
18