k
Use the [ ][ ][ ][ ] buttons to adjust the boundary line
positions, and then press the [
] button.
l
Press the [ ][ ][ ][ ] buttons to select the point you want to
move, and then press the [
] button.
The selected point is displayed in orange.
m
Press the [ ][ ][ ][ ] buttons to move the point.
To continue to move another point, press the [Esc] button to return
to step 12, and then repeat steps 12 and 13.
To adjust another boundary line, press the [Esc] button until the
screen for selecting a boundary line from step 9 is displayed.
a
To return Black Level to its default value, press the [Esc]
button to return to the screen from step 7, select [Reset], and
then press the [
] button.
n
To complete the adjustment, press the [Menu] button.
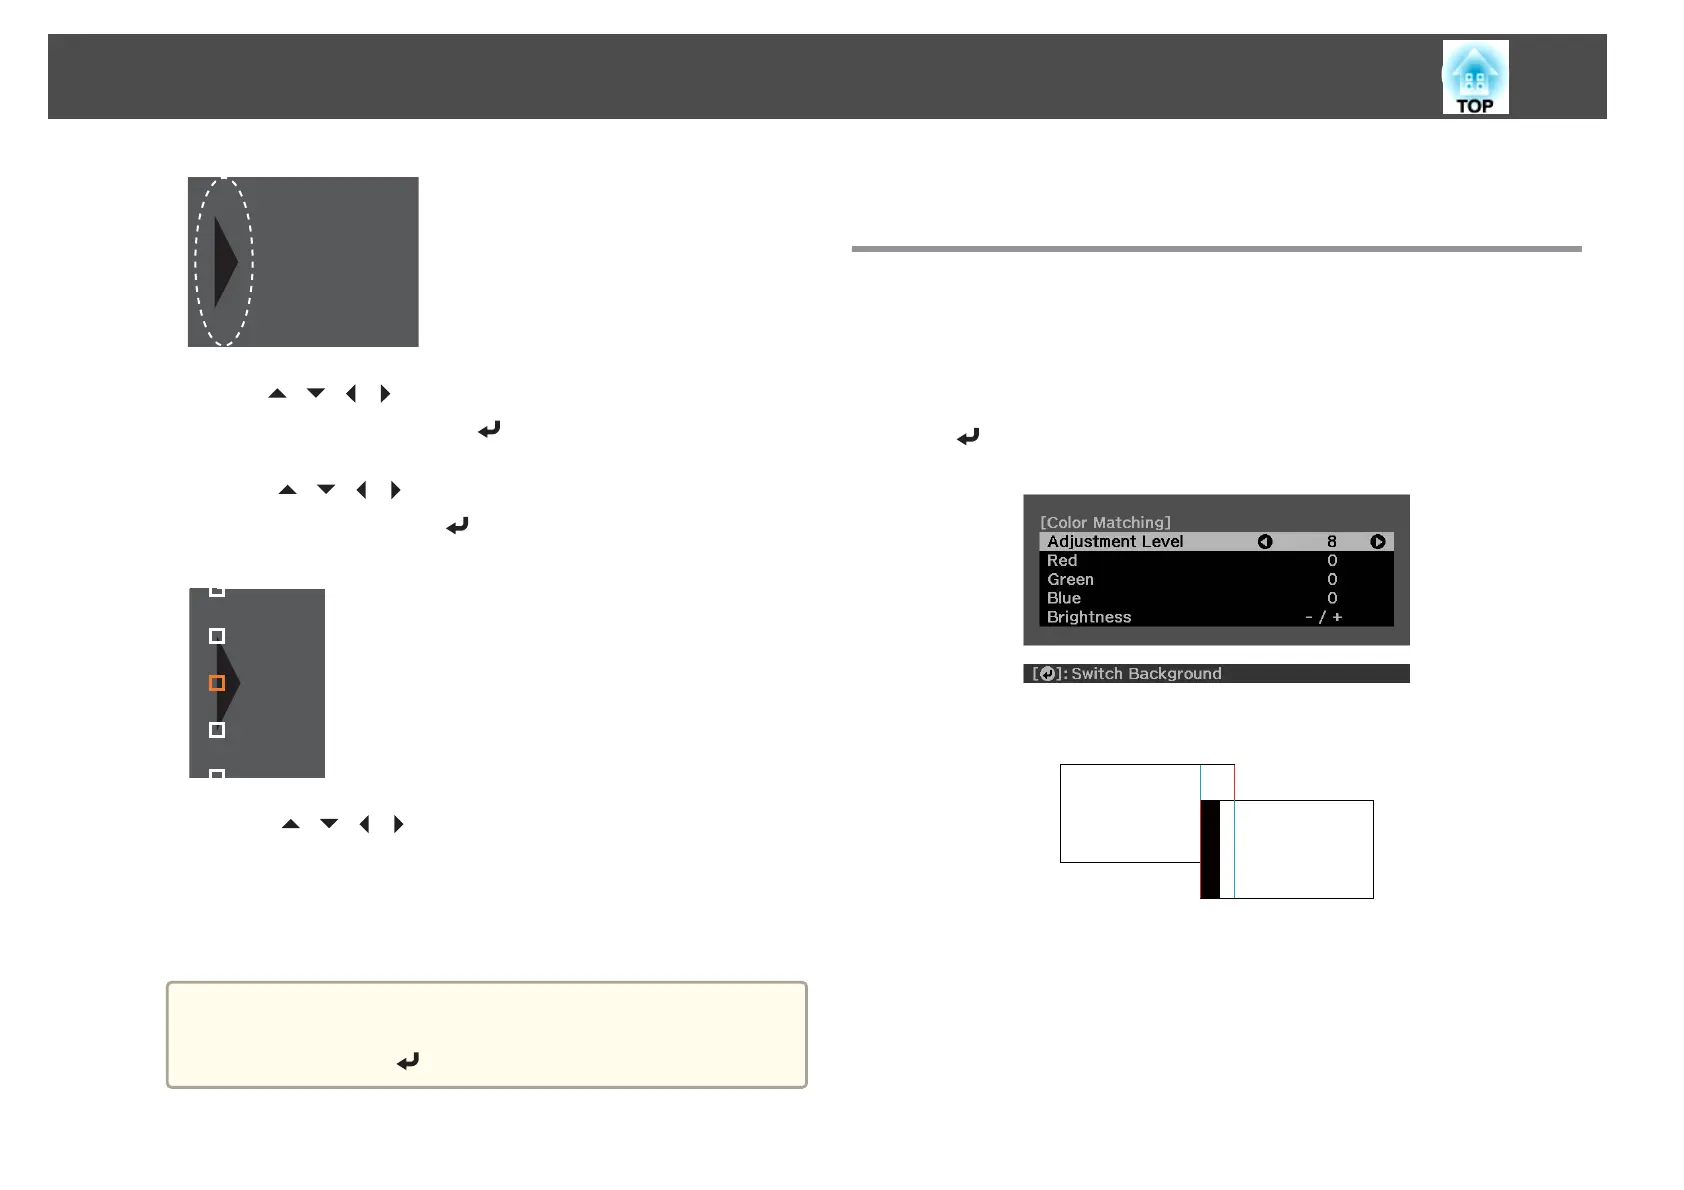
Color Matching
You can fine tune the color balance and brightness from black to white for
each color tone.
a
Select Color Matching from Multi-Projection, and then press the
[
] button.
The following screen is displayed.
Half of the overlapped area is displayed in black so that it is easy to
check the edge of the image.
Adjustment Level: There are eight levels from white, through gray,
and up to black. You can adjust each level individually.
Red, Green, Blue: Adjusts the tone for each color.
Brightness: Adjusts the image brightness.
Multi-Projection Function
96