EPSON Stylus COLOR 860/1160 Revision C
Troubleshooting Overview 60
3.1.1.3 Remedies for No I/C and Ink Out Errors
This section includes the check points and corresponding actions which
are necessary when the black ink (or color ink) LED comes on or blinks
at power on despite the ink cartridge has been replaced with a new one.
Be sure to follow the steps in the order described in the tables.
NOTE:If the finding for the question is Yes, take the action described in
the right column. If “No”, proceed to the next step.
Table 3-7. Remedies for No I/C and Ink Out Errors
Step Detail Phenomenon Check & Actions
1 Dot missing occurs
despite the Ink end
condition is not
indicated. And the dot
missing number is
increased every
printing.
or
Enough ink is
remaining in the
cartridge, but the
printer shows the Ink
low or Ink end
condition and can not
continue to print.
Make sure the I/C was replaced with the new one in
the I/C replacement sequence. If not, explain the
situation to the user well and replaced the I/C with
new one in the I/C replacement sequence.
The ink consumption counter, separately set for
black and color ink, adds up points according to ink
weight used to form one dot. This counter is reset
(the value returns to zero) when the I/C replacement
sequence is performed and I/C is replaced. If the
I/C is replaced with the used I/C in the I/C
replacement sequence, the following adversities will
occur.
• Ink has run out but the printer continues to print
and starts false firing, which damages the print
head.
If the new I/C is installed without entering the I/C
replacement sequence, the ink consumption counter
is not reset and the following adversities will occur.
• Enough ink is remaining in the cartridge, but the
printer shows the Ink low or Ink end condition and
can not continue to print.
2 If the I/C is removed
and reset into the CR
unit, the Ink Out LED
is not turn on and off.
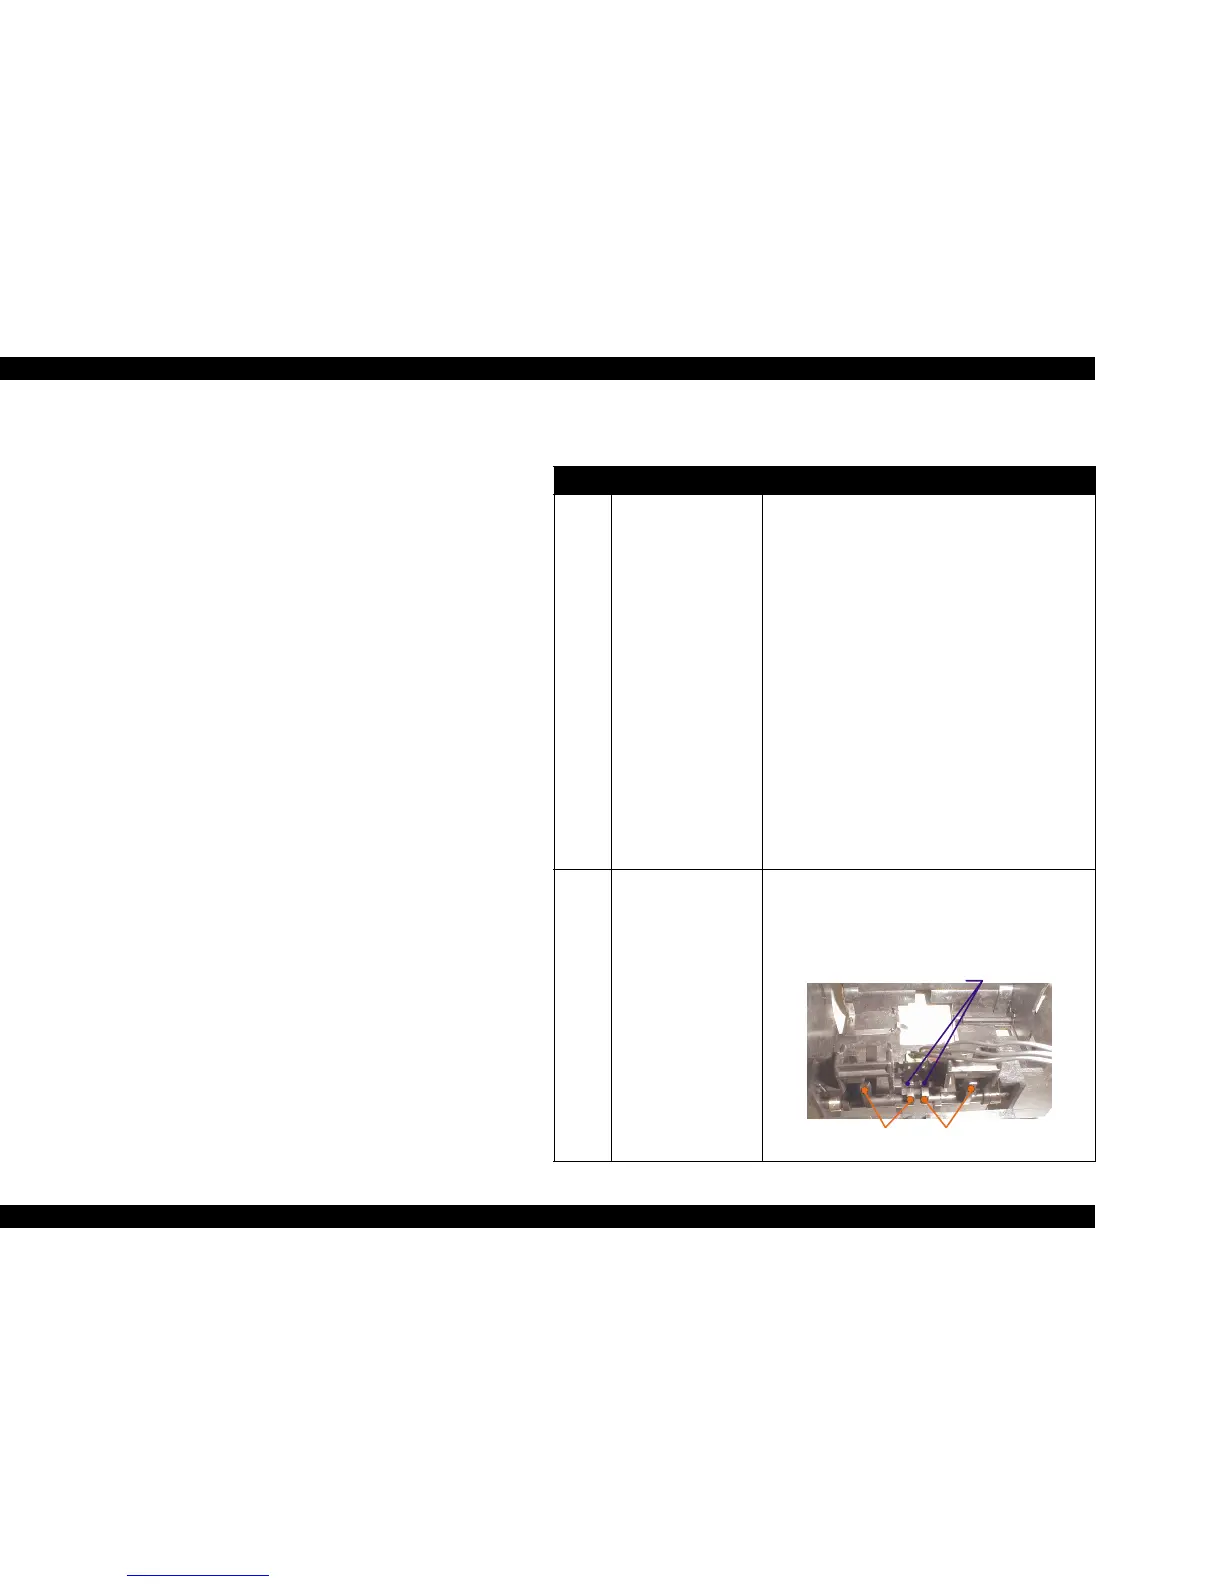
Turn the both actuators (right and left) manually and
check that they properly push the micro switches.
Then, also check that the actuators return to their
normal conditions shown in the figure below
automatically.
M icro Sw itches
Actuator 1
Actuator 2

 Loading...


