EPSON Stylus COLOR 860/1160 Revision C
Disassembly and Assembly Disassembly Procedures 85
4.2.4.1 Removing the Printhead Unit
1. Remove the Upper Housing. (Refer to Section 4.2.1.)
2) Slide the CR Lock Lever to the front side with tweezers or small driver and
release the CR Lock Lever from the CR unit. Then move the CR Assembly
to the left.
3) Take both black and color ink cartridges out of the CR Assembly.
4) Remove the blue covers for black and color ink cartridges from the CR
Assembly.
5) Remove the Torsion Spring 49 from the left side of the CR Assembly and
one screw (No.2) securing the Fastener Head Plate.
Then take out the Fastener Head Plate. Refer to Figure 4-7.
6) Remove the Head FFC Holder from the CR Assembly by releasing four
hooks. (Two hooks; Left/Right sides of CR unit, Two hooks; Back side of
the CR unit) Refer to Figure 4-7.
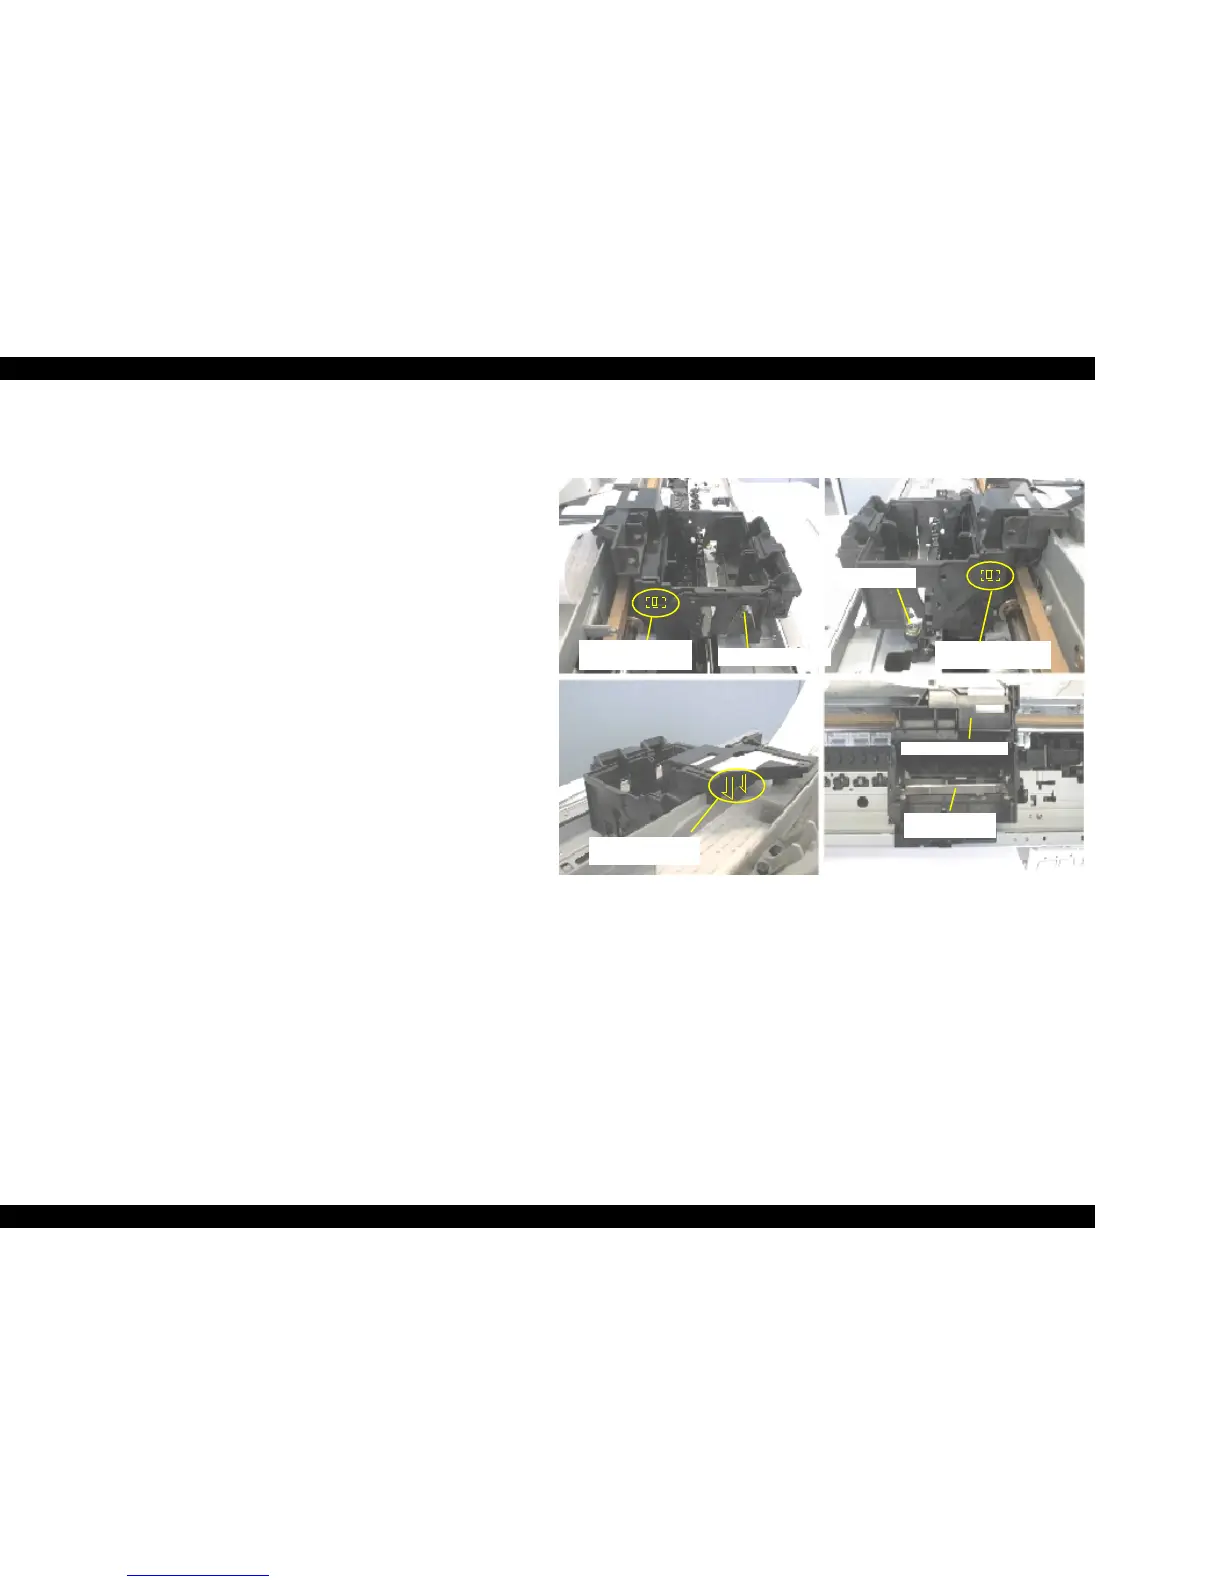
Figure 4-7. Removing the Printhead
7) Remove the two Head FFCs that connect to the Printhead Drive Circuit
Board built in the CR Assembly and remove the narrow FFC from the CR
Encoder Sensor Board on the CR Assembly.
Fastener Head
Plate
Head FFC Holder
One hook for
Head FFC Holder
No.2 Screw
Torsion Spring 49
One hook for
Head FFC Holder
Two hooks for
Head FFC Holder

 Loading...


