EPSON Stylus CX3500/CX3600/CX3650/CX4500/CX4600 Revision A
DISASSEMBLY AND ASSEMBLY Disassembly 139
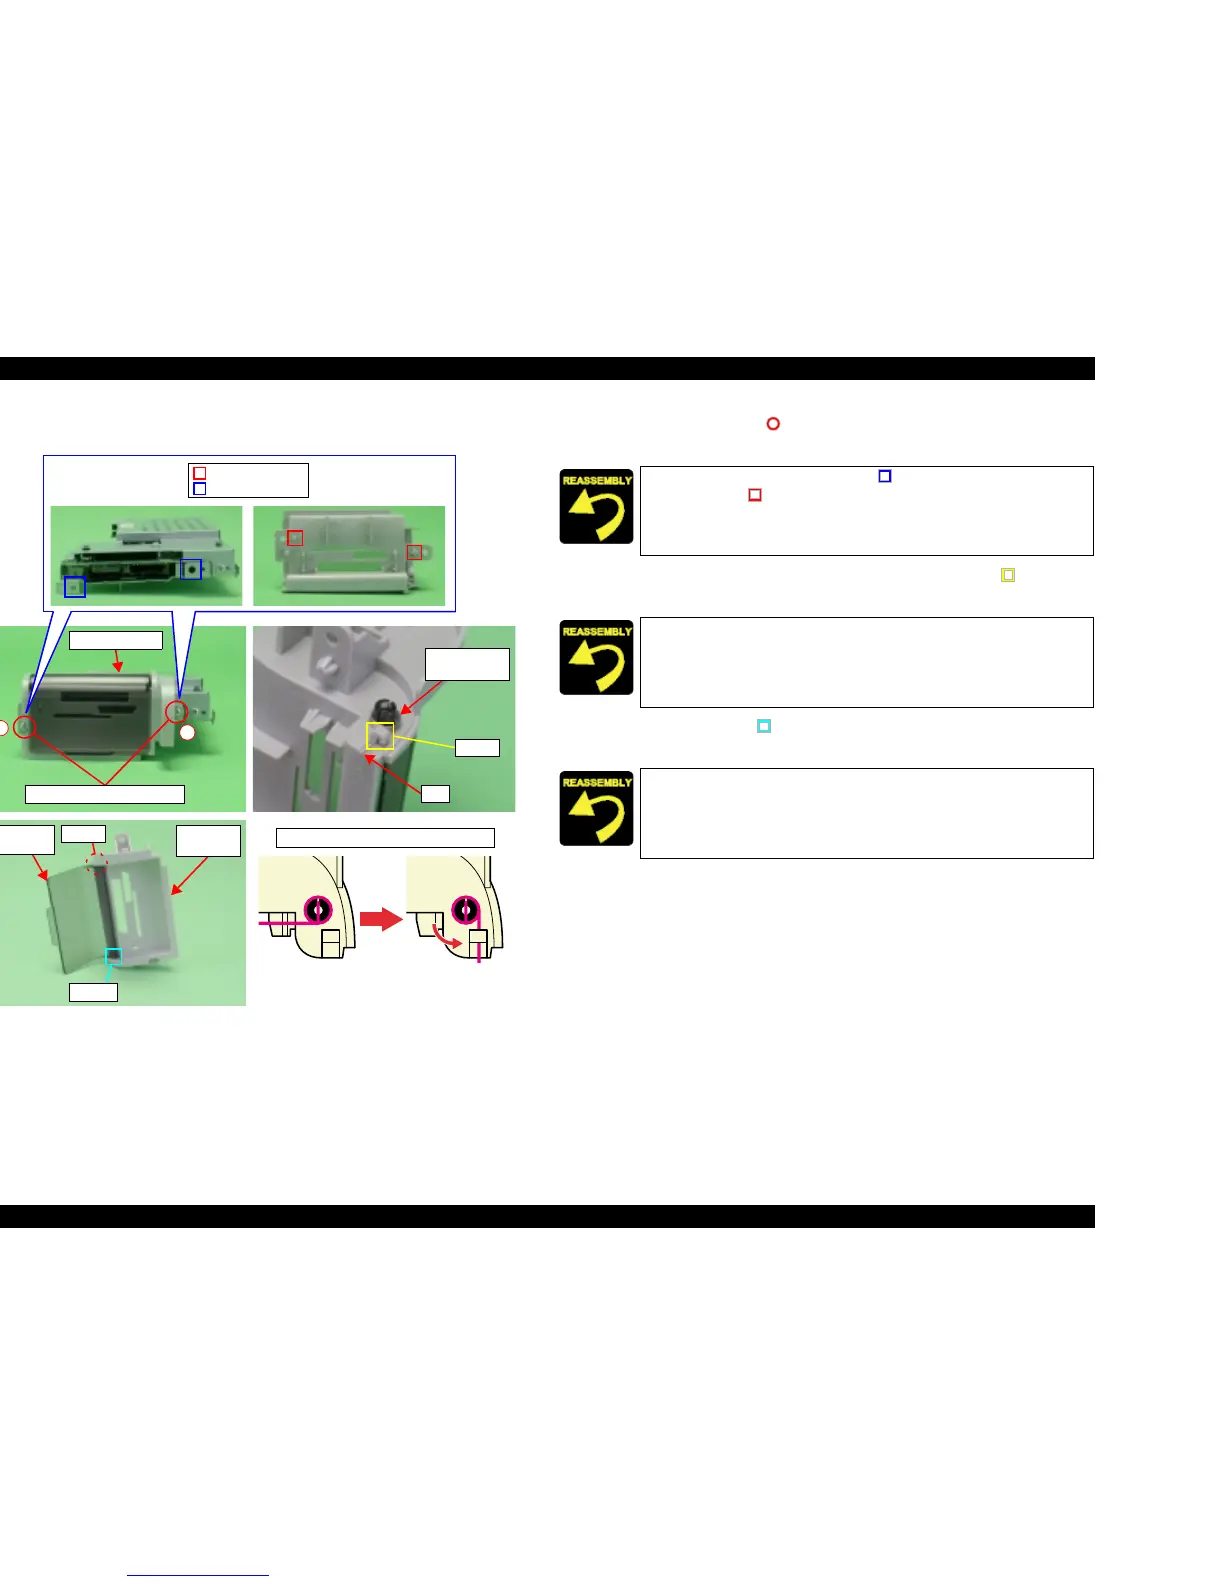
V External View (2)
Figure 4-27. Main Board Unit Removal (2)
6. Remove the screws (x2, ) for securing Card Slot Unit, and then remove
Card Slot Unit from and Main Board Unit.
7. Release the foot of Card Slot Cover Spring from the hook (x1, ) of Card
Slot Housing, and then remove Card Slot Cover Spring.
8. Release the dowel (x1, ) of Card Slot Cover from Card Slot Housing, and
then remove Card Slot Cover.
Card Slot Unit
C.B.S 3x6 F/Zn (7±1kgfcm)
1
2
Card Slot
Cover Spring
Hook
Leg
Card Slot
Housing
Card Slot
Cover
Shaft
Dowel
Installation of Card Slot Cover Spring
Dowels
Positioning Holes
T Align the positioning holes (x2, ) of Main Board Unit with the
dowels (x2, ) of Card Slot Housing.
T Tighten the screws of Card Slot Unit in order shown by figure.
Install Card Slot Cover Spring as shown by figure.
Set the shaft of Card Slot Cover into Card Slot Housing and then
align the dowel.

 Loading...


