EPSON Stylus Photo R1900/R2880/R2000/R2000s/SC-P400 Series Revision I
Disassembly And Assembly Disassembling the Printer Mechanism 105
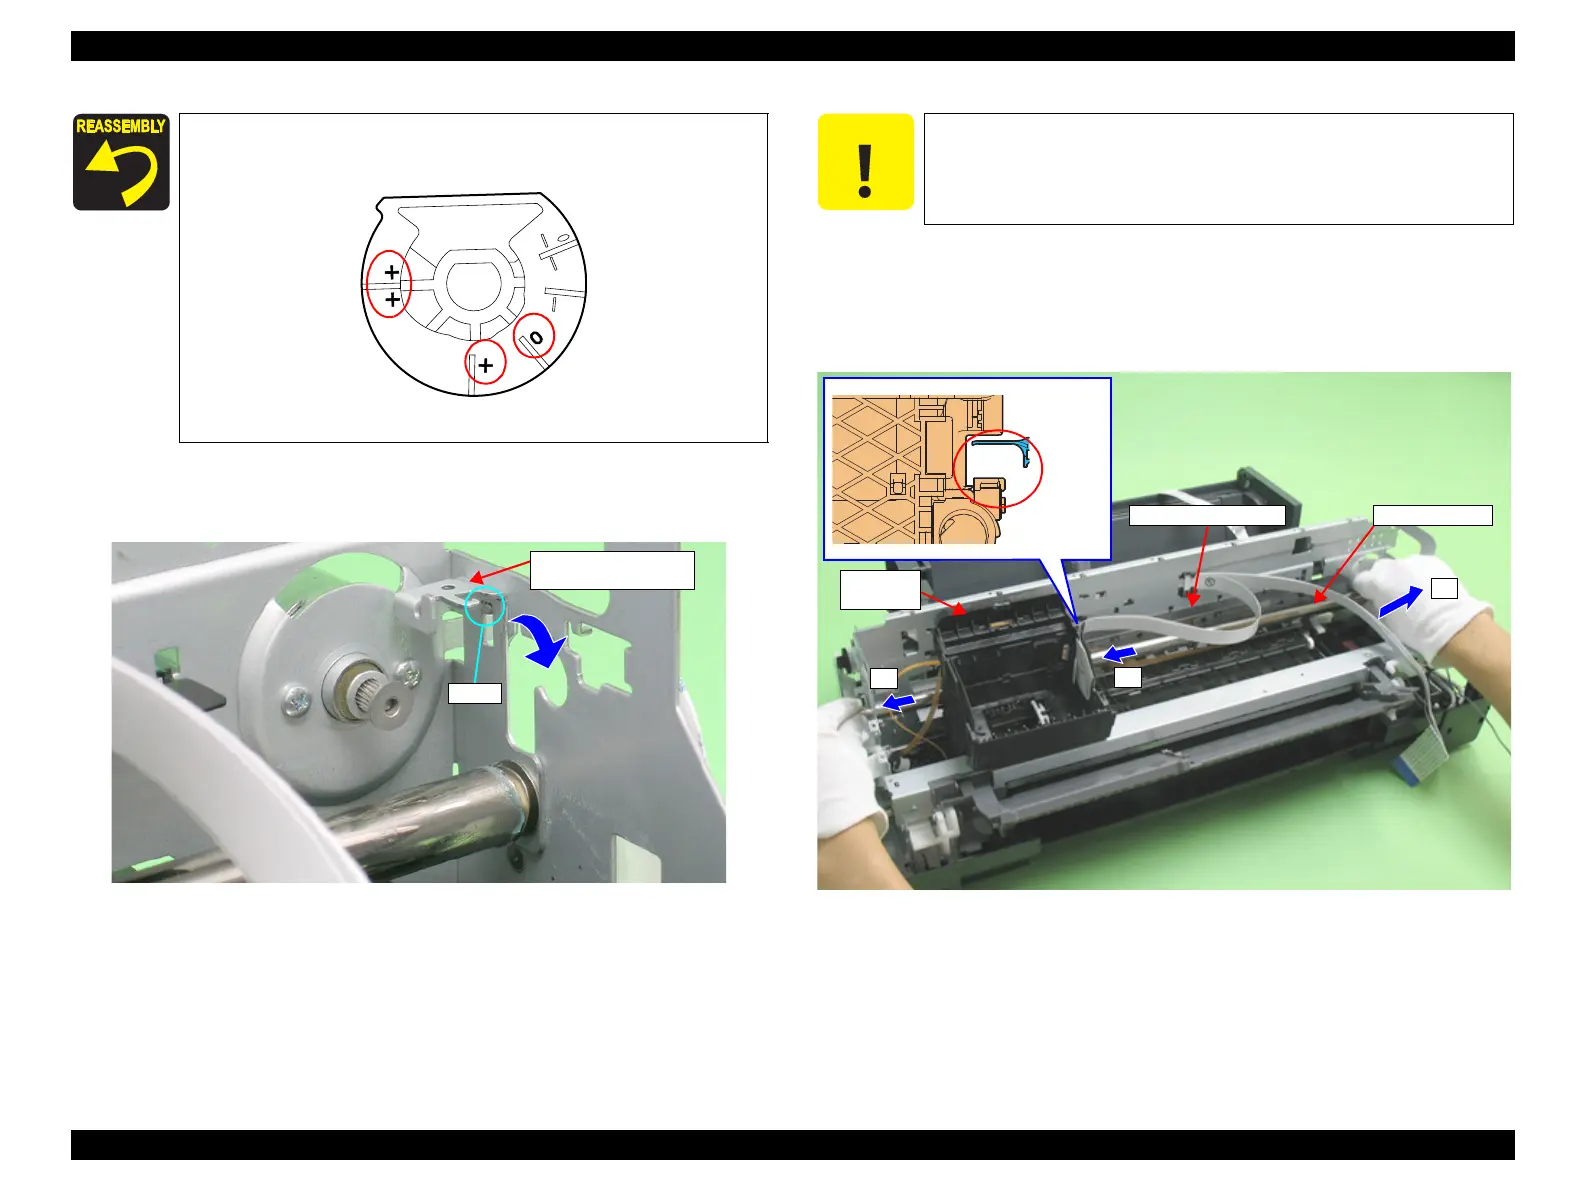
20. Pull the Right CR Shaft Mounting Plate away from the tab on the Main Frame and
rotate toward you.
Figure 4-84. Rotating the Right CR Shaft Mounting Plate
21. Slide the Carriage Unit to the left side to prevent the CR Scale Cover from
interfering with the rear of the Carriage Unit, slide the Carriage Shaft to the left
side and pull out its right end from the Main Frame, and pull out the Carriage Shaft
from the Main Frame and Carriage Unit.
Figure 4-85. Removing the Carriage Shaft
Install the Right PG Cam so that one of these positions marked "0",
"+" or "++" faces downward.
Figure 4-83. Right PG Cam Installation Direction
Right CR Shaft
Mounting Plate
Tabs
When performing the following procedure, take care not to scratch
the Carriage Shaft.
Carriage
Unit
Carriage Shaft

 Loading...


