EPSON Stylus Photo R1900/R2880/R2000/R2000s/SC-P400 Series Revision I
Disassembly And Assembly Disassembling the Printer Mechanism 106
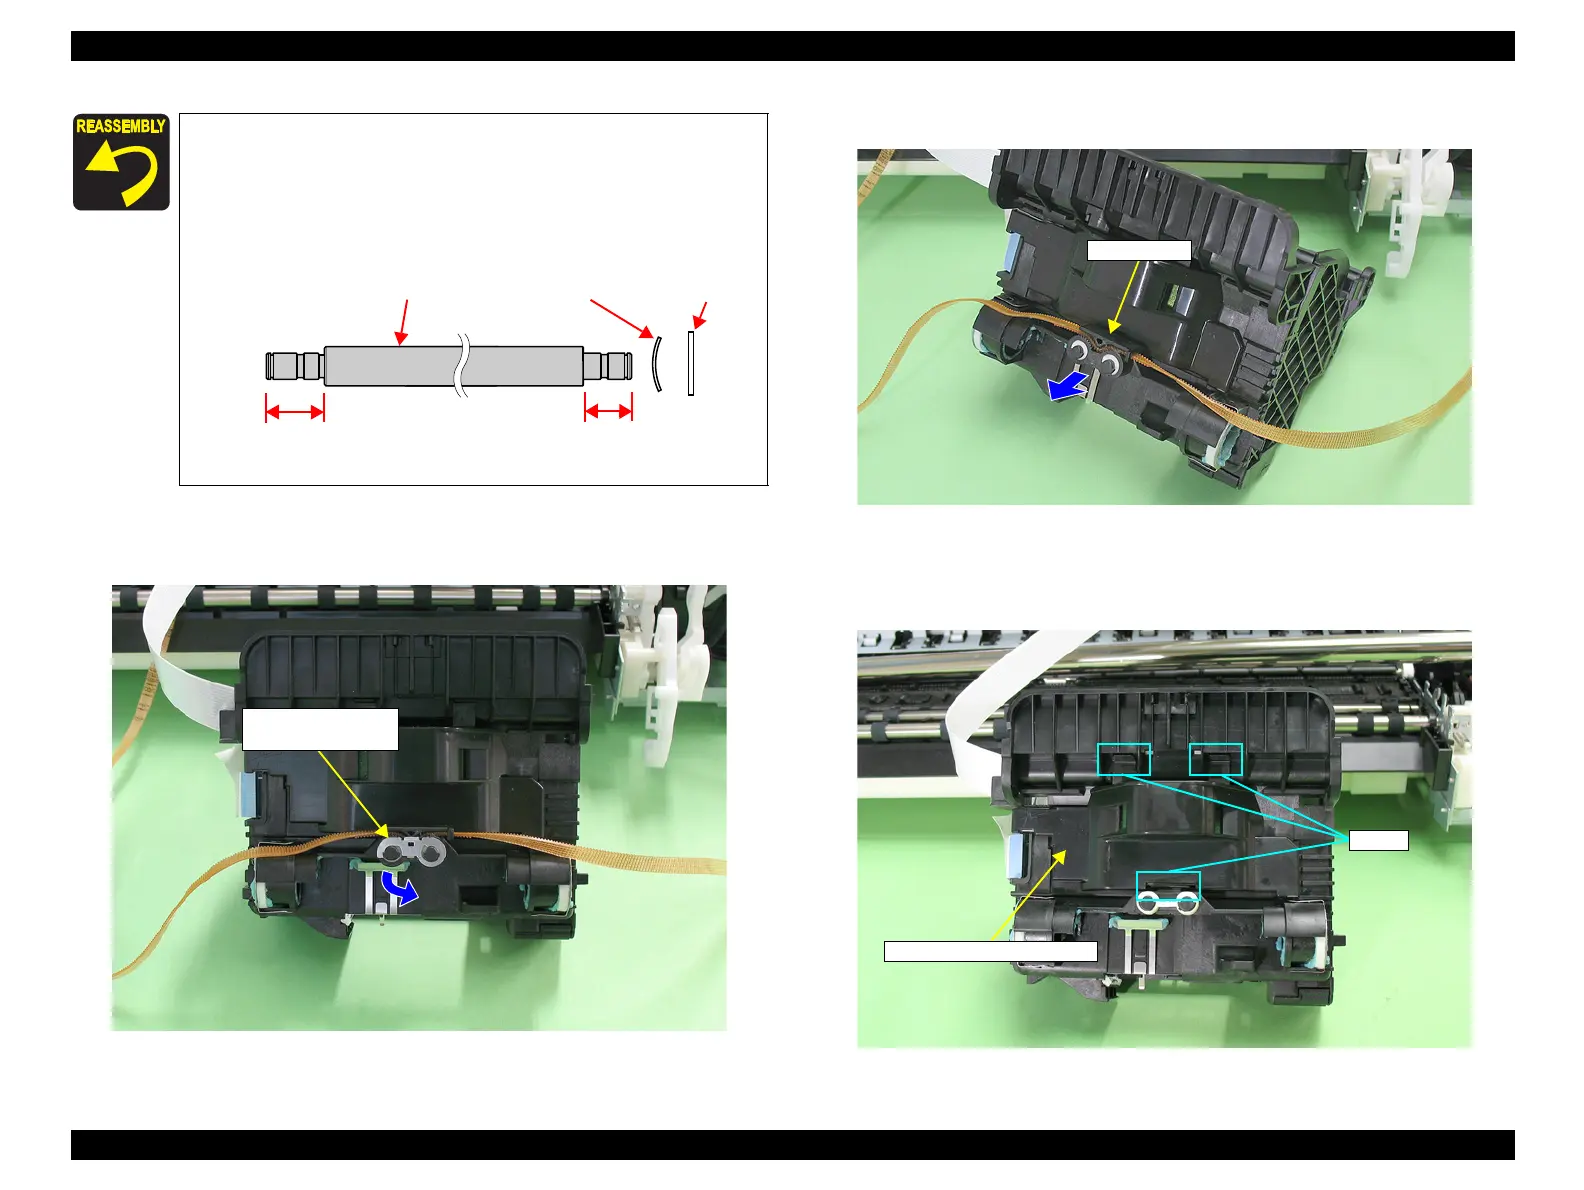
22. Turn the Belt Holder Mounting Plate in the direction of the arrow, and remove it
from the Carriage Unit.
Figure 4-87. Removing the Belt Holder Mounting Plate
23. Remove the Belt Holder from the Carriage unit.
Figure 4-88. Removing the Belt Holder
24. Release the CR Encoder Board Holder from the three Tabs to remove it from the
Carriage Unit.
Figure 4-89. Removing the Belt Holder
Set the longer end of the Carriage Shaft to the left side.
When the Carriage Shaft is removed, the Plain Spring and Leaf
Spring that are attached to the right end of the Carriage Shaft
may drop off. In such case, be sure to attach them in the order
as shown in the figure below.
Figure 4-86. Reinstalling the Carriage Shaft
Leaf Spring
Plain Spring
Carriage Shaft
Left Side Right
Side
Longer
Shorter
Belt Holder Mounting
Plate
CR Encoder Board Holder
Tabs

 Loading...


