EasyManuals Logo

Epson Stylus Photo R2000s Series User Manual

Epson Stylus Photo R2000s Series
230 pages
To Next Page IconTo Next Page
To Previous Page IconTo Previous Page
Page #188 background imageLoading...
Page #188 background image
Stylus Photo R1900/R2880/R2000/R2000s/SC-P400 Series Revision I
Stylus Photo R2000/R2000s Disassembly 188
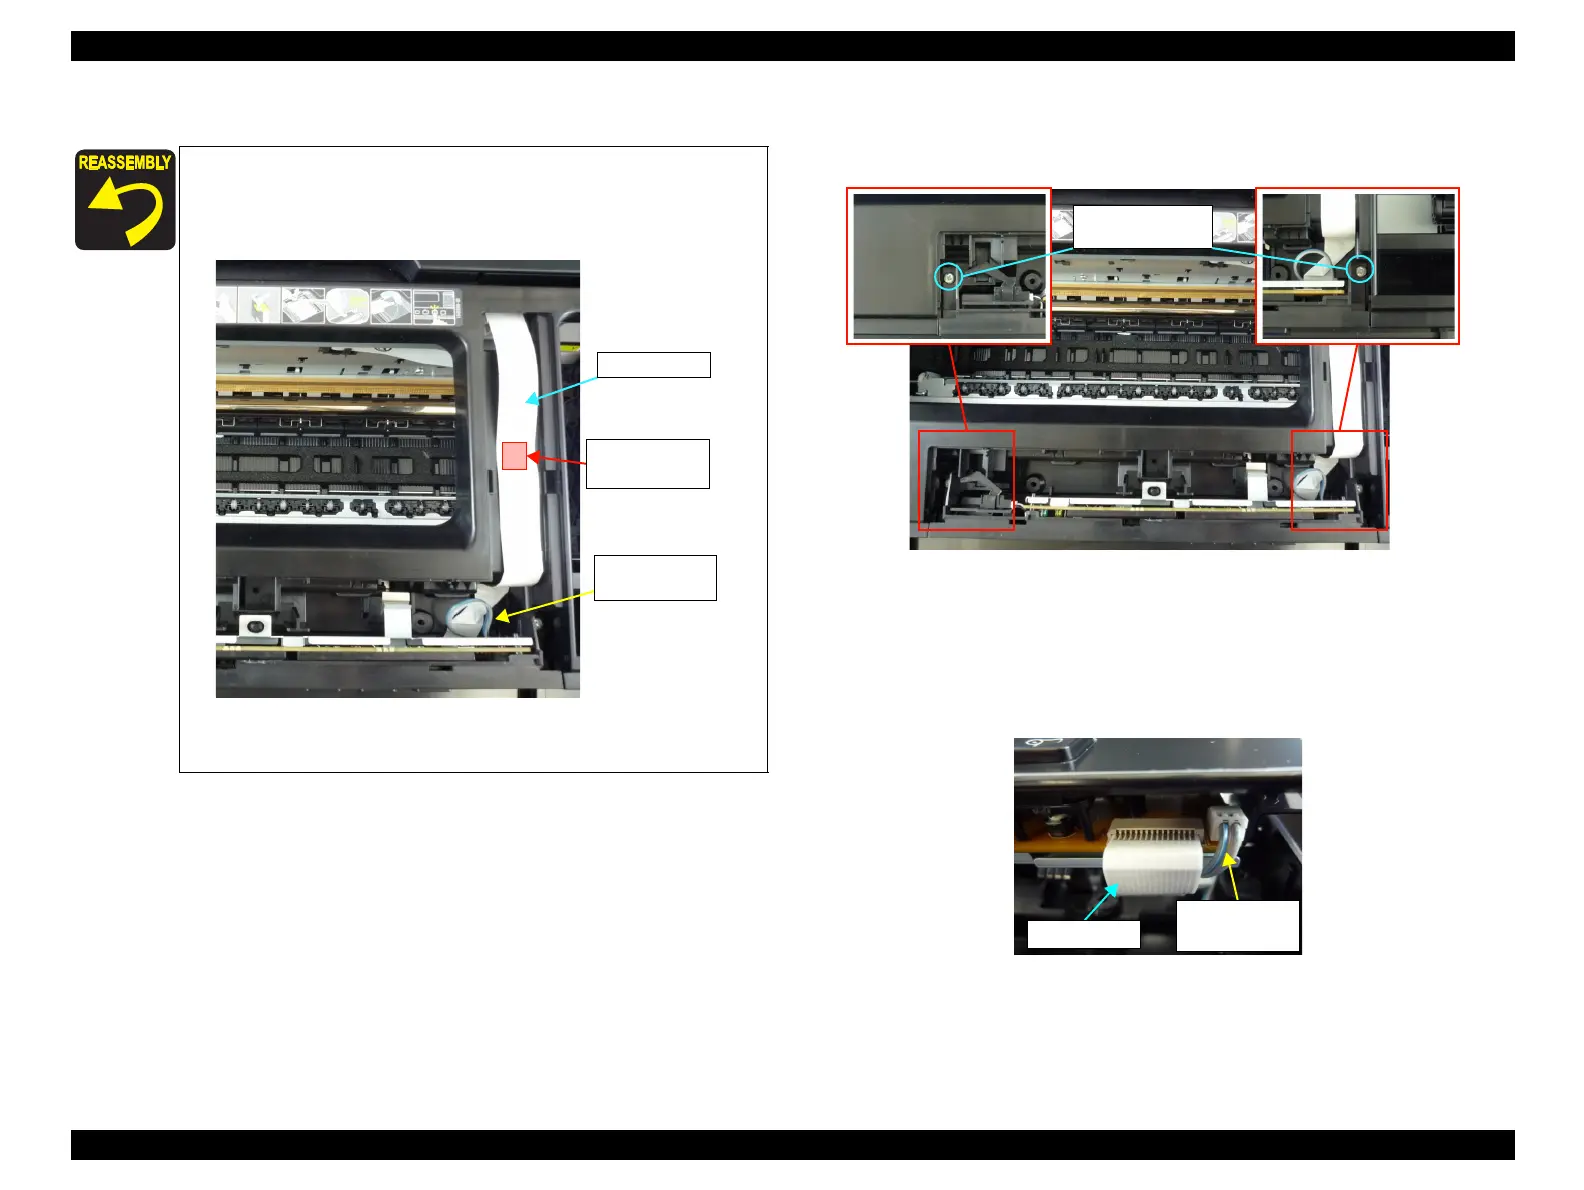
Panel Unit
1. Remove the screws (C.B.P 3x10) (x2)that secure the Panel Unit.
Figure 8-7. Remove the Panel Unit (1)
2. Disconnect the Panel FFC and CDR Sensor cable from the Panel Board.
Figure 8-8. Remove the Panel Unit (2)
Be careful not to get the Panel FFC caught underneath
the hooks on the Panel FFC Cover
Secure the Panel FFC with double-sided tape as follows.
Panel FFC
CDR Sensor
Cable
Double-sided
tape
Figure 8-6. Panel FFC
C.B.P 3x10
(6±1kgf.cm)
Panel FFC
CDR Sensor
Cable

Table of Contents

Questions and Answers:

Question and Answer IconNeed help?

Do you have a question about the Epson Stylus Photo R2000s Series and is the answer not in the manual?

Epson Stylus Photo R2000s Series Specifications

General IconGeneral
BrandEpson
ModelStylus Photo R2000s Series
CategoryPrinter
LanguageEnglish

Related product manuals