Stylus Photo R1900/R2880/R2000/R2000s/SC-P400 Series Revision I
SC-P400 Series Disassembly 209
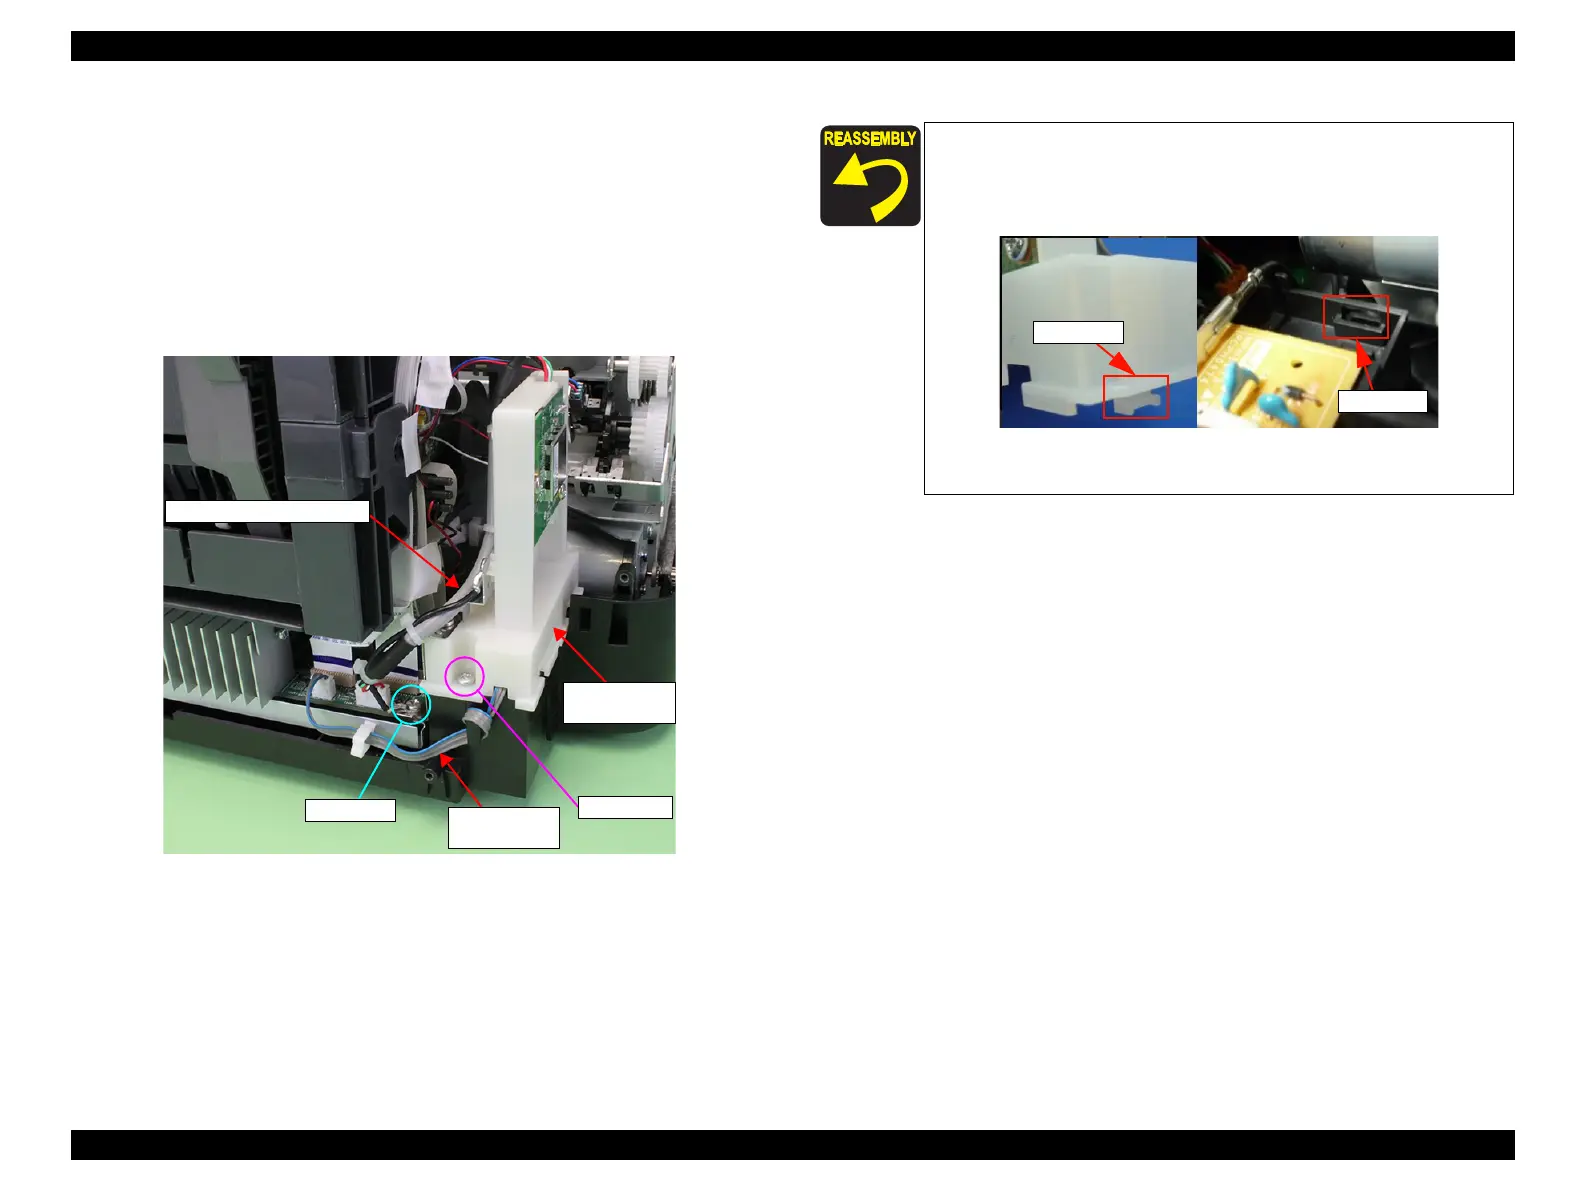
Wireless LAN Board Assy
1. Remove the
C.B.P. M3 x 8 screw that secures the earth plate of the wireless
LAN board assy.
2. Disconnect the wireless LAN board cable from the connector (CN2) on the
main board.
3.
Remove the
C.B.P. M3 x 10 screw that secures the wireless LAN board
Assy, and remove the wireless LAN board assy.
Figure 9-3. Remove the wireless LAN board assy
Wireless LAN
board assy
C.B.S 3x8
C.B.P 3x10
High voltage
module cable
Wireless LAN Board cable
When installing the wireless LAN board assy, first insert the
hook on the wireless LAN board assy into the hole on the lower
housing, and then secure the wireless LAN board assy with the
screw.
When routing cables, be careful not to let them caught between
the parts. (See
Figure 9-3
.)

 Loading...


