Epson Stylus Pro 7700/7710/7700M/7710M/7900/7910/9700/9710/9900/9910/WT7900/WT7910/9890/9908/7890/7908 Revision I
ADJUSTMENT Head Related Adjustments 394
Confidential
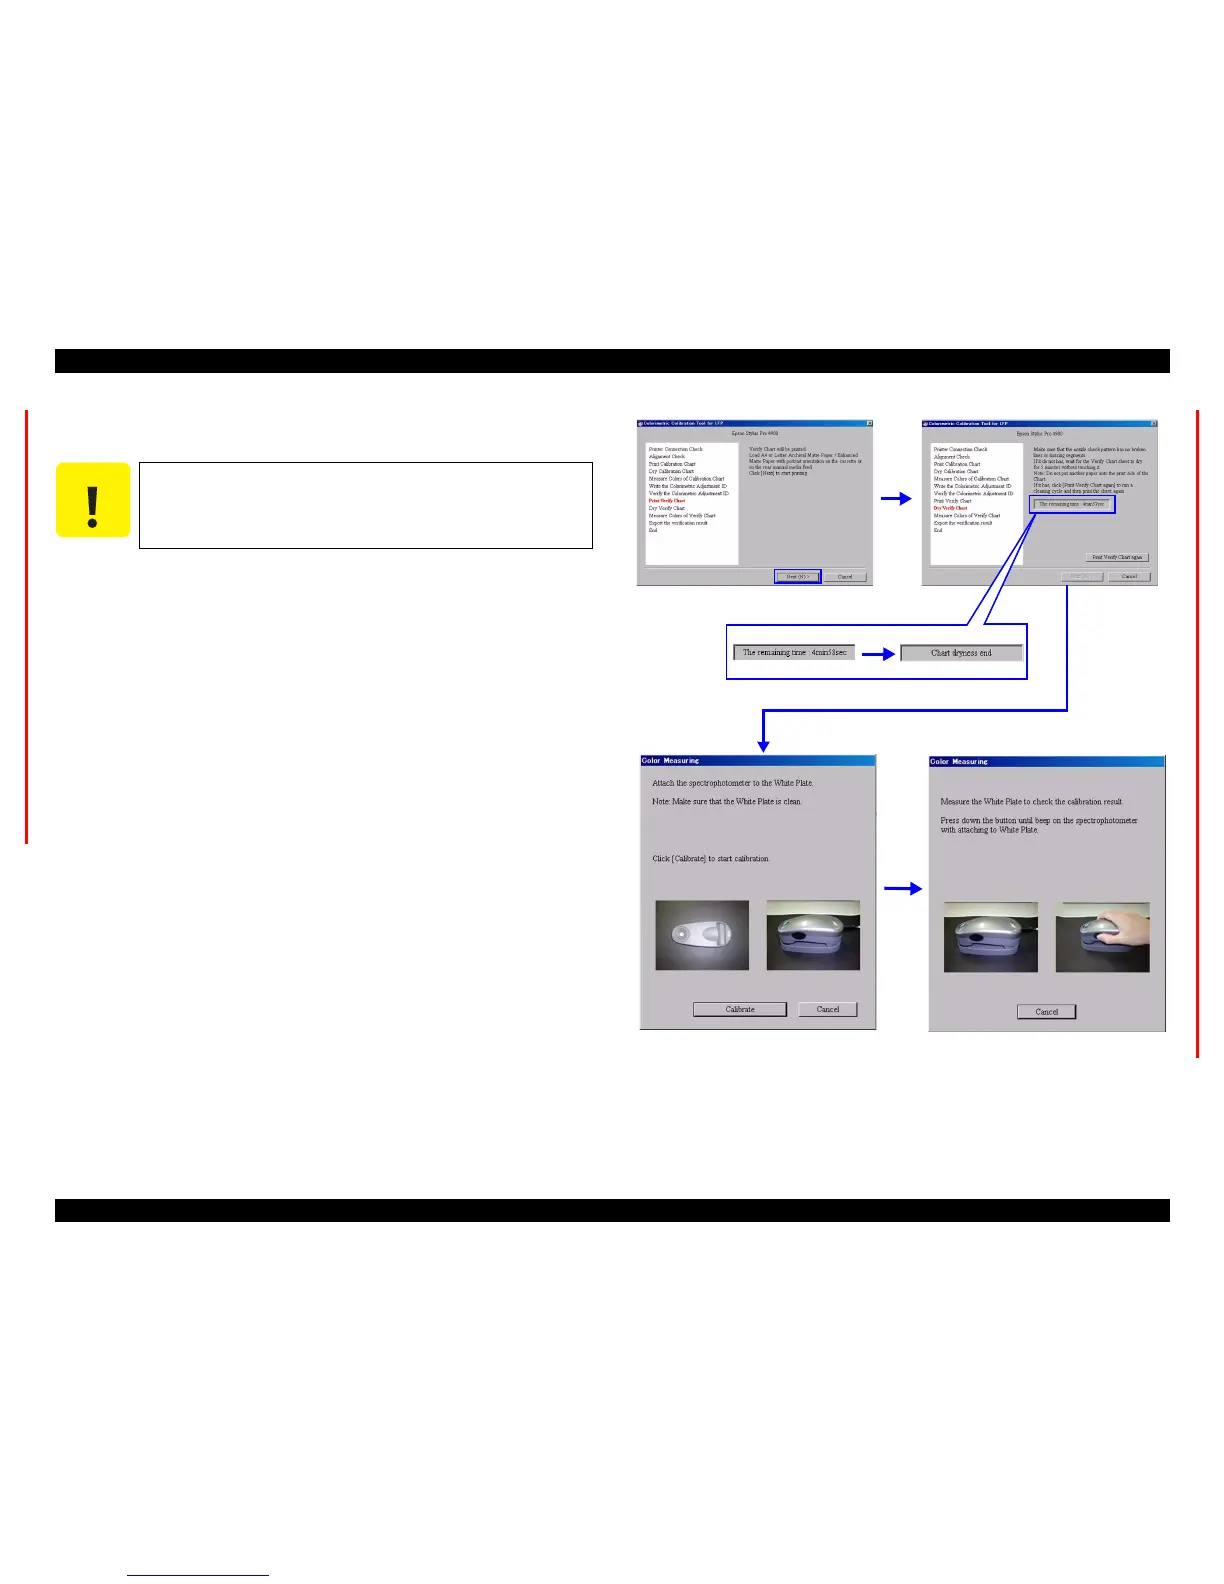
20. Load an A4-sized Enhanced (Archival) Matte Paper vertically on the paper tray,
and click [Next] to print the first page of the verify chart.
21. Check the nozzle check pattern on the bottom of the verify chart to make sure that
there is no missing dot.
If there is any defect, click [Print Verify Chart Again]. The verify chart will be
printed again after performing cleaning.
If there are no missing dots, let the chart stand for five minutes until it dries out
paying attention not to touch the chart.
22. When the verify chart dries out (after five minutes), click [Next].
23. Click [Measure].
24. Place the calibrator on the calibration base plate, and click [Calibrate].
25. Keep the calibrator remain set on the base plate, hold down the button on the side
of the calibrator until it beeps.
Once the calibration completed normally, following screen appears.
Figure 5-51. Screen
C A U T I O N
Make sure to leave the adjustment chart for 5 minutes to dry it out.
Wait for the countdown to end.

 Loading...


