S
61
630791 DS MKII INSTALLATION MANUAL
S6
If the wireless control becomes lost or damaged, a new one can be ordered from any Escea retail agent.
1. Hold down the black (AUX) buon on your re for a minimum of 20 seconds, this will tell your re to forget any
paired remotes.
2. Ensure the re and remote are set to ‘O’. Gently shake the remote to wake it up if necessary.
3. Press the menu buon on the touchscreen
ͳ Go into Sengs
ͳ Advanced
ͳ More
ͳ Pair Fire
4. Select the re you wish to pair to and select “Next”.
5. Enter the re’s PIN. Tap each digit then use the up and down arrows to change the digit.
6. Press “Pair”. The re is now linked to the remote control.
Note: Do not aempt to use the old remote once the new one is paired.
S7 Replacing the Burners
See secon secon "E4 Removing (and Replacing) the Inll & Burners" on page 28.
S8
The serial number for the re can be found in three places. The rst is through the remote; tap the menu buon
and select “Informaon”. The second is on the data sckers on the chassis under the electronics tray, and on the
electronics tray. (See secon "S10 Removing the Control Tray" on page 62)
S9
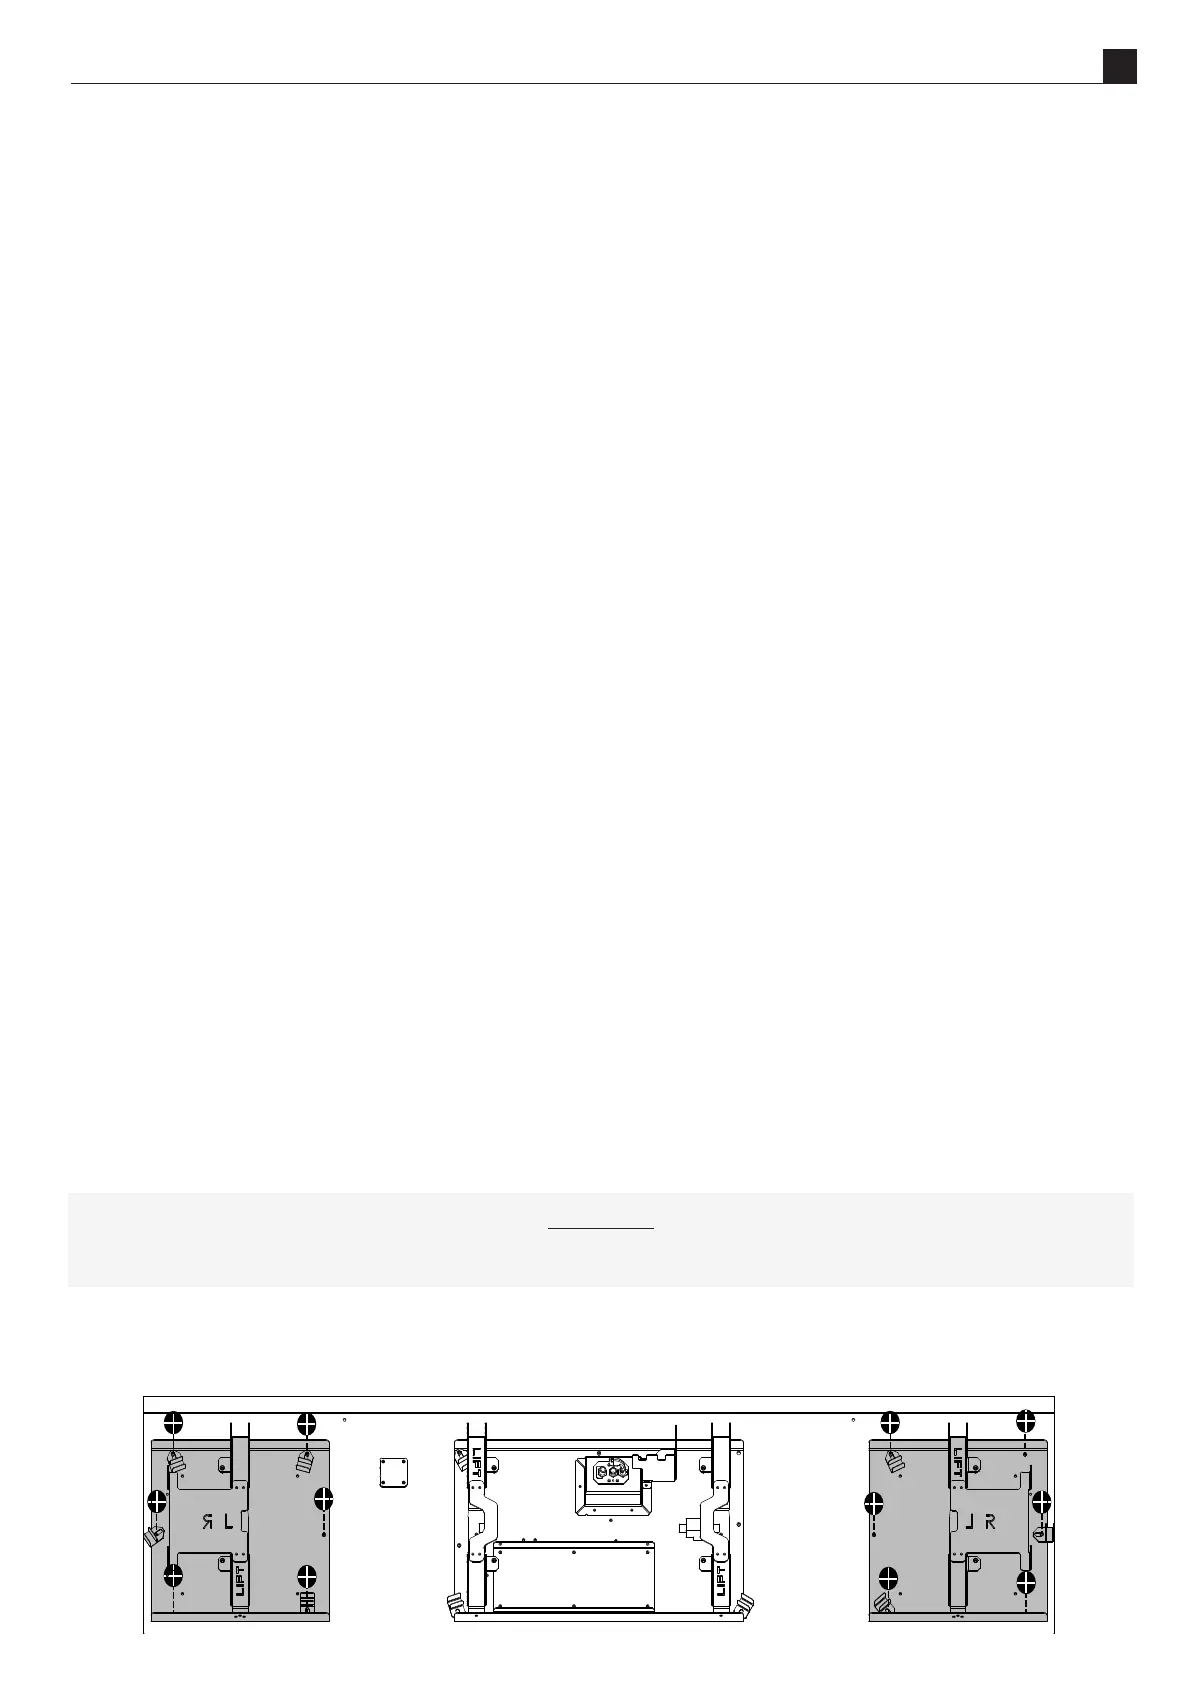
As part of regular service procedure, it is recommended that the fan is removed for cleaning. Dust will build up
on the fan rotor and in the cavity where the fan is located. This can be removed by the service person using a
hearth brush and a vacuum cleaner.
WARNING!
TURN THE GAS AND POWER SUPPLIES OFF.
Remove the trims, glass, inll, and burners following secons "Removing (and Replacing) the Glass" on page
27 & secon "E4 Removing (and Replacing) the Inll & Burners" on page 28
Remove the six screws holding the fan assembly in place and li out using the handles.