S
63
630791 DS MKII INSTALLATION MANUAL
S11
1. Follow the steps in secon secon "E3 Removing (and Replacing) the Glass" on page 27 to remove the glass from
the front of the appliance. Follow the steps in secon secon "E4 Removing (and Replacing) the Inll & Burners" on
page 28 to remove the burners and inll.
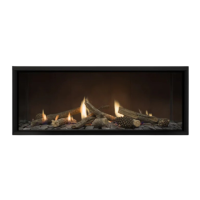
2. Using the tab at the top li the reecve panel up and lt forward to remove from the retaining hooks. Be careful
not to scratch any paint..
3. Remove the 10 screws (shown in the diagram below) in the access hatch and carefully remove from the rebox.
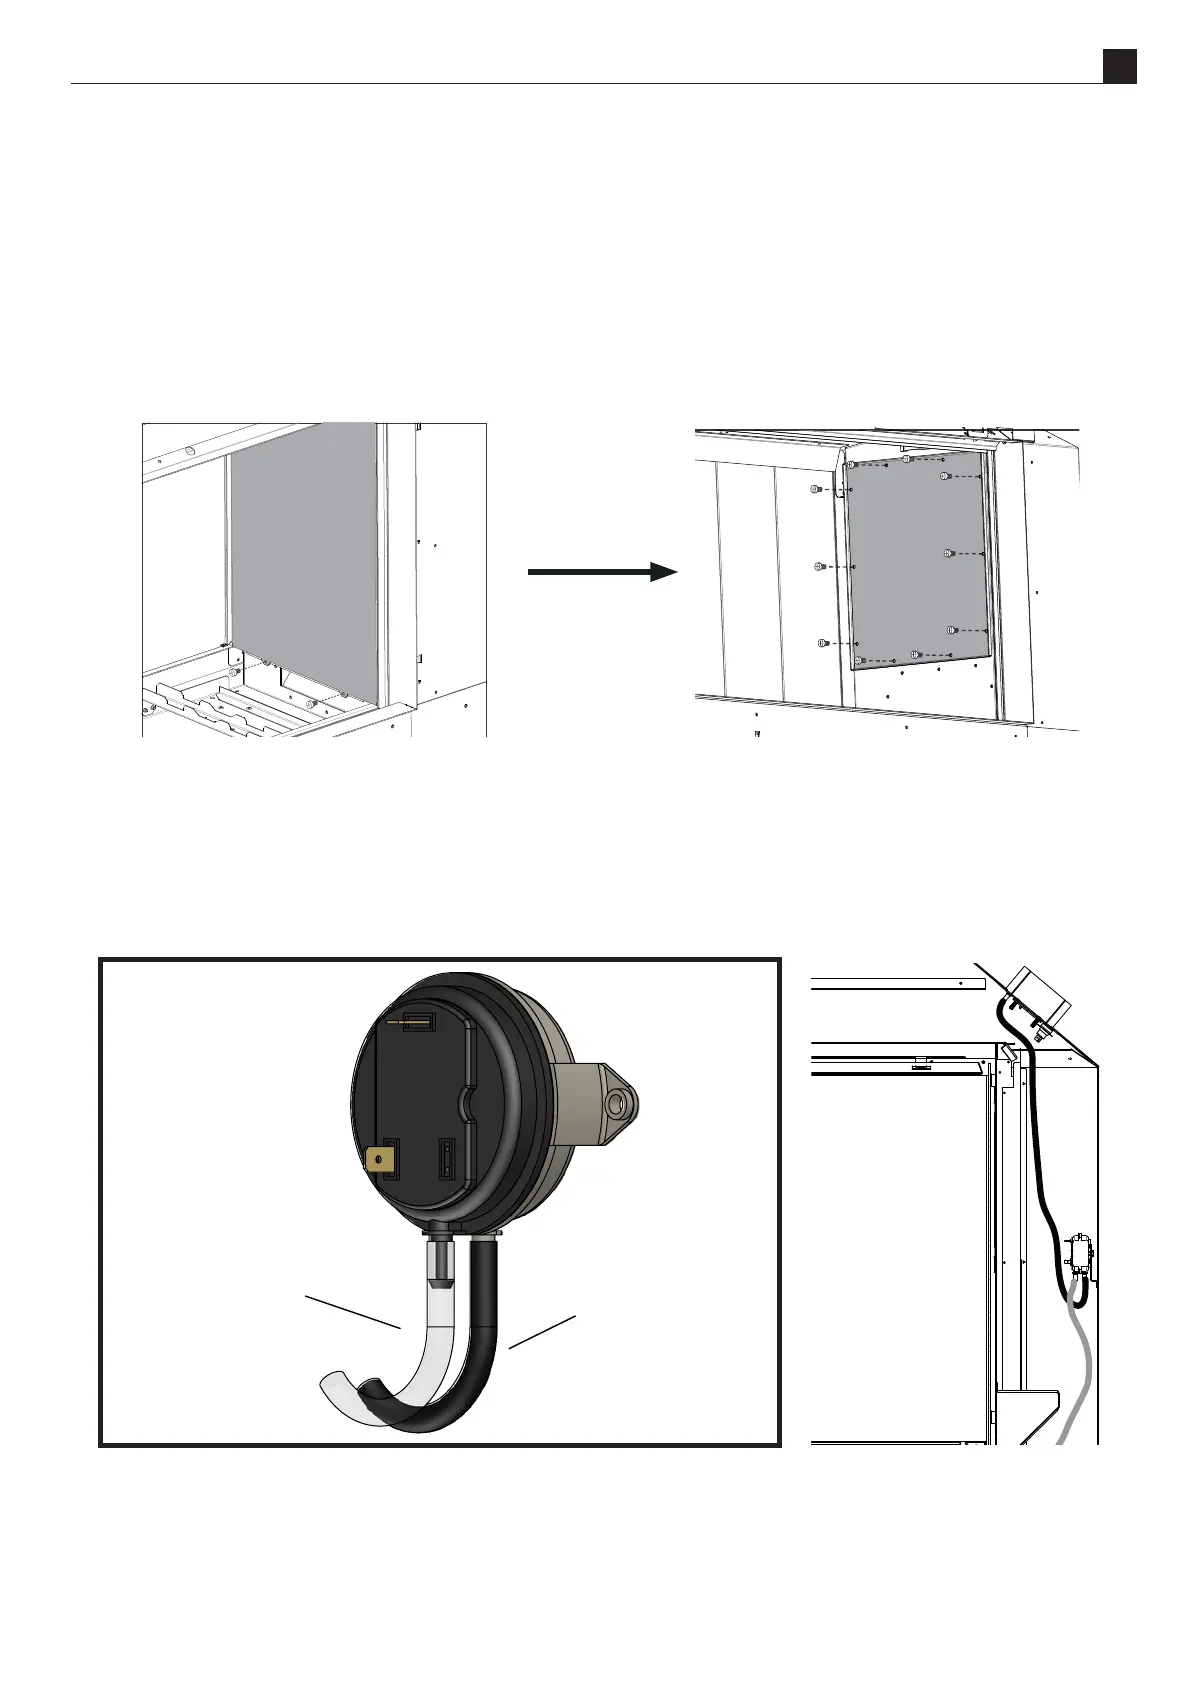
4. Remove the 2 silicone tubes. Disconnect the two wires from the pressure switch and remove the two screws on
either side of the pressure switch to remove it from the bracket.
When reconnecng the pressure switch, be sure to connect the tubes as shown in the diagram below. The
black tube should be connected between the grey side of the pressure switch and the low pressure port. The
translucent tube should be connected between the black side of the pressure switch and the high pressure port.
Black tube attaches to the white
side - this connects to the low
pressure port at the top of the
replace.
Clear tube attaches to the
black side - this connects to the
high pressure port at the
bottom of the replace.