35
630791 DS MKII INSTALLATION MANUAL
F FINISHING THE INSTALLATION
F1
When seng up a log or woodland log fuel bed, you must have the correct retainers present before assembling
the fuel bed. The correct retainers are supplied with the fuel bed packaging. On your retainers you will see
either a leer at the start that will determine the fuelbed type (i.e. W = Woodland, L = Logs). The leers and
numbers that follow help to determine the retainer locaon.
Remove the inll by following secon E4 on page 28. Place the inll upside down with the hole for the
pilot on the side furthest from you; this is the back (for the DS1400, place the pilot on the side closest to you).
Remove the retainers from the at nested sheet. When reading the text on each retainer, fold ALL the retainer
tabs 90° away from you.
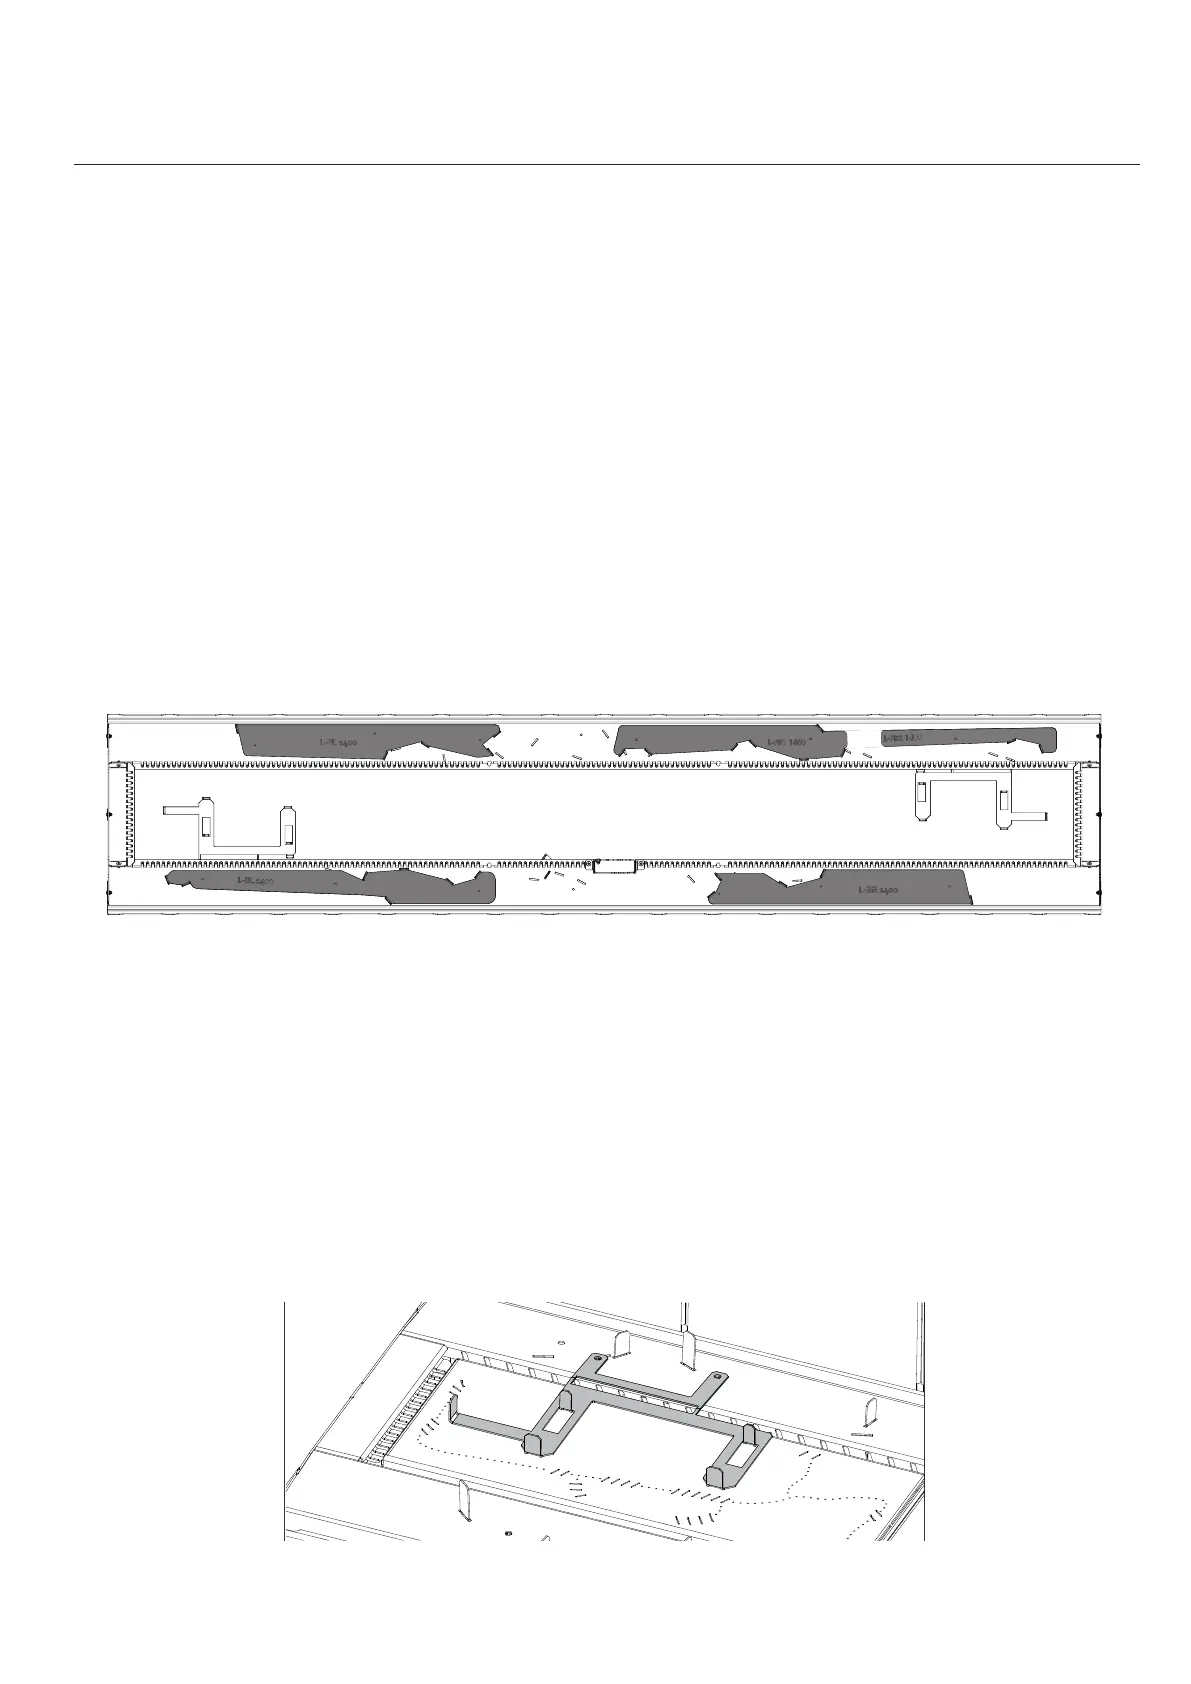
For some older inlls, on the UNDERSIDE of the inll you may see numbers from 1 to 4. If the inll has numbers,
then match the numbers on the inll with the numbers on the log retainers. For all other inlls, the combinaon
of leers and numbers provides an indicaon of the locaon: B- Back, F- Front, L-Le, R-Right. The inll for the
DS1400 Log installaon is shown below as an example.
Aach all retainers by feeding the tabs from the UNDERSIDE (unpainted side) through the cutouts on the inll.
Fix each retainer in place from the top of the inll with the screws provided.
Replace the inll and burners in the replace.
The nal log retainers are placed on top of the inll and burners to support the end log (number 2 from index).
This part comes in at form and is to be folded as per the images that follow.
They are then installed on both outer sides of the inll and are xed in place by 2 screws as below.