E
28
630791 DS MKII INSTALLATION MANUAL
E4
Ensure that the gas jets and burner collars are appropriate to the gas type using the tables on page 30. For
gas type conversion, proceed to secon "E6 Gas Type Conversion" on page 31.
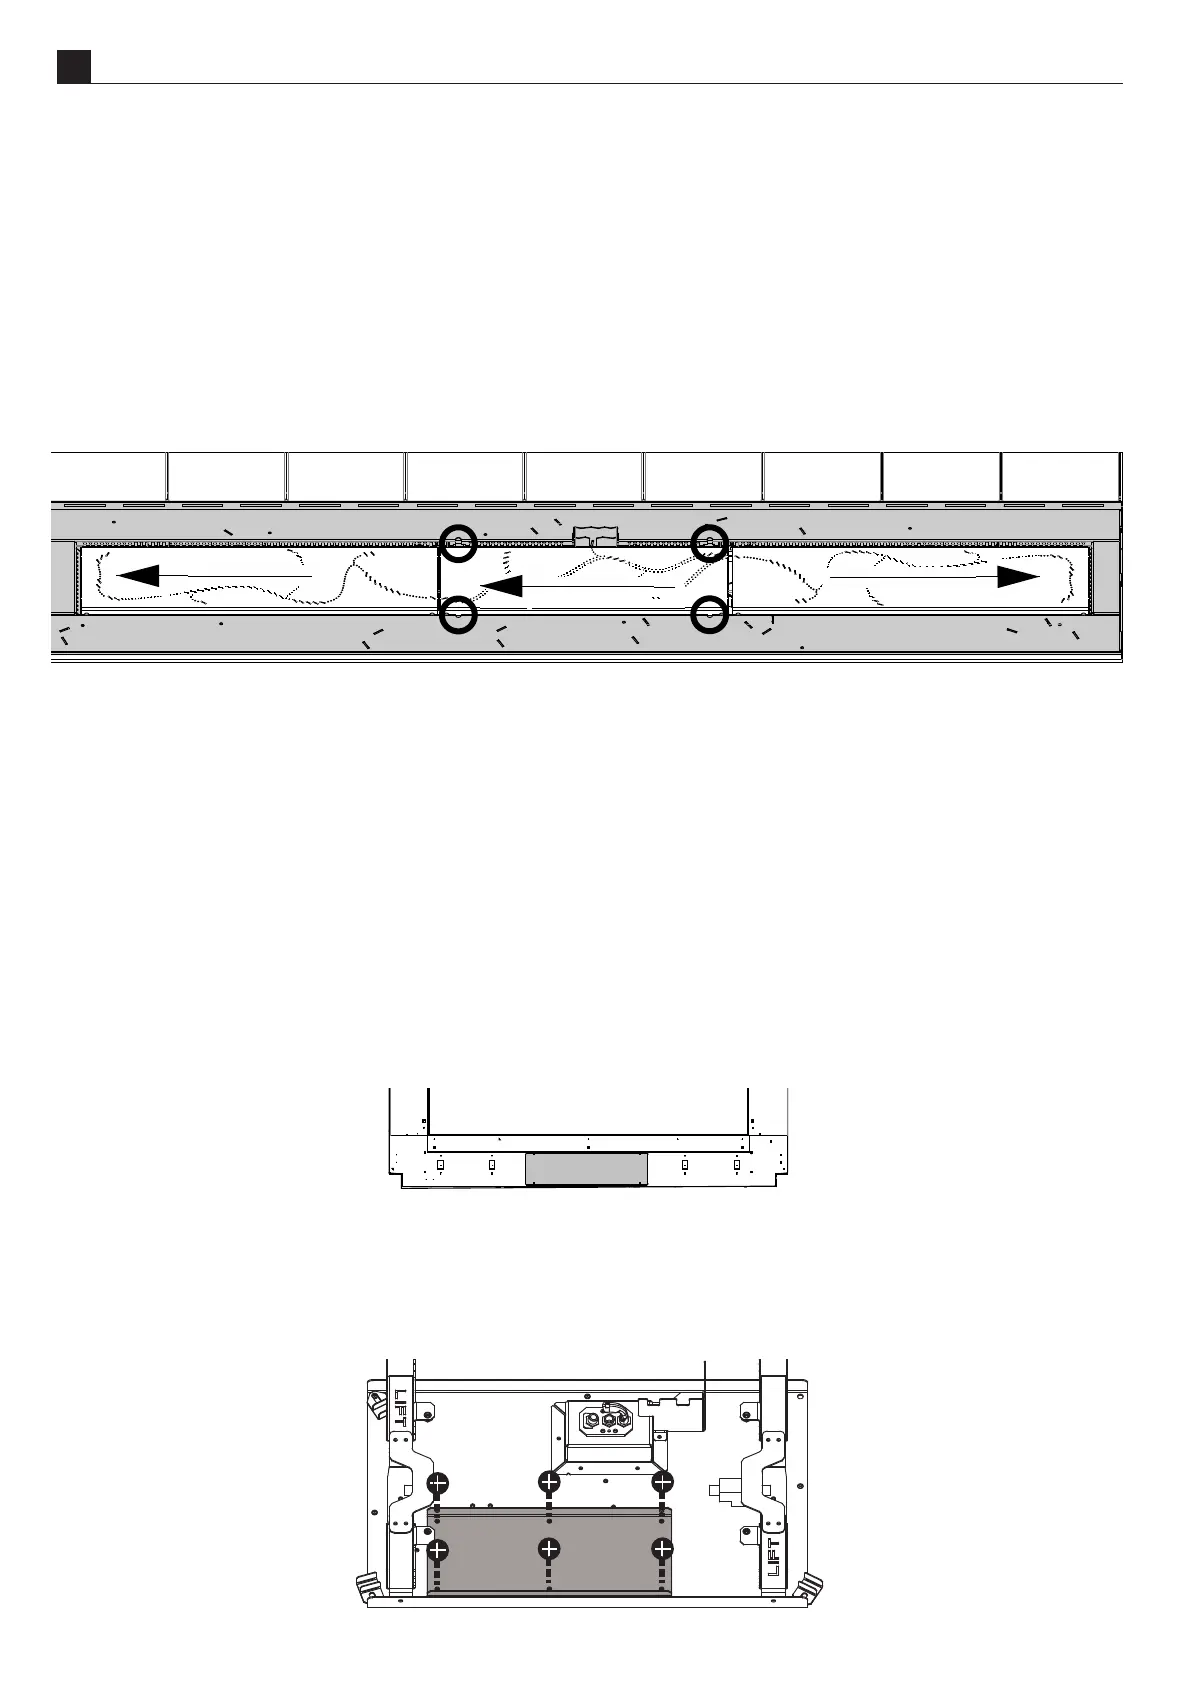
Remove the inll rst by removing the 4 screws circled below (8 screws in the DS1650), li one end out rst,
then gently li the other. (When replacing, ensure the pilot shroud sits around the pilot.)
Remove the burners by sliding them in the direcon of the arrows (above). Start with the sides before removing
the centre burner.
To replace the burners and inll, reverse the steps above, placing the centre burner before the sides.
E5
Note: Ensure the thermostat control within the remote does not cause the ame to modulate down by
increasing the set temperature and keeping the remote in a cool environment.
Check the inlet pressure upstream of the appliance using the test point installed earlier.
If the wallboard has not been installed, the regulator, valve, and test points can be accessed without removing
the glass, inll, or burners by removing the hatch at the boom front of the re.
Otherwise, the regulator, valve, and test points can be accessed through a hatch inside the rebox:
ͳ Follow the instrucons in secon "E3 Removing (and Replacing) the Glass" on page 27.
ͳ Follow the instrucons in secon "E4 Removing (and Replacing) the Inll & Burners" on page 28.
ͳ Remove the access panel on the gas tray by removing the 6 screws indicated below.