Room Scheduling System • Microsoft Extchange Setup 69
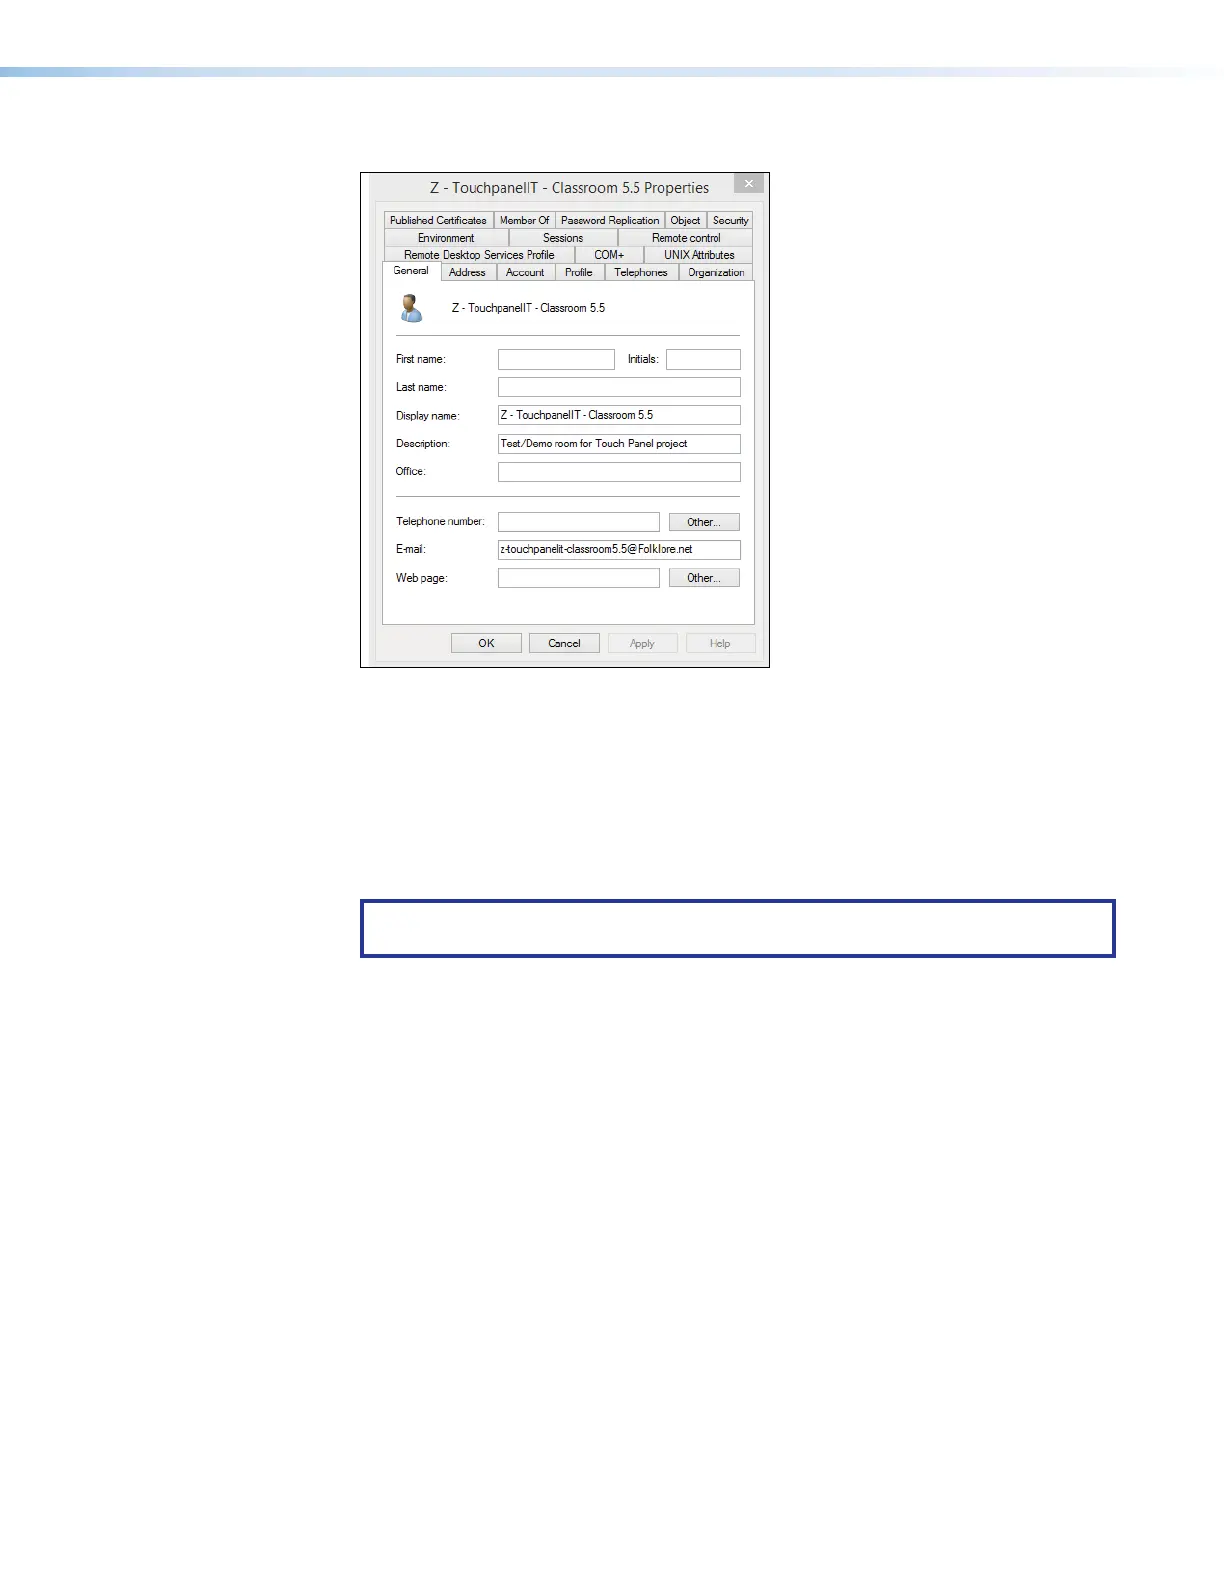
The Properties dialog box opens (see figure 78).
22
2222
2222
33
3333
3333
11
1111
1111
Figure 78. E-mail Address Displayed on the General Tab
6. If necessary, click the General tab (
1
). The general properties for the room are
displayed.
7. Note the room e-mail address shown (
2
). This value is the UPN, the value used as the
only valid Exchange User ID for this room in the Room Scheduling System.
8. Click Cancel to exit the display (
3
).
9. Repeat steps 3 through 8 for each desired room. .
TIP: Write down the UPNs of all rooms for setting up the Room Scheduling
System.