Room Scheduling System • Panel Overview 7
Panel Overview
This section summarizes how to operate the scheduling system from the distributed
scheduling panels. It is presumed that you have installed and configured the Extron Room
Agent software and the desired calendar server. See the following sections if necessary:
• Room Agent Installation and Configuration beginning on page 11
• Ad Astra Setup (see page 41)
• CollegeNET 25Live Setup (see page 44)
• EMS Setup (see page 46)
• Google Calendar Setup (see page 55)
• Microsoft Exchange Setup (see page 61)
• Microsoft Office 365 Setup (see page 70)
• Rendezvous by NFS Setup (see page 79)
Overview
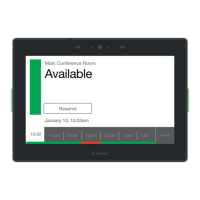
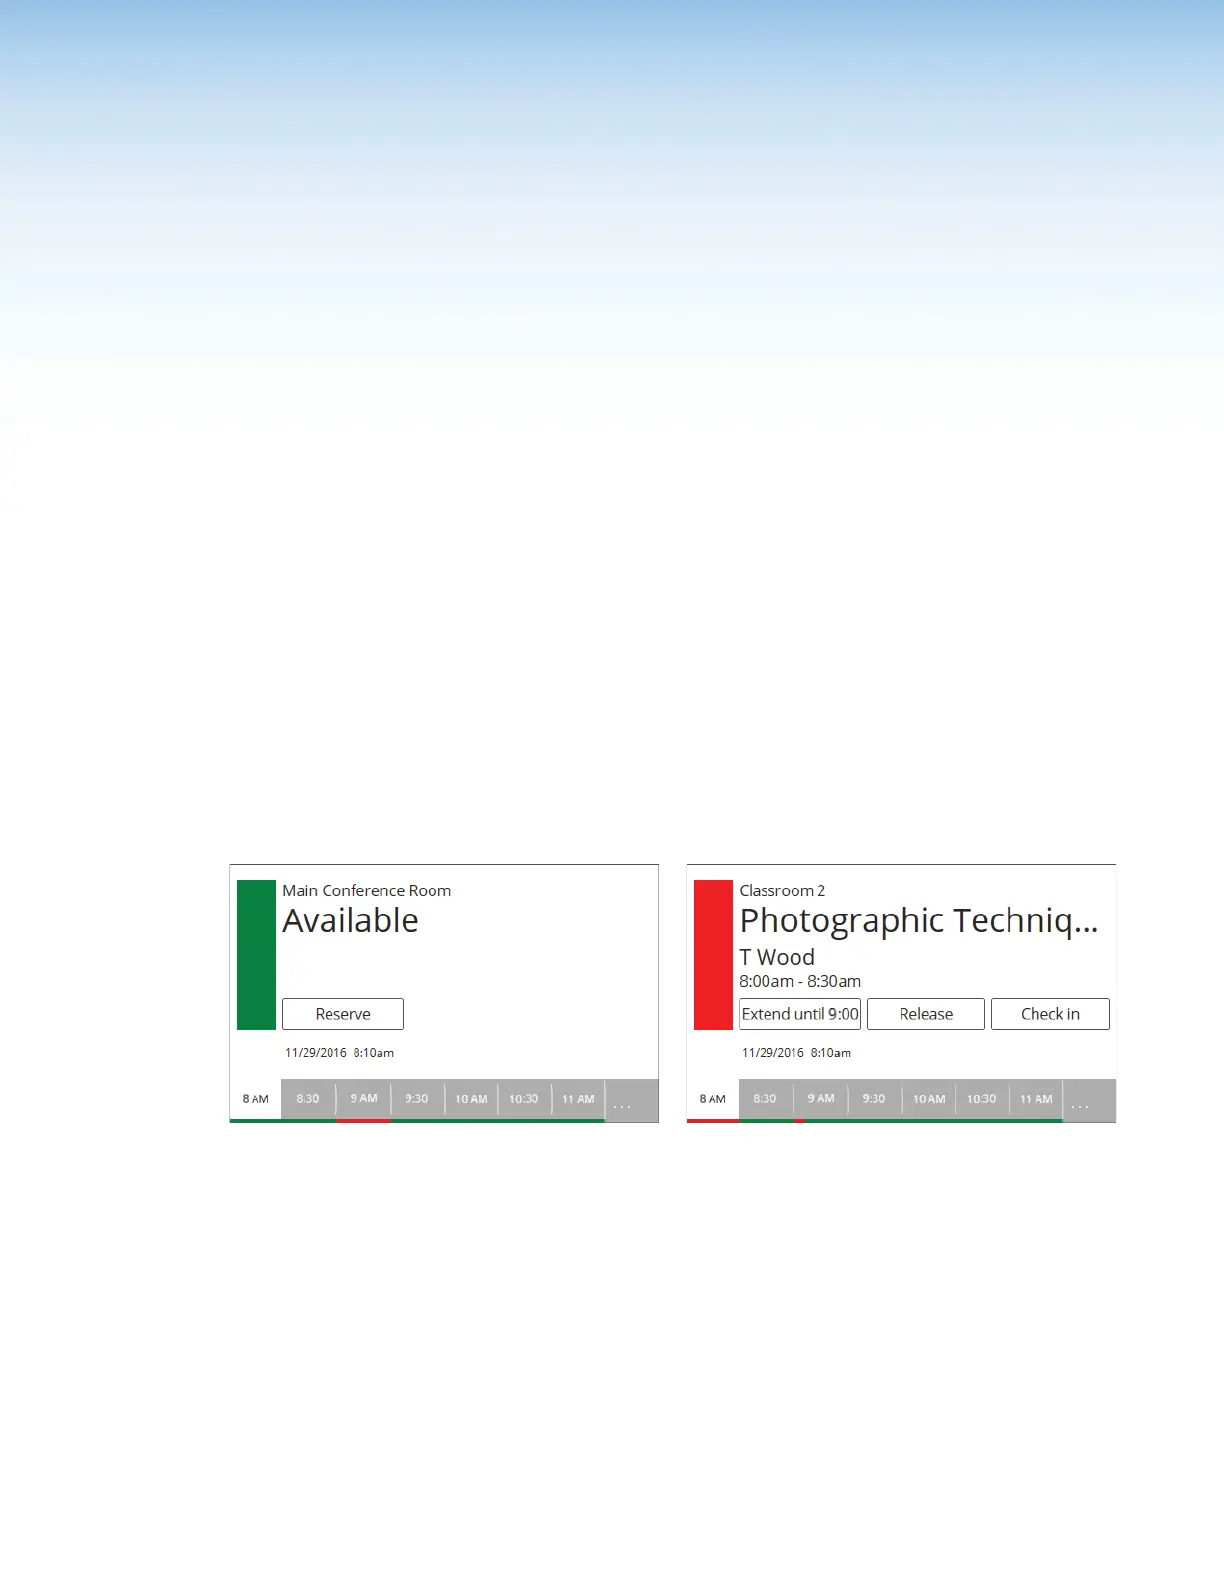
Once the system is installed and configured, you can use a scheduling panel (see figure 3)
to check the availability of the associated room and to reserve a room now or in the future.
The display is highly customizable with the Room Agent software (see Layout tab on
page 26), so your panels may not exactly resemble the sample displays shown below.
6666666666
6666
111111111111111111 111111111111111111
7777777777
7777 8888888888
8888 9999999999
9999
3333333333
3333
4444444444
4444
5555555555
5555 5555555555
5555
Room Available Display Room Unavailable Display
Figure 3. Typical Room Scheduling System Panel Displays
1
Data fields (see the next page)
2
Room available (green) flag (see the next page)
3
Room unavailable (red) flag (see the next page)
4
Timeline (see the next page)
5
Full day (...) button (see page 9)
6
Reserve button (see page 9)
7
Extend button (see page 9)
8
Release button (see page 10)
9
Check in button (see page 10)
figure 3