108
OPERATION
24. Track adjustment
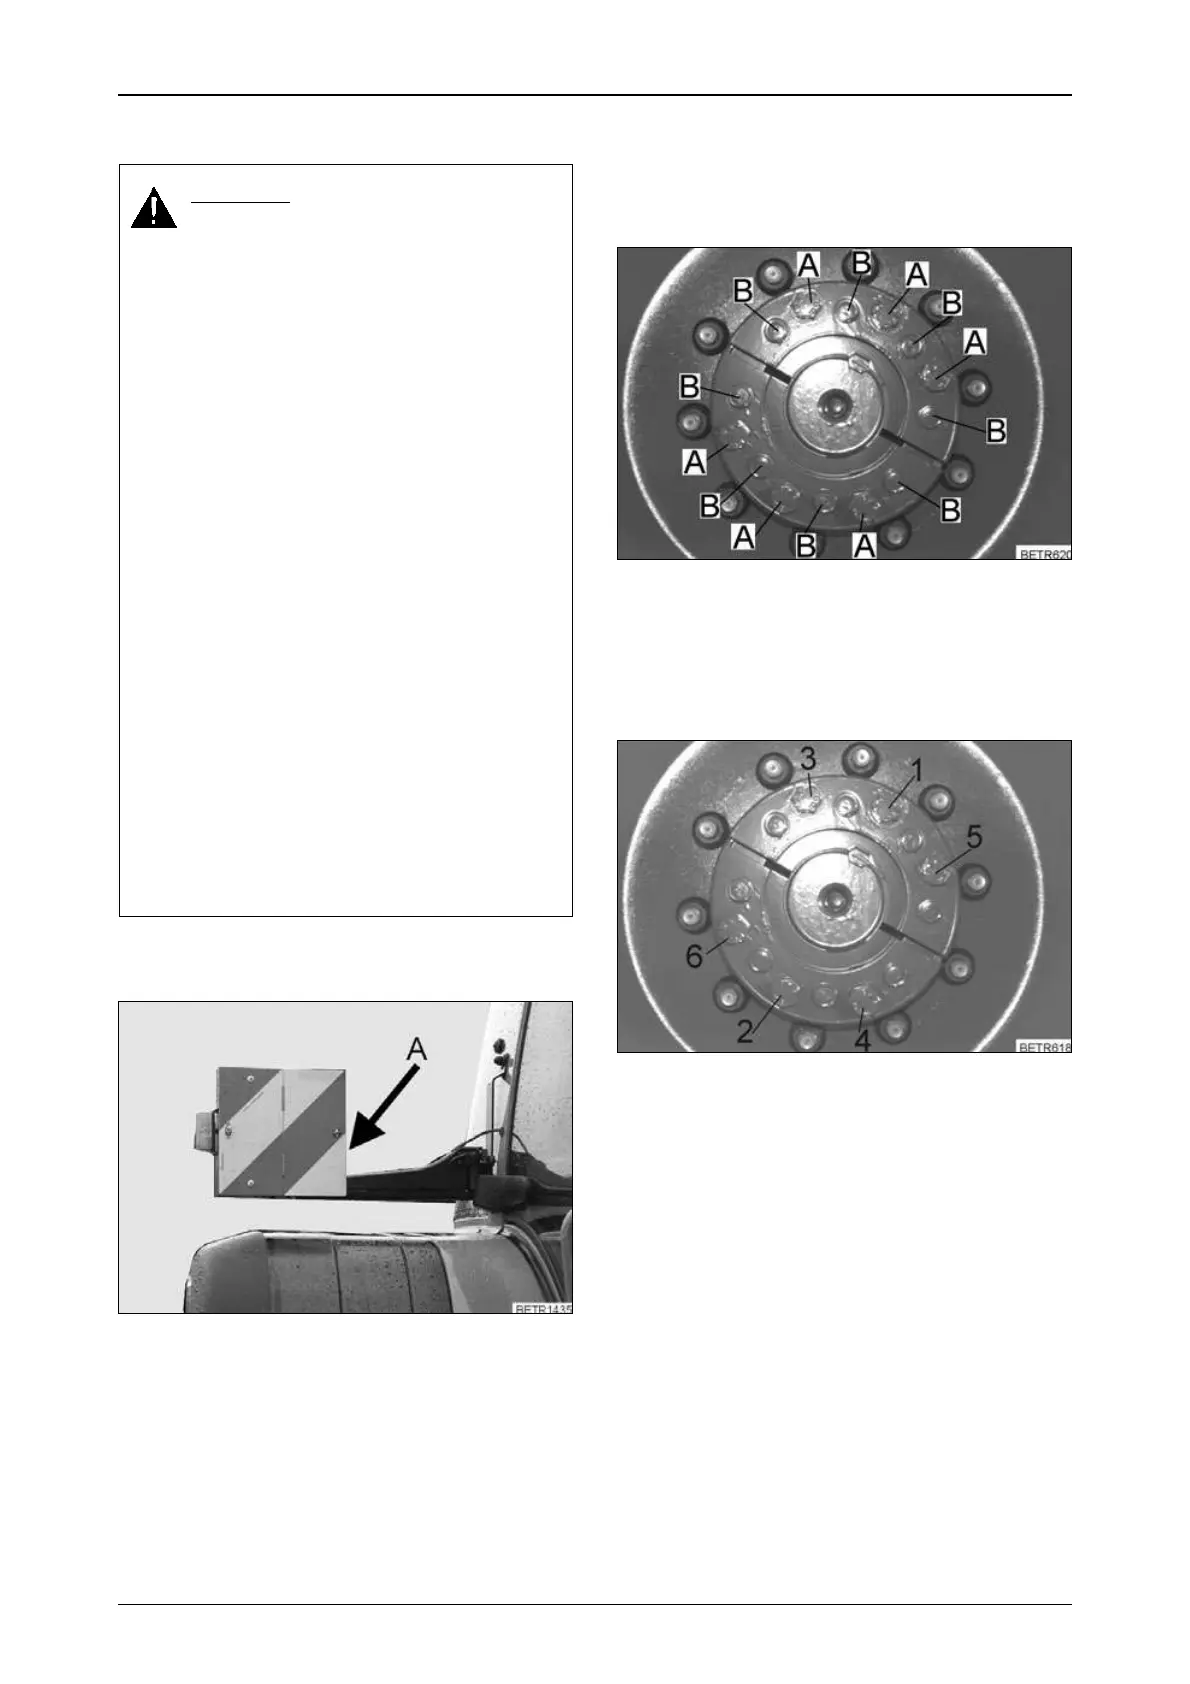
24.1 Lighting wide vehicle
Operation_Pic_number:1
Apply left and right warning signs flush with the
outer edge of the tyre.
Tighten locking screw (A) at 5 Nm.
DANGER:
When working on tyres, make sure
the tractor is properly parked and
secured against rolling away (wheel
chocks)!
If the engine needs to be started for
turning the wheels, both wheels
must be jacked up and turn free.
When the tractor is jacked up and
some one is working underneath, no
one else should be on the tractor.
If the tractor is lifted with the lower
links, additional supports are
required!
Tyre repairs should be performed
only by qualified personnel using
suitable tools.
Tyres may explode if the air pressure
is too high! Check tyre pressures
regularly!
Do not use special protective tyres
for heavy-duty traction work or front
loader operations; maximum road
speed 25 km/h.
After wheel mounting or track
adjustment, tighten the bolts and
nuts on front and rear wheels and on
track adjusting elements. Check
these regularly!
Fig.258
24.2 Rear axle stub
Text-module
(optional).
Change track width
Operation_Pic_number:1
Jack up rear wheels, loosen screws (A).
Screw in the screws (in tool box) in hole (B) to
loosen the chuck cone.
Set to the desired track width.
Operation_Pic_number:1
If the track width is changed, the mounting bolts
should be tightened in accordance with the
following diagram.
1 = Tighten hexagon screws in the order
shown (1-6) at a torque of 200 Nm.
2 = Tighten hexagon bolts to Nm in the order
shown (1-6).
3 = Drive tractor for a couple of hundred
yards then retighten to 600 Nm in the or-
der shown (1-6).
4 = After another 3 operating hours, re-
tighten in the order shown (1-6), to
600 Nm.
5 = After 10 additional operating hours re-
tighten according to the shown pattern
(1-6) at 600 Nm.
Fig.259
Fig.260
 Loading...