ST51A/ST75A/ST75AV Mass Flow Meters INSTALLATION
Fluid Components International LLC 11
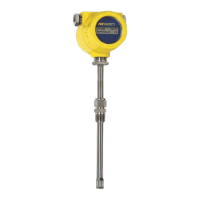
Installing ST75A/ST75AV Flow Element
The element is shipped already installed in the tee oriented for inline installation. Do not remove the sensing element
from the tee during installation as performance can be affected.
The ST75A/ST75AV is available in pipe tee configurations with NPT threads and tubing tees with a compression fitting to clamp down on
concentric smooth surface tubing. The pipe tee versions are standard 150# class rated tees suitable for service up to 150 PSIG at the
process temperature maximum of 250 °F (121 °C). The compression fitting material offered in the tube type configuration is rated for 250
PSIG service. See APPENDIX A for instrument outline dimensional details.
Pipe Tee Installation
With pipe extensions cut to length and sealing materials used on the threads, install flow element section by slowly rotating the
configuration until secure. Complete by installing the opposing end pipe section using care to secure the element assembly either in a top
mount or side mount position.
Tube Tee Installation
Clean all mating surfaces of the tee fitting, ferrules and the flow tube. Insert the flow tubing into the tee fitting. Make sure the tubing rests
firmly in the fitting counter bore seat. Tighten the nut on both ends of the tee by hand. Hold the fitting body steady with a backup wrench
and tighten the fitting nuts 1-1/4 turns from hand-tight baseline.
The ST75AV is available with flow tube configurations offering male and female NPT threads, ANSI flanges and DIN flanges. The flow tube
assemblies are rated for service up to 240 PSIG at the process temperature maximum of 250 °F (121 °C).
NPT Flow Tube Installation
With pipe extensions properly cut to length and sealing materials used on the threads, install flow element section by slowly rotating the
configuration until firmly secure on the pipe section. Complete by installing opposing end pipe section, using care to firmly secure the
element assembly either in a top mount or side mount position.
Flanged Installation
Clean all mating surfaces. Install appropriate sealing gasket between mating flanges. Tighten flange mating hardware to meet system
sealing requirements.
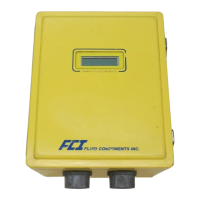
Re-positioning the Display
The LCD digital display can be rotated in 90° increments to improve its readability if necessary for the application. Referring to Figure 8
below, follow these steps to re-position the display.
The instrument contains electrostatic discharge (ESD) sensitive devices. Use standard ESD precautions when
handling the instrument.
1. Use .050″ hex key to loosen set screw locking window lid and then unscrew window lid from enclosure body.
2. Lift and remove blue bezel.
3. Unplug transmitter/display board from power supply board by pulling display board straight up. Carefully set board aside.
To avoid damage to board components use fingers only to remove the board. Do not pry the board off using a
screwdriver or similar tool.
4. Removing transmitter/display board exposes power supply board in enclosure body. Remove two securing 6-32 x ¼″ Phillips pan
head screws and star washers from power supply board.
5. Turn power supply board in 90° steps in either direction until desired orientation is achieved.
6. Secure power supply board to enclosure body using hardware removed in step 4. Use alternate pair of mounting holes in power
supply board if required for new display orientation.
7. With transmitter/display board aligned over power supply board (connectors mate only one way) press down to fully engage
connectors on both boards.
8. Reinstall bezel over transmitter/display board by engaging bezel guide posts into corresponding holes in display board.
9. Reinstall window lid. Tighten lid one full turn past point where O-ring makes contact with lid, then tighten lid set screw to lock lid (set
screw must not protrude from its threaded hole after tightening).