ST51A/ST75A/ST75AV Mass Flow Meters INSTALLATION
Fluid Components International LLC 15
4. Install remote cable to local enclosure as shown in Figure 11. For NPT port units: Use an appropriate size reducer as applicable to the
cable fitting used and the application. Ensure adequate cable service loop length before tightening the customer-supplied cable fitting.
5. Thread cable end (metal ferrule leads) through interconnection board grommet (from solder side) and un-cinched (open) tie-wrap.
6. Connect the cable leads to Phoenix connector TB1 as shown in Figure 12. After attaching all leads cinch tie-wrap to secure cable to
board (snip off excess tie-wrap length).
7. Reinstall interconnection board to local enclosure mounting bosses.
8. Reinstall local enclosure blind lid as described in Accessing the Interface Board Connection Terminals on page 18.
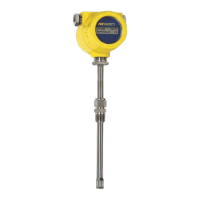
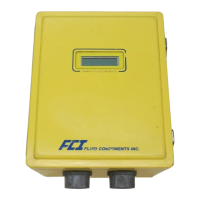
Remote Enclosure
Install the remote enclosure at the desired location using the supplied mounting bracket. Follow the steps below to install the remote
enclosure cable. Refer to Figure 13 below when following the steps.
1. Install mounting bracket at desired location.
2. Metric thread application only: Assemble cable gland, washer and adaptor (all customer-supplied items).
3. Thread connector end of the remote cable through customer-supplied cable fitting (3/8" NPT or M16 cable gland/washer/adapter) then
make a knot in cable 1.5" (38 mm) from connector tip.
4. Apply Loctite 567 to customer-supplied liquid tight fitting threads or cable gland adapter threads as applicable. Then install customer-
supplied liquid tight fitting/cable gland-adapter assembly into mounting bracket reducer bushing making sure that connector end of
remote cable exits through reducer bushing.
5. Access remote enclosure interface board as described in Accessing the Interface Board Connection Terminals on page 18.
6. Remove interface board: Remove two ea. 6-32 x ½" pan hd. Phillips screw/#6 star washer, and then unplug board by pulling straight out.
7. Thread remote cable connector end through ¾-14 NPT threaded opening at enclosure bottom.
8. Apply Loctite 567 to mounting bracket reducer bushing threads.
9. Install remote enclosure onto mounting bracket reducer bushing making sure that the fit is tight with the display in the desired
orientation.
10. Place remote cable in notch on curved edge of interface board PWB (with connector on component side of PWB) then reinstall
interface board. See Figure 14 on page 16.
11. Firmly plug cable connector into interface board connector J4 header until cable connector latch clicks. (Connector is keyed to ensure
correct mating.)
Connector J4 is located differently on AC and DC interface boards (i.e., the J4 location/orientation is not the same for
both interface board types).
12. Connect power wiring as described in Interface Board Connections on page 19.
13. Reinstall remote enclosure blind lid as described in Accessing the Interface Board Connection Terminals.