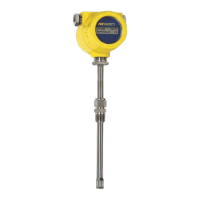
TROUBLESHOOTING ST51A/ST75A/ST75AV Mass Flow Meters
70 Fluid Components International LLC
Transmitter Circuit Calibration Check (Delta R Verification)
References
● Delta R Data Sheet
Equipment
● Serial console connection to instrument via FC88 or PC (see Instrument Configuration and Setup Using the Service Port (RS-232), page 27)
● DMM
● Delta R data sheet (matched to serial number of instrument under test)
● Two precision decade resistance boxes, 0.1% (largest steps: 1 KΩ, smallest steps: 0.01 Ω)
● 250 Ω axial lead precision resistor, 0.1% or better, 1 W
● Small flat-blade screwdriver, 3/32″ width blade
● Banana plug jumper cable
● FCI Normalization Cable (FCI part number 022610-0x, unit part number 022517)
Procedure
1. Verify all “D” mode calibration parameters are correct according to the meter’s Delta R Data Sheet before starting. See Verifying
Calibration Parameters , page 68.
2. Turn instrument power OFF.
3. Remove enclosure housing blind lid, exposing interface board and its power and signal connections. See Accessing the Interface
Board Connection Terminals, page 18.
4. Install 250 Ω precision resistor across instrument’s Ch.1 4-20 mA output (INT_HART- & INT_HART+/J8-4 & J8-1).
5. Connect normalization cable plug to interface board J4. Connect other end of normalization cable (with 2 pair of dual banana plugs) to
resistance decade boxes as shown in Figure 29 below.
Interconnector wiring (resistance decade box to electronics) must be 24 AWG and less than 36 inches long to avoid
any inaccuracies caused by improper wire lengths or wire gauges.
6. Connect both resistance decade box LOW terminals together with banana plug jumper cable (stack onto dual plug).
7. Set both decade boxes for nominal resistance value (1000 Ω) ±0.01%.
8. Connect DMM, set for volts DC, across 250 Ω resistor and monitor voltage output.
9. Turn power ON and allow 5 minutes for stabilization.
10. At serial console main menu enter “1” to place instrument in “RS-232” mode (which puts instrument in “Normal Mode Operation”).
(See Main Menu, page 28.)
11. Adjust Active decade box (Reference decade box remains fixed @ 1000 ohms) to achieve the appropriate Delta R for displayed flow
value and output, noted on meter’s Delta R Data Sheet.
12. Enter “C” at console. Verify meter’s displayed TCDR and REFR values correspond to displayed flow rate per meter’s Delta R Data Sheet.
13. Return to Normal Mode Operation (“T” menu).