- 127 -
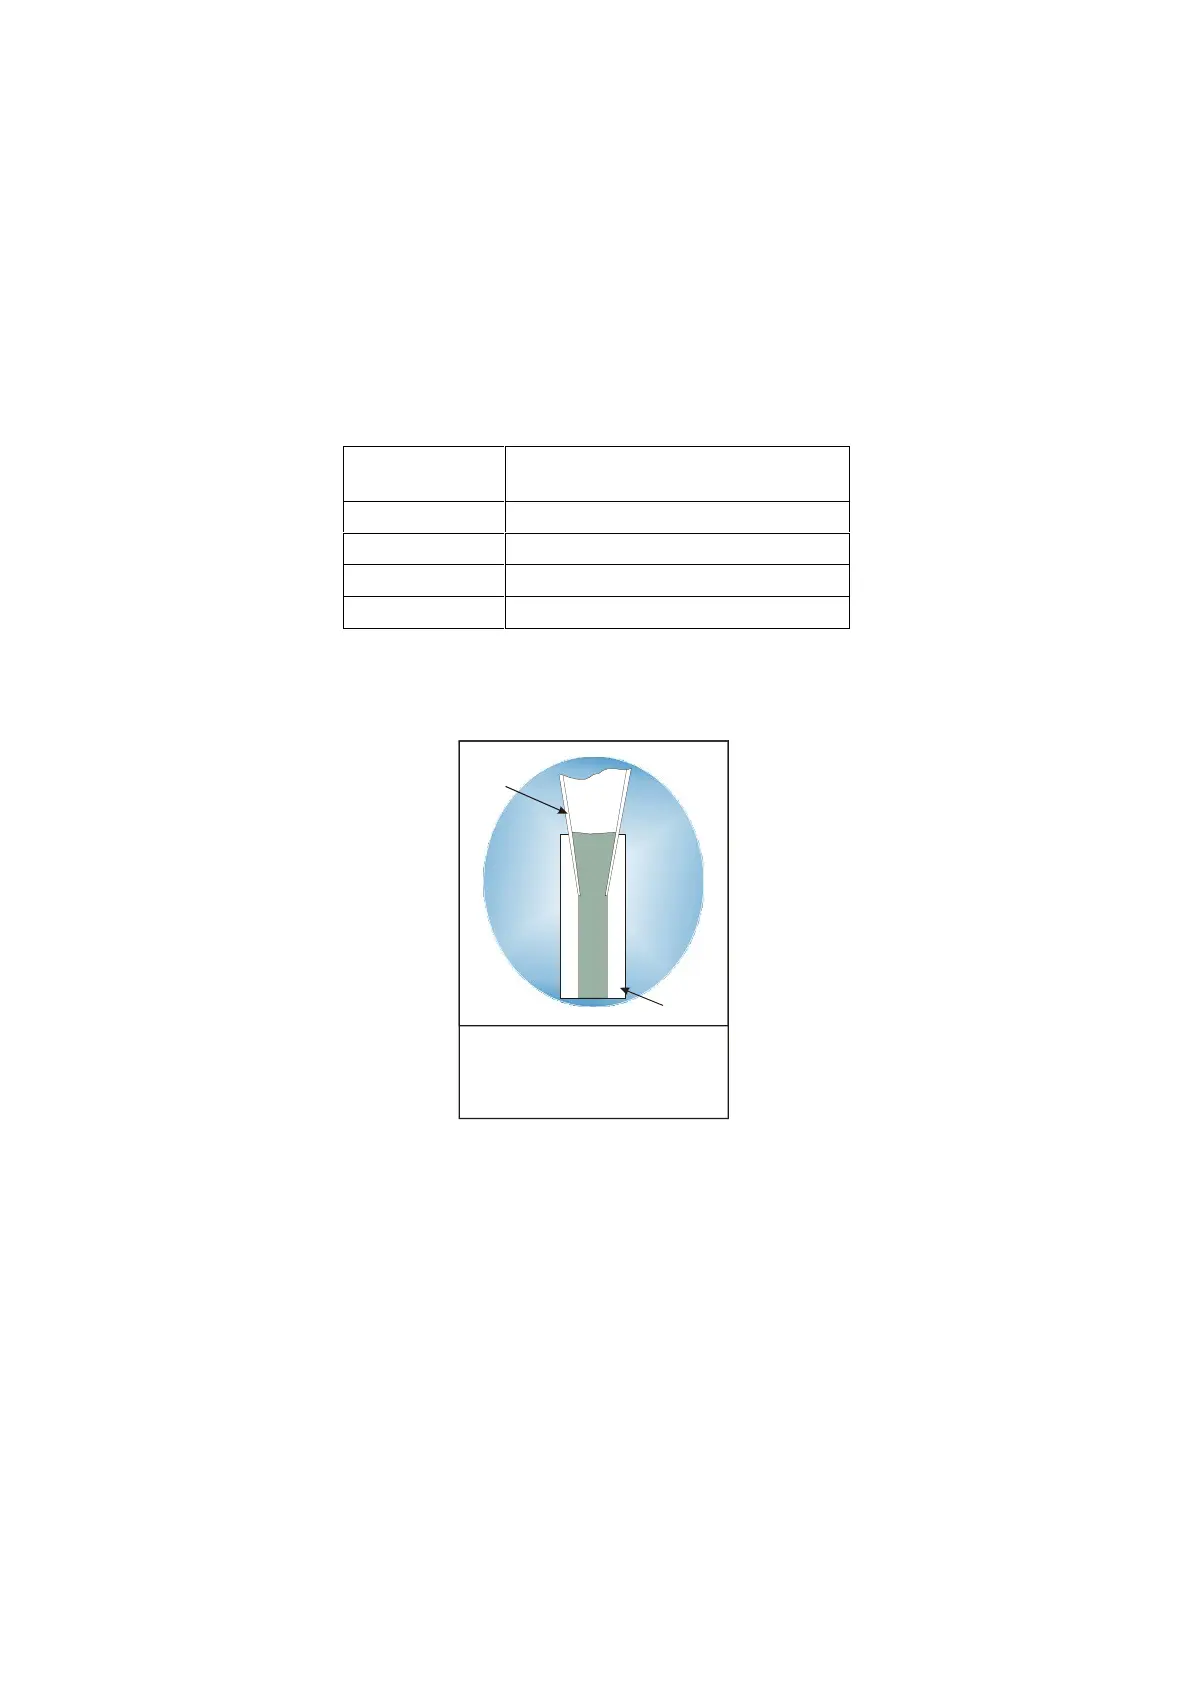
Prime water down until top
meniscus aligns with end of
flow cell tubing
.
flow cell tube
Pipette tip
manufacturer/supplier) then the calibration factor value should be checked to ensure it is set to the
factory default value. Note that changing the calibration factor value from the factory default value will
change the particle size and volume reported.
Counting Procedure: The acceptable region (Setup > Context > Capture > Acceptable Region) should
be constrained by one pixel on the Top and Left side only. If a field-of-view (FOV) flow cell is being
tested, then the Right and Left sides should be constrained as normal (along with the Top by one pixel).
Rinse out the flow cell with distilled water and place a new 1 mL pipette tip on the sample holder.
Select the correct count standard bead size for the objective being tested.
Objective
Count Standard Bead Sizes
(µm)
20X 10 or 20
10X 20
4X 50
2X 50 or 100
Add 0.5 mL of distilled water to the instrument and prime the system until the top meniscus is level with
the top of the flow cell tubing as indicated in the graphic below.
The length of tube from the top of the flow cell to the bottom of the pipette tip is known as the dead
volume. This volume of liquid dilutes the concentration of the sample and needs to be controlled to
accurately calculate sample concentration. Under Setup > Context > Flow Cell (tab) and Fluidics (tab)
the operator can enter the correct values to account for this dilution effect. Enter the correct values for
the flow cell type and all tubing lengths. Enter the correct values for Sample Volume, Flow Rate,
Autoimage Rate, and the Priming method of choice. Continue to check the remaining context settings.
When finished click “OK” to save and exit the Context settings.
Thoroughly mix the bottle of count standard by inverting the bottle at least 10 times. Use a pipette to
aspirate 0.5 mL (1.0 mL for 2x), and dispense it into the pipette tip attached to the flow cell tubing.
Start an AutoImage analysis and save the file with an appropriate name. If necessary, turn the pump on
and run the sample through until the trailing meniscus reaches the top of the flow cell. Stop the run
before the meniscus enters into the camera’s field of view, to prevent the erroneous imaging of bubbles.