- 19 -
Instrument Setup
· Initial Setup and Instrument Configuration
· Optimizing the Field of View and Focus
· Maintenance and Shutting Down
Initial Setup and Instrument Configuration
Note that a basic “Quick Start” procedure (Appendix VI) and a list of standard Hardware configurations
(Appendix VII) can be found at the end of this manual.
Power Configuration for a Portable FlowCAM
Due to the portable nature of this model of the FlowCAM, it includes a power cord that will plug into a
12V power supply (for example, a power outlet in a vehicle). There are up to three other power cords
for the Portable FlowCAM. These include a standard wall outlet cord and a cord for the wireless mouse
charger. If your FlowCAM came with a USB hub, that may have be the third power cord.
The Wireless Mouse and Keyboard Charger included with the FlowCAM can only be used in a
120V/60Hz power receptacle.
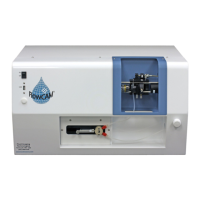
Power Configuration for an Open Benchtop and Benchtop FlowCAM
There are two power cords for the Benchtop FlowCAM. These two cords belong the FlowCAM and
FlowCAM LCD Monitor.
The monitor is usually powered up first. If the system is configured with a wireless mouse, it should be
fully charged and the wireless keyboard must have batteries installed. The USB style mouse and
keyboard draw power through the computer’s USB port. For the Benchtop FlowCAM, USB ports are
located on the back of the instrument case. These ports are for connection of the Keyboard (USB),
Mouse (USB), Monitor, and Network cable. Extra USB ports can also be found on the back (and one on
the front) of this model of FlowCAM.
Activate Power to the FlowCAM
Locate and activate the power toggle marked “Power” or “P” on the switch plate. The switch plate
location is illustrated in Figure 3 for an Open Benchtop and Portable FlowCAM. The power switch for a
Benchtop FlowCAM is illustrated in Figure 4 and 5. On the back of the Benchtop FlowCAM (Figure 4),
the Master power switch must first be switched to the On (I) position. The red 115 V switch can be
toggled to 230 V to match the power supply of your country/location. On the front of the Benchtop
FlowCAM (Figure 5), the Standard power switch must be switched to the On (I) position to power on